105 - Issue Automation - Keeping your issues squeaky clean
Objective:
When you use issues and labels to manage day to day work and define a specific process, often there are situations and times where it’s hard to keep labels in the right status. For example:
-
Label Hygene: Consider a situation where there is a process defined by an overall label (ABC) and the specific steps in the process are defined by the scoped labels (ABC::1, ABC::2, and ABC::3)
-
The process assumes that everyone in the team will assign “ABC” and one of the scoped labels “ABC::x”
-
However it’s likely that people will forget to assign both labels, and over time there will be a mixture of issues missing one of the two labels.
-
Label Hygiene Consider a process, where you want to summarize issues based on a set of detailed labels that might be assigned to them. Such as, a process where there are 10 scoped labels “ZYX::1, ZYX::2, ZYX::3, … ZYX::10”, and you want to summarize them in to “ODD” and “EVEN”. So ZYX::2,4,6,8,10 all would be labeled “EVEN” and ZYX::1,3,5,7,9 would be labeled “ODD”.
-
You could request your team to update their issues with the right “ODD”/“EVEN” labels based on the ZYX::nnn label
-
You could bulk update labels (find all the ZYX::1 issues and then add the “ODD” label, and repeat 9 more times) In either case, the ODD/EVEN summary labels would be most likely incorrect, as people would forget to update them, or if something changed, they would be wrong
There are other key situations where automation can help. (see below for these practical examples)
- Moving issues to a certain project - consider a situation where you have an issue or group of issues that you want to periodically move to a specific project.
- Promoting issues to be epics - consider a situation where you have a set of related epics you want to re-create. You have the epics defined as issue templates and want them to automatically be promoted to be epics.
- Deprecating/deleting an issue - Consider where you have an issue that you want to effectivley delete and therefore remove all the lables, epics, estimates, milestones etc.
Automation can address all of these situations and streamline work.
Solution - Label Hygiene / Triage Bot
Define a set of rules that will automatically
- Add a label when it is missing
- Change or remove a label when it’s wrong
- Add a comment, mention a user, and more thorough comments and /quick actions.
The Triage Bot is an Open GitLab project that makes it possible to automate many issue and merge request hygiene tasks to ensure that your projects are more consistently following a given process.
Example Triage Policies/rules
Here are two examples of how Triage Polices/Rules can automate updates and issue hygiene:
- This example finds issues that are more than 5 days old, but have no label associated with them, then it adds a comment to ask the Author to do something. The policy also notifies a team member to make them aware of the issue.
|
|
- In Strategic marketing, here is a rule that finds any Strategic marketing Requests that are missing a Scoped Workflow label.
|
|
Setting Up the Triage Bot:
There are only two simple steps to set up the TriageBot.
- Configuring your CI/CD pipeline
- Drafting your first Triage Policy
- Setting up a CI/CD Schedule to run your Triage Policies periodically.
Step 1: Configuring your CI/CD Pipeline for the first time.
- The triage bot runs as a scheduled CI pipeline job, so your project will need to define a
gitlab-ci.ymlfile. Thegitlab-ci.ymlfile is stored in the root directory of your project.
Here is an example of the Product and Solution Marketing pipeline, where there are three Jobs defined. There are two Manual jobs, and one Scheduled Job. The two Manual jobs either test(dry-run) the rules/policies, or actually apply the rules/policies (policy:run). The one Scheduled job (schedule:policyrun), when runs will actually apply the rules/policies.
|
|
- The TriageBot needs to have access and permission to your GitLab project to read and update issues. This is called a “token”, and is stored in GitLab using a “CI/CD Variable” - in this case it is the
$API_TOKENthat you see in the above example pipeline.
You will need to configure a GitLab CI/CD Environment Variable$API_TOKEN for these jobs to run.
Here’s how:
| 2. Setting Up CI-CD API Token Variable | Image |
|---|---|
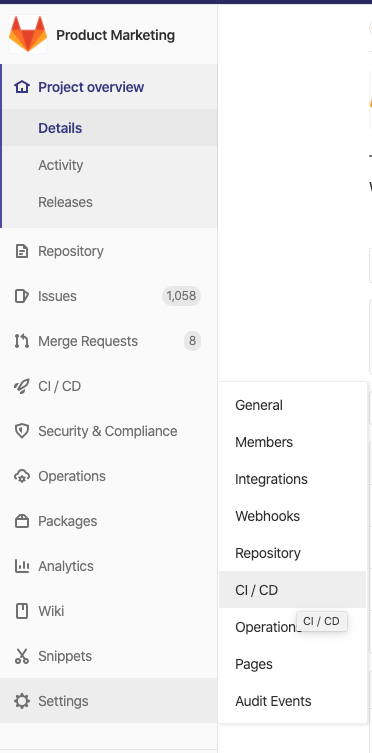
1. In your project select the left menu option Settings-->CI/CD |
 {: .margin-right20 .margin-left20 .margin-top20 .margin-bottom20 .image-width30pct } {: .margin-right20 .margin-left20 .margin-top20 .margin-bottom20 .image-width30pct } |
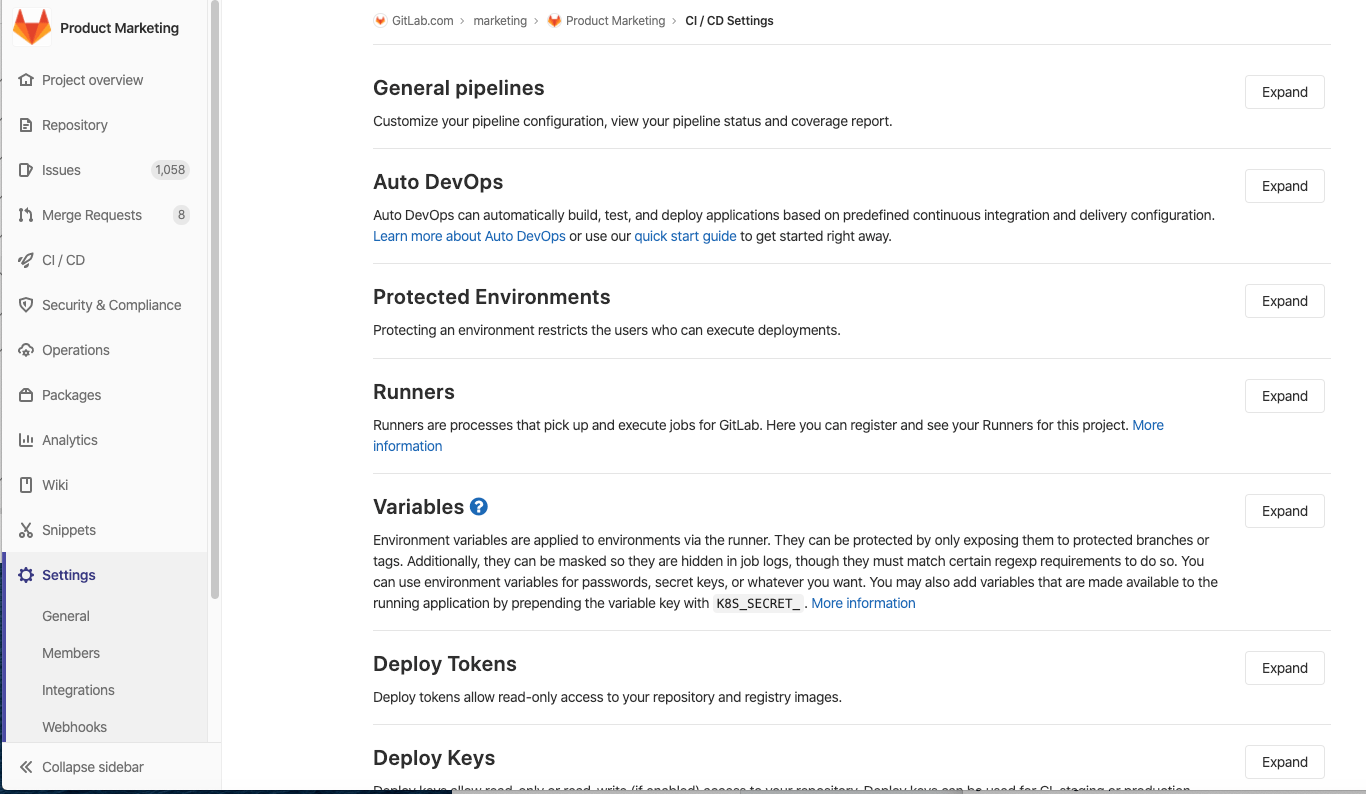
2. Then expand the Variables section |
 {: .margin-right20 .margin-left20 .margin-top20 .margin-bottom20 .image-width80pct } {: .margin-right20 .margin-left20 .margin-top20 .margin-bottom20 .image-width80pct } |
| 3. Add a new line where - Type= “Variable” - Key = “API_TOKEN” - Value = Your API Key. - You have an API Key don’t you? (See short instructions below) - Set Masked to True. |
 {: .margin-right20 .margin-left20 .margin-top20 .margin-bottom20 .image-width80pct } {: .margin-right20 .margin-left20 .margin-top20 .margin-bottom20 .image-width80pct } |
| 4. Save Variables |
| 3. Getting your API Key | Image |
|---|---|
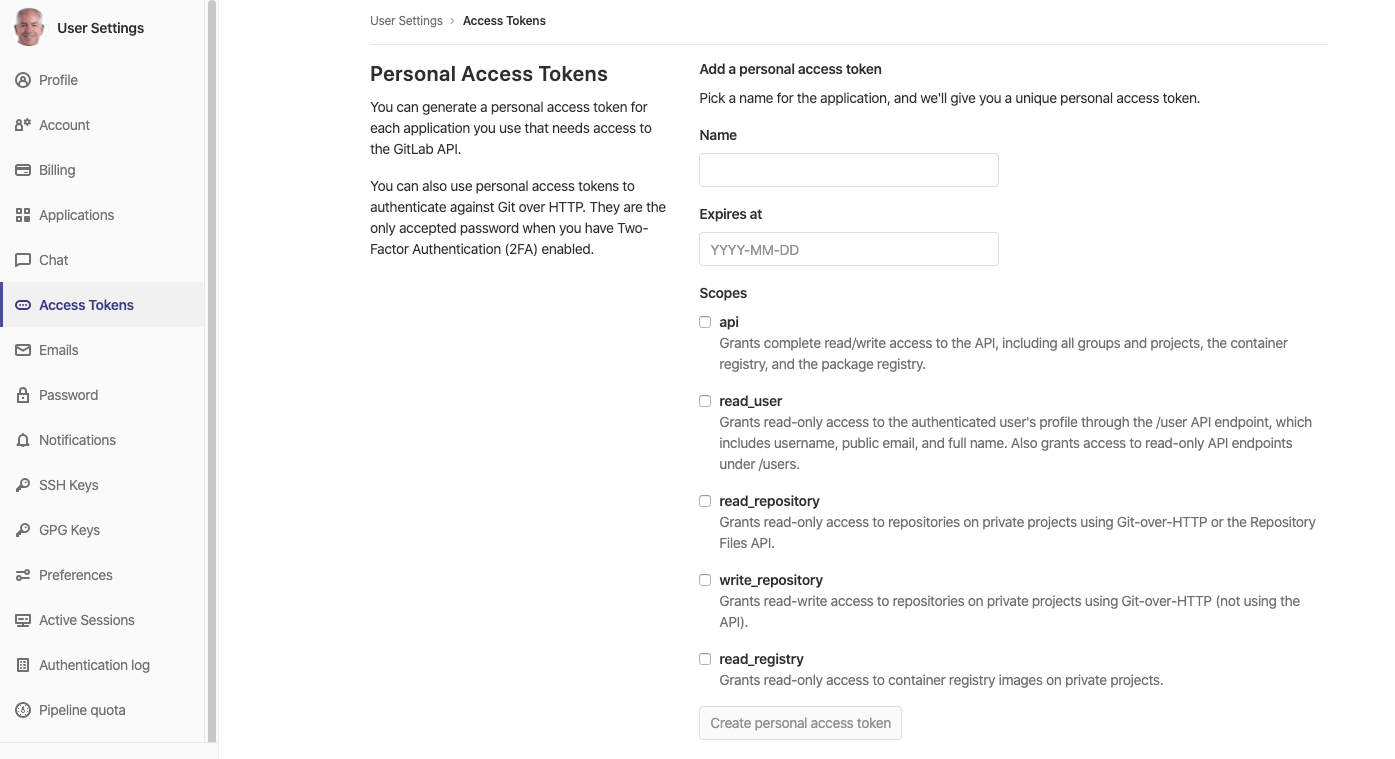
| 1. The API Key is linked to your account and basically gives the Bot permission to act on your behalf. First click on the dropdown on your personal settings in GitLab. |  {: .margin-right20 .margin-left20 .margin-top20 .margin-bottom20 .image-width50pct } {: .margin-right20 .margin-left20 .margin-top20 .margin-bottom20 .image-width50pct } |
2. Select Access Tokens and - Give the access token a Name - Leave the Expiration Date blank (unless you want it to expire) - Select “API” for the Scopes - Click Create personal access token |
 |
| 3. The Personal Access Token will appear at the top of the page. | 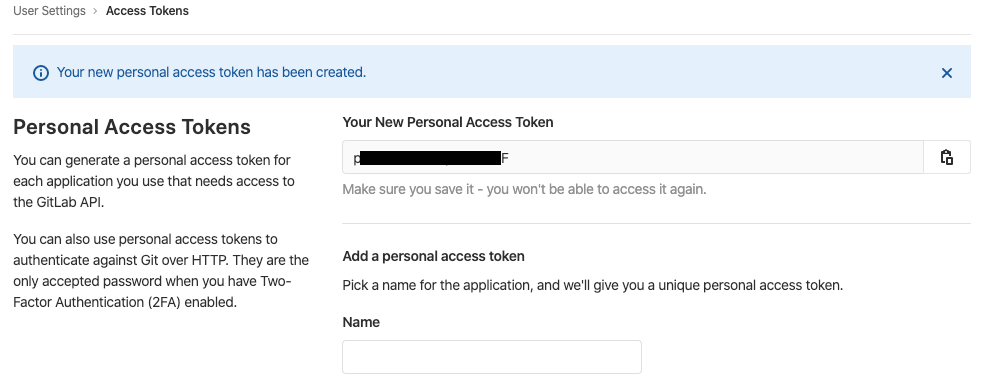 |
| 4. Copy the Token and then Add it to the API_TOKEN Value in the CI/CD Variables settings. |
Step 2: Setting up your FIRST Triage policy
The Triage Policies/Rules are defined in a YML file called .triage-policies.yml which is stored in the root directory of your project. For DETAILED instructions about rules and policy options read the Defining a Policy section in the README.md file in the Triage Bot project.
- Create a new file in the root directory called
.triage-policies.yml - Paste in the following first simple rule:
|
|
- Commit and merge your changes.
This will trigger a pipeline, where the Jobs should all be skipped. You should see this at the bottom of your screen.
 {: .margin-right20 .margin-left20 .margin-top20 .margin-bottom20 .image-width80pct }
| 4. Dry-Run TriageBot | Image |
|---|---|
| 1. Click on the Pipeline link and go to the pipeline screen | 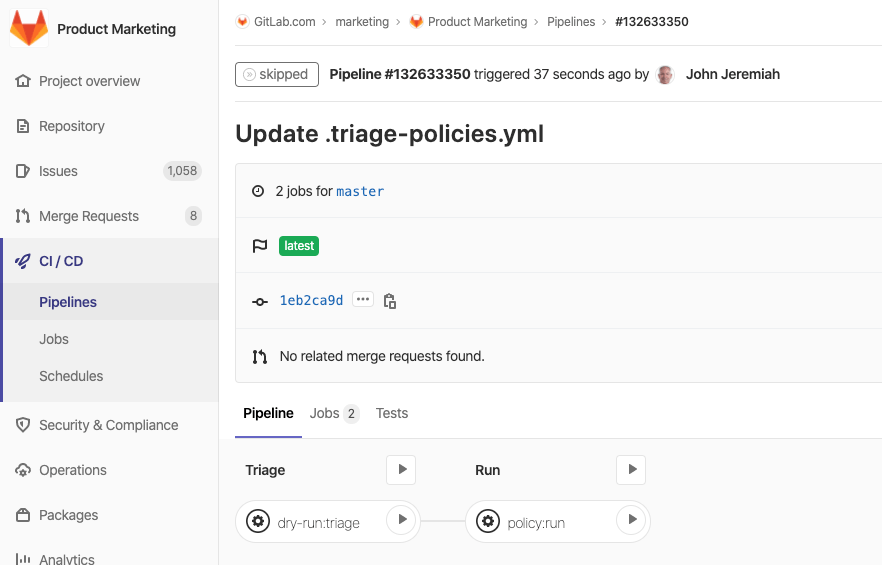 {: .margin-right20 .margin-left20 .margin-top20 .margin-bottom20 .image-width80pct } {: .margin-right20 .margin-left20 .margin-top20 .margin-bottom20 .image-width80pct } |
| 2. Run the “Dry Run” pipeline job. | 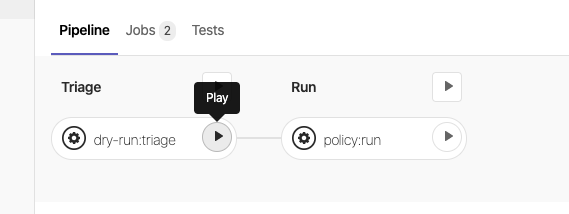 {: .margin-right20 .margin-left20 .margin-top20 .margin-bottom20 .image-width80pct } {: .margin-right20 .margin-left20 .margin-top20 .margin-bottom20 .image-width80pct } |
| 3. Click on the job and watch it run. | 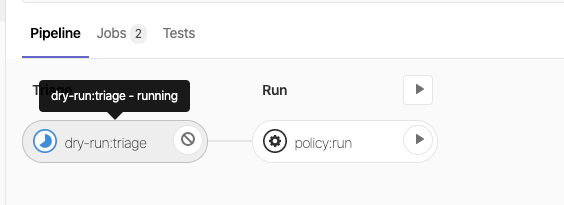 {: .margin-right20 .margin-left20 .margin-top20 .margin-bottom20 .image-width80pct } {: .margin-right20 .margin-left20 .margin-top20 .margin-bottom20 .image-width80pct } |
| 4. Fist it starts by creating a container and getting a runner growing (That means your CI job is defined OK so far) | 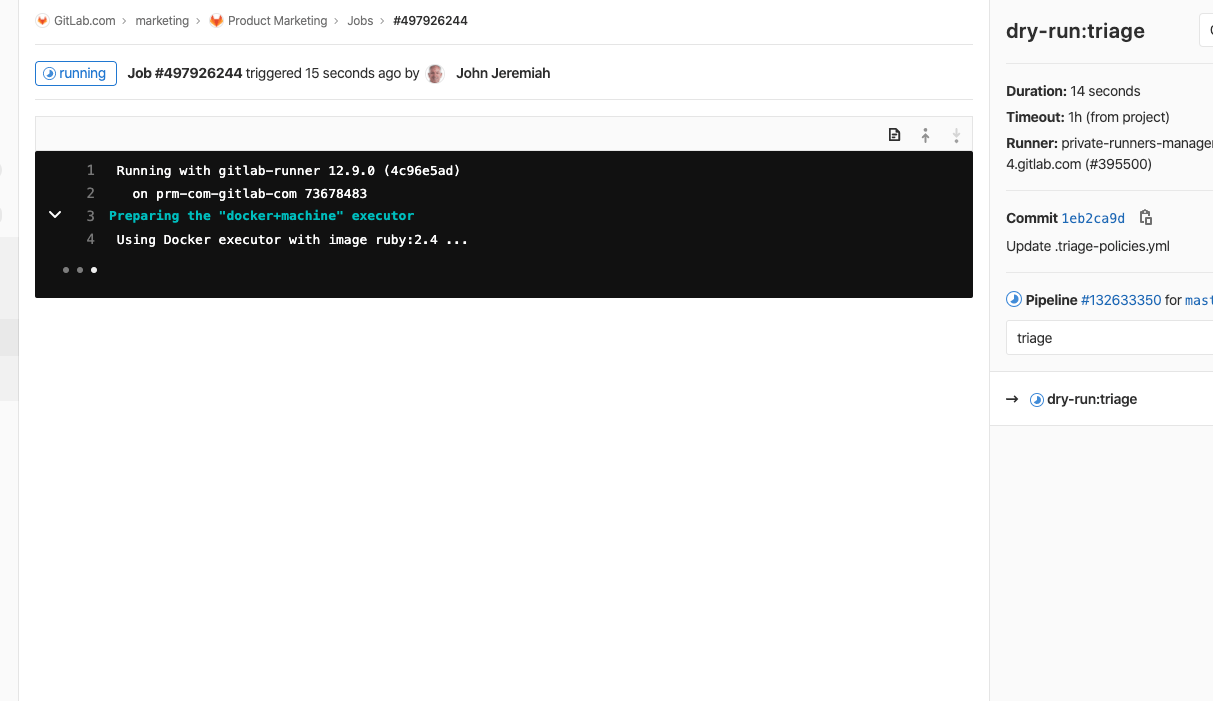 {: .margin-right20 .margin-left20 .margin-top20 .margin-bottom20 .image-width80pct } {: .margin-right20 .margin-left20 .margin-top20 .margin-bottom20 .image-width80pct } |
| 5. Then it prompts the Triage bot to show it’s help output (that means it’s working, and your API key is good) | 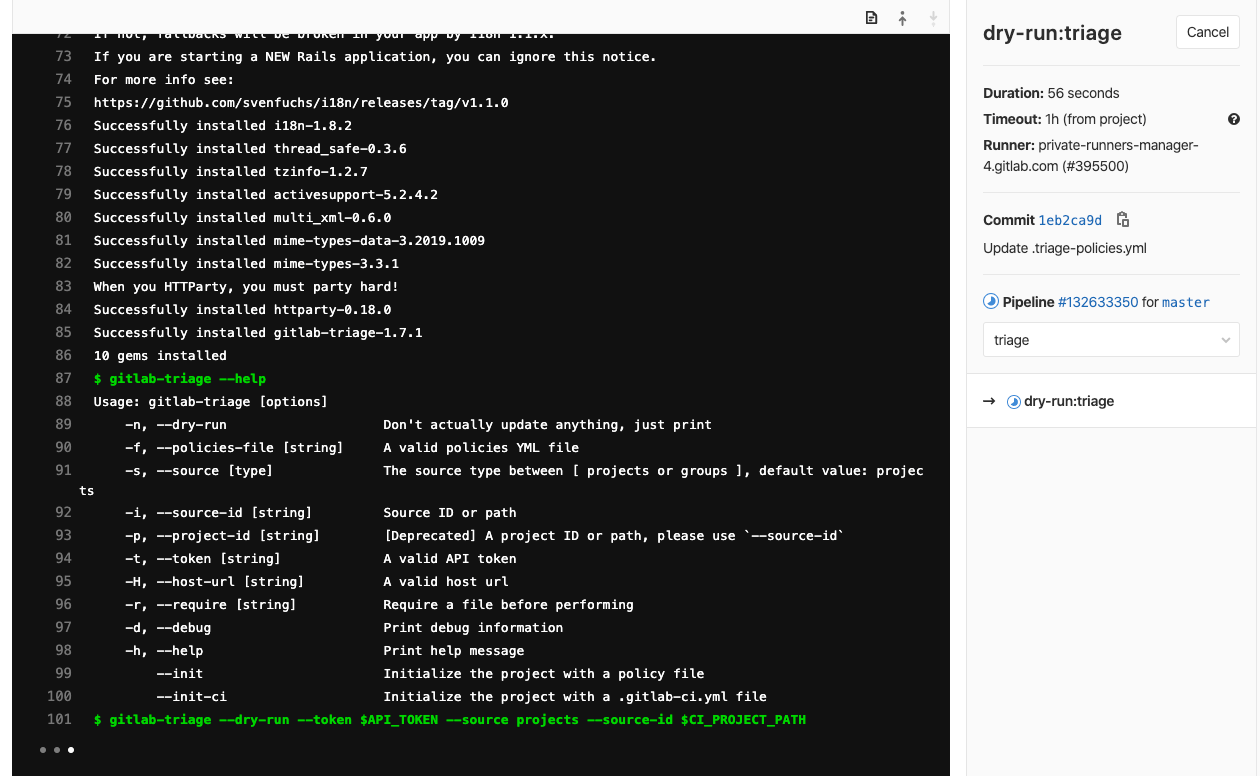 {: .margin-right20 .margin-left20 .margin-top20 .margin-bottom20 .image-width80pct } {: .margin-right20 .margin-left20 .margin-top20 .margin-bottom20 .image-width80pct } |
| 6. Then the job runs the “Dry-Run” and you see the output from the bot as it runs. Just one job - find all the open issues, so it runs fast, finds over 1,000 issues. Since the policy/rule had no filters or actions, the job finishes. | 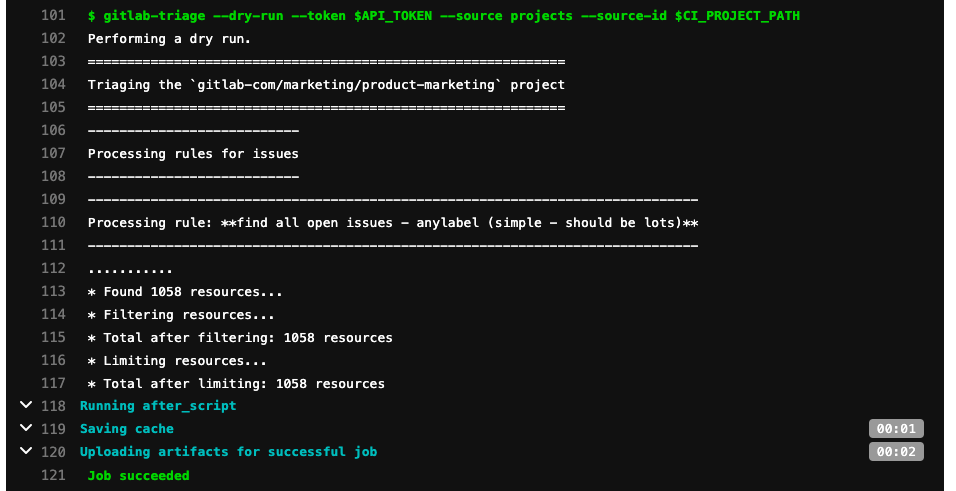 {: .margin-right20 .margin-left20 .margin-top20 .margin-bottom20 .image-width80pct } {: .margin-right20 .margin-left20 .margin-top20 .margin-bottom20 .image-width80pct } |
Now, you need to define any specific policies/rules that you need for your project.
Step 3: Scheduling Jobs
| Scheduling Jobs | Image |
|---|---|
| 1. Go to CI/CD–>Pipelines on the left menu | 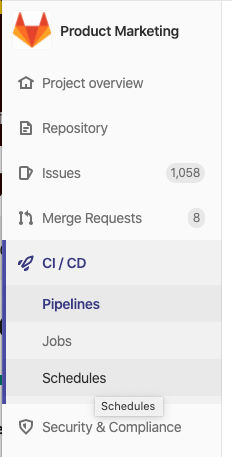 {: .margin-right20 .margin-left20 .margin-top20 .margin-bottom20 .image-width20pct } {: .margin-right20 .margin-left20 .margin-top20 .margin-bottom20 .image-width20pct } |
| 2. Click on Create New Schedule |  {: .margin-right20 .margin-left20 .margin-top20 .margin-bottom20 .image-width80pct } {: .margin-right20 .margin-left20 .margin-top20 .margin-bottom20 .image-width80pct } |
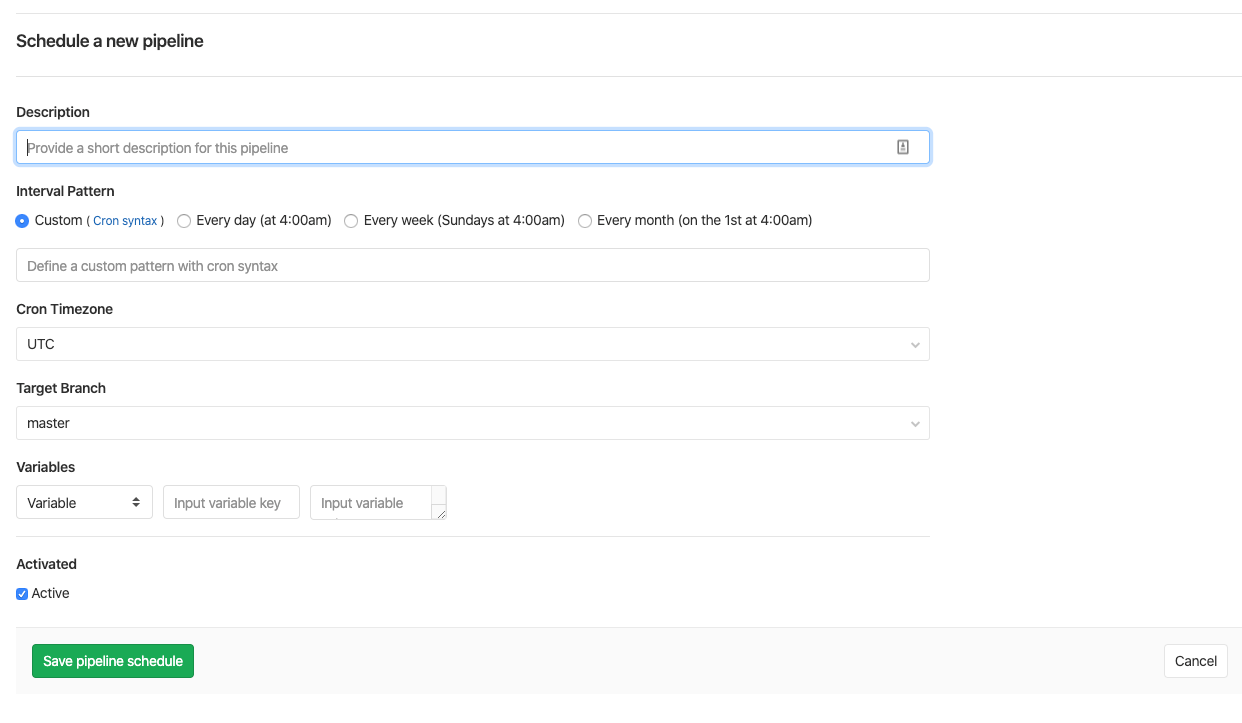
| 3. Create the schedule - Write a Name/description - Select an Interval pattern (how frequently do you want it to run. Probably daily.) - Leave the Target Branch, and Variables options with the default - Click on Save Pipeline Schedule. |
 {: .margin-right20 .margin-left20 .margin-top20 .margin-bottom20 .image-width80pct } {: .margin-right20 .margin-left20 .margin-top20 .margin-bottom20 .image-width80pct } |
Other specific scenarios
Moving issues to a certain project
Create a label in your project that is the flag that tells the automation bot to move the issue.
- The label must be unique for the destination project. For example
move--> project2Test
- Update
.triage-policies.yml - Paste in the following rule:
|
|
This rule will look for the label move--> project2Test in all open issues and then apply the quick action
/move ....where it specifies the destination for the issue.
In the future if you want to move a bunch of issues to that project, all you have to do is add the move--> project2Test label.
Promoting issues to be epics
Create a label in your project that is the flag that tells the automation bot to promote the issue to be an epic.
- For example
promote-me
- Update your
.triage-policies.yml - Paste in the following rule:
|
|
This rule will look for the label promote-me in all open issues and then apply the quick action
/promtewhich promotes the issue into an epic.
In the future if you want to promote a bunch of issues, all you have to do is add the promote-me label.
Deprecating/deleting an issue
If you want to effectively delete an issue (strip it of labels, remove it from epics and milestones,and remove estimates, and close it)
Create a label in your project that is the flag that tells the automation bot to promote the issue to be an epic.
- For example
deprecate-me
- Update your
.triage-policies.yml - Paste in the following rule:
|
|
This rule will look for the label deprecate-me in all open issues and then apply a bunch of quick actions that update and close the issue.
In the future if you want to delete and deprecate a bunch of issues, all you have to do is add the deprecate-me label.
Success and Next Steps.
From here, you can build/draft your specific policies/rules for your project.
95292dbd)
