Zendesk for GitLab Developer Relations
Developer Relations Zendesk instance
The Developer Relations team uses a dedicated Zendesk instance to centralize the management of relevant community mentions, and to process Education Program, Open Source Program, and Startup Program applications and requests. This instance is separate from other Zendesk instances GitLab uses.
The majority of cases in Zendesk are routed there via Zapier automation, or a native Zendesk integration.
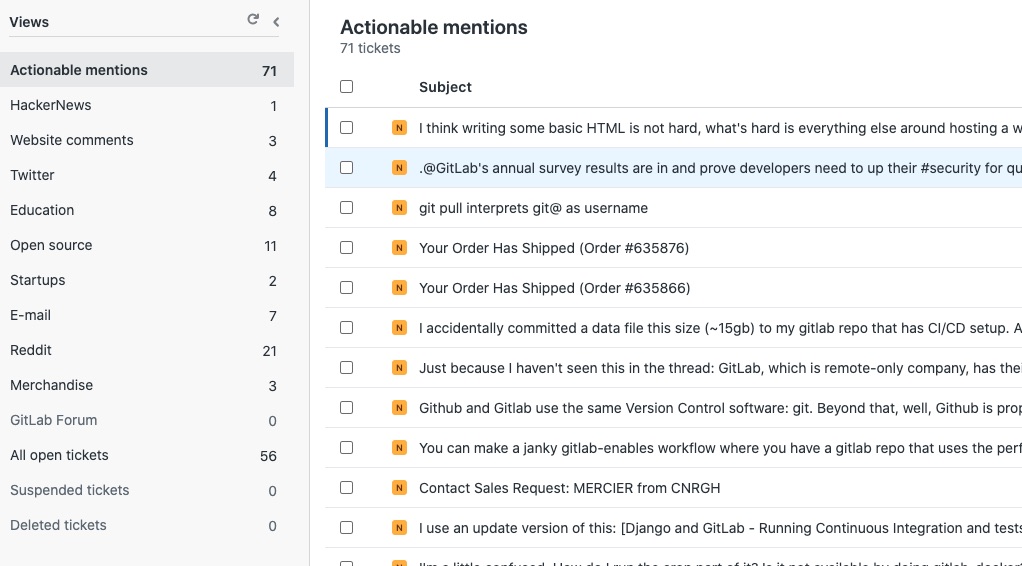
Each case is then converted into a Zendesk ticket and filtered into a View, ordered by category. As part of their daily workflow, the Community Operations Team, and the Education and Open Source Program Managers monitor these views and process tickets through completion.
Zendesk subscription
After a discussion with the GitLab Support team, it was concluded that for the specific Developer Relations workflows and metrics it would be best to keep the Developer Relations Zendesk instance separate from the Support team’s Zendesk instance.
The Developer Relations instance runs on a Professional Zendesk Support subscription, with one Agent seat per Developer Relations team member, plus extra seats for the team manager and collaborators. Additionally, the Collaboration Add-on provides us extra seats for Light Agents with read-only access to tickets.
Adding new agent seats to existing subscription
- If there is a need to increase the number of agent seats, contact the GitLab Account Manager at Zendesk. Their details are in the
Developer Relations - Zendesk contactsecure note in 1Password, on the Marketing vault. - Account billing details (only accessible by the Zendesk instance owner)
After the initial contact and agreeing to the subscription plan update:
- The GitLab Account Manager at Zendesk sends the unsigned service order to the DRI at GitLab via e-mail.
- DRI submits a finance issue following the Procure to pay process, attaching the unsigned service order. See this existing subscription add-on issue for reference.
- DRI works with stakeholders to complete the approval chain
- DRI reaches back to the GitLab Account Manager at Zendesk and asks them to:
- Please send the DocuSign contract to our CFO to sign. His e-mail address is:
{ADD_CFO_EMAIL} - Please add the comment: “Approved by GitLab at
{ADD_FINANCE_ISSUE_LINK}” to the DocuSign e-mail - Please add me as CC on the DocuSign document so that I have visibility of it and get a notification when it’s been signed by GitLab
- Please send the DocuSign contract to our CFO to sign. His e-mail address is:
- DRI uploads signed contract to ContractWorks after CFO signature.
Zendesk access
Zendesk access is provided during onboarding for members of the Developer Relations team when needed. Access as an Agent (read/write access to tickets) or a Light Agent (read-only access to tickets) can also be provided for other team members using the access request process if needed.
Once access is set up:
- Go to https://gitlab-community.zendesk.com
- Log in as “Agent” via SSO and your GitLab Google Workspace account.
Provisioning agents
To add an Agent:
- Log into Zendesk
- Go to
Settings > Manage > People - Click on
add agent - Fill in name and e-mail address
- Choose the role, either
Agent(read/write access to tickets)Light Agent(read-only access to tickets, but can leave internal notes) - Click
Add - Choose the relevant groups for the new agent, and optionally set their time zone
Deprovisioning agents or changing roles
To find a user account and edit their status:
- Log into Zendesk
- Go to
Settings > Manage > People - Enter their e-mail on the search box and click on
Search - When the user appears on the list of results, click on
Edit
To change the role for an account (e.g. promote or demote as Admin):
- Follow steps above to find a user account and edit status
- Click on the
Roledropdown on the left - Select the appropriate role. The status is saved automatically upon change.
To deprovision (remove agent status):
- Follow steps above to find a user account and edit status
- Click on the
Roledropdown on the left - Set the role to
End User(no read/write access). The status is saved automatically upon change.
Zendesk views
View limits workaround
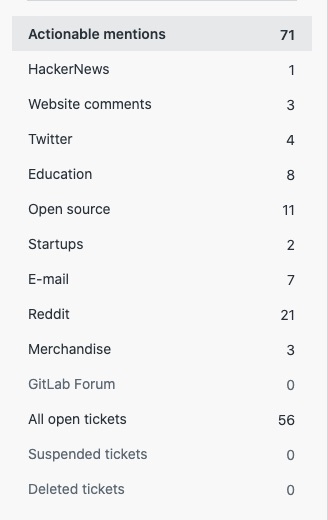
There is a limit on the number of views that can be displayed on the main “Views” panel on Zendesk, regardless of the type of subscription:
- 12 shared views
- 8 personal views
If the number of views exceeds these limits, the additional views are moved to the Settings > Views panel. As the Community Operations Manager makes use of the shared views feature, and as the number of response channels already exceeds the limit of 12, this poses a hindrance on ticket visibility and effectivity.
As a workaround, the team has decided to standardize our personal views, thus effectively increasing the number of visible Views to 20. If the number of response channels exceed the count of 20, an alternative approach could be to consolidate some of the existing views –a practice already followed where it makes sense (e.g. E-mail view).
The workaround is based on two steps: creating a shared view, which then can be cloned as a personal view.
Creating new shared views
To create a new shared view:
- Navigate to
Settings > Views - Click on the
Add viewbutton or clone an existing shared view - Set up or modify the filter conditions if necessary
- On
Available for, chooseAll agents - Inform the rest of the team about the availability of the new view
Cloning shared views as personal views
To create a personal view from a shared view:
- Navigate to
Settings > Views - In the views list, hover over the right hand side of view you want to clone
- Click on the ellipsis to open the context menu
- Choose
Clone - Do not modify the filter conditions
- On
Available for, chooseMe only
Zendesk macros
A macro is similar to an email template and consists of one or more actions that modify the values of a Zendesk ticket’s fields. Macros are applied to tickets manually from the drop down within each message.
While macros provide template responses, please keep in mind that the goal is to personalize each response as much as possible in order to provide excellent service to our community.
Macros can perform the following tasks:
- Add comment text
- Update ticket fields
- Add or remove ticket tags
- Add CCs
- Change the assignee
- Set the ticket subject
- Add attachments to ticket comments
Creating macros
There are two types of macros: personal macros (created by an agent or administrator for their own use) and shared macros (created by an administrator with permission for multiple users).
Please make sure to focus on creating shared macros since we want to keep all the info transparent and available to the whole team.
Tips:
- If you are creating a new Macro, open an existing one in another tab so you can see the formatting and all of the
Actionsyou should add. - If you think you need Admin access, let your manager know.
- Without Admin access, you can create Macros that are available only to you (e.g a Macro with your personal email signature).
Creating personal macros
Although only administrators can create the macros that are shared by all, we can also create personal macros. A personal macro is only visible to and can only be used or modified by the creator.
- Click the Admin icon in the sidebar, then select Macros.
- Click the All shared macros drop-down menu and select Personal macros.
- Click the Add macro button.
- Enter the macro name, and add actions for your macro as described in Building macro action statements.
- Click Create.
Creating shared macros
Administrators (and agents in custom roles with permission) can create macros that are shared by all Zendesk Support agents or macros that are shared by only agents in a specific group. Administrators can also create personal macros for their own use.
A personal macro is only visible to and can only be used or modified by the creator. Administrators can create shared macros, and can modify all shared macros, regardless of who created them.
- Click the Admin icon in the sidebar, then select Macros.
- Click the Add macro button.
- Enter a Macro name.
- (Optional) Enter a Description.
- Select an option from the Available for menu:
- All agents, available to all agents.
- Agents in group, available only to agents in the group specified. A drop-down menu to choose the group appears when you select this option.
- Me only, available only to you.
- Under Actions, use the drop-down menus to add actions for your macro as described in Building macro action statements.
- If you choose the Comment/description macro action, and you have rich text formatting enabled, you can add formatting and inline images and you can add attachments to your macro comments.
- Click Create.
Applying macros
You can manually apply one or more macros to a ticket. Just as you can make bulk updates to many tickets at once, you can also apply a macro to more than one ticket using your views.
A typical use case is a ticket that contains more than one question or issue, let’s say two in this example. You might have set up two macros that both insert a comment into a ticket to answer each issue separately. By applying each macro to the ticket, you add two comments and address both issues in a single response.
- In a ticket , click the Apply macro button in the bottom toolbar.
- Typically, your five most commonly used macros from the past week appear at the top of the macros list.
- You can select one of these, begin typing the name of the macro, or scroll through the list to find the one you want to use.
- The actions defined in the macro will be applied. If the macro updated the ticket comment, you can edit the text before submitting the ticket.
- To apply another macro, click Apply macro again and select another macro.
Previewing macros
There is an option to view a description of a macro, and preview the update it will make to a ticket, before applying it.
- In a ticket, click the Apply macro button in the bottom toolbar.
- Scroll through the list to locate the macro you want to use.
- Hover your cursor over the macro to display its description tooltip.
- If the macro does not have a description, the tooltip does not appear.
- If the description matches the macro you want to apply, click on it to use it.
Current macro stack (click link for macro details)
Common Requests
- Application Form Not Visible
- Authenticating Gold
- Delayed Response
- e-signature request via eSertifi (Salesforce)
- Error with processing application (Salesforce error)
- Handing off to sales team (Send via Gmail)
- Internal Support Ticket Filed
- License Update
- Pandemic response
- Redirect Technical Support Question to Forum (Support)
- Request modification to our terms
- Send Quote via Email
- Ultimate license download instructions
EDU
- EDU new application approval Zendesk notification
- EDU Renewal quote sent Zendesk notification
- Basic info on EDU program
- Collecting EDU qualification info
- EDU Announcement
- EDU General Rejection
- EDU Rejecting Students
- EDU Renewal Thank You
- EDU Requesting Email Domain
- EDU Requesting Non-Profit Verification
- EDU Requesting Renewal Information
- EDU Welcome
- Second email asking for participants data
NP
Ops
OSS
- Clarifying “not-seeking-profit” req and Qualification Examples
- OSI-approved license
- OSS Announcement
- OSS Basic Program Information
- OSS new app need more info
- OSS new application approval (Zendesk notification)
- OSS Rejection
- OSS Renewal quote sent (Zendesk notification)
- OSS Renewal Reminder and Request for Info
- OSS Welcome (new applicants)
- OSS Welcome (Renewals)
- Qualification error, OSS federal exception rejection, and sales intro
Startups
- Need info about product and seats
- Providing basic program information
- Qualification for program
- Renewal request sales handoff
- Startup Rejection
- Startups Welcome
Swag
Sending emails through Zendesk
Emails sent to our list of contact emails create a new ticket in Zendesk, and public comments in Zendesk are sent as an email from that contact email back to the recipient.
There are instances where it is necessary to change the email address of the recipient, the sender, or both, which can be done through Zendesk.
Changing the email recipient
- Click
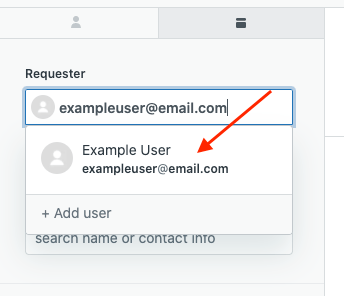
(change)next to the recipient’s email address at the top of the ticket. Alternatively, you can click the 👤 symbol on the left pane to bring up theRequesterfield.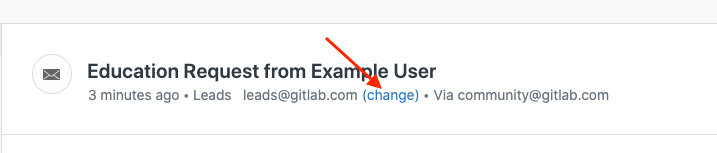
- This will open the
Requesterpanel on the left side. Paste the new email address in theRequesterfield.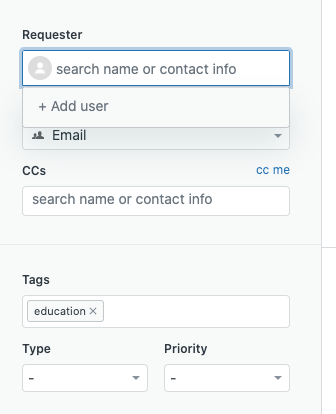
- If their email address is already in Zendesk, the record will show up, which you can select.
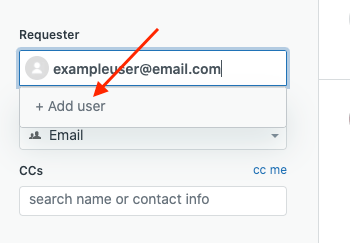
- If their email isn’t in Zendesk, add them as a new user.
- Click
Add new user - Add their name and email to the corresponding fields
- Select
End Useras the role - Click
Add
- Click

- If the email has been successfully changed, the new recipient will show up at the top of the ticket.

Changing the email sender
- Check what email address is currently used to send replies from at the top of the ticket. It will say
Via {email address}
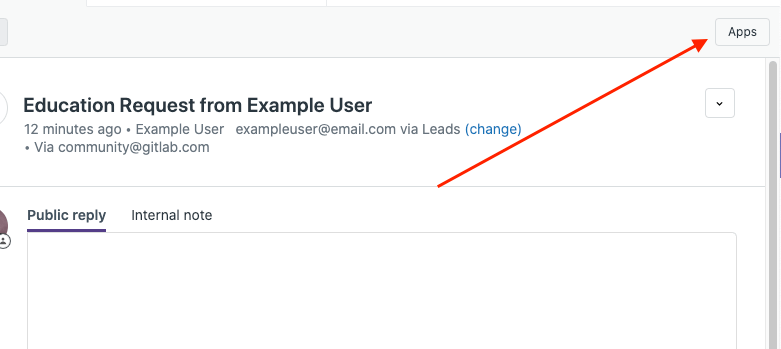
- On the top-right of Zendesk underneath your profile picture, click
AppsChange sender step 2 - The app panel on the right-hand side will open up. Click the dropdown next to
Select an Email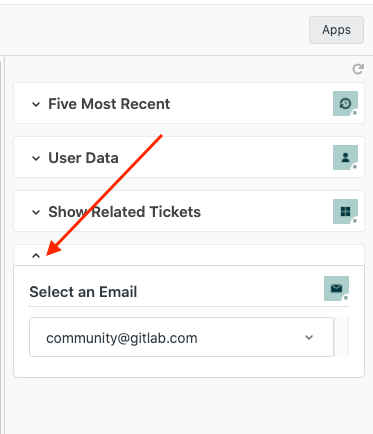
- Select the email address you want to send the email from via the drop-down list of email addresses.
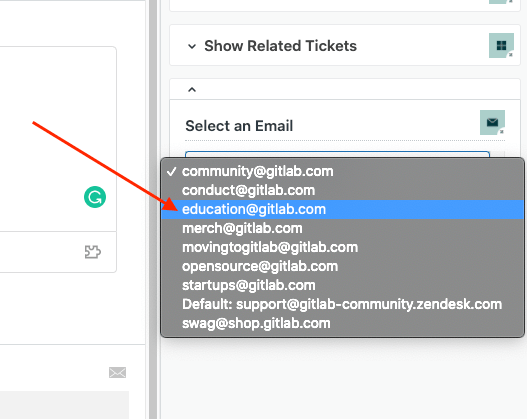
- If the sender address has been successfully changed, a notification saying
This ticket will be sent from {email address}will pop up by theAppstab, and the field at the top of the ticket will change.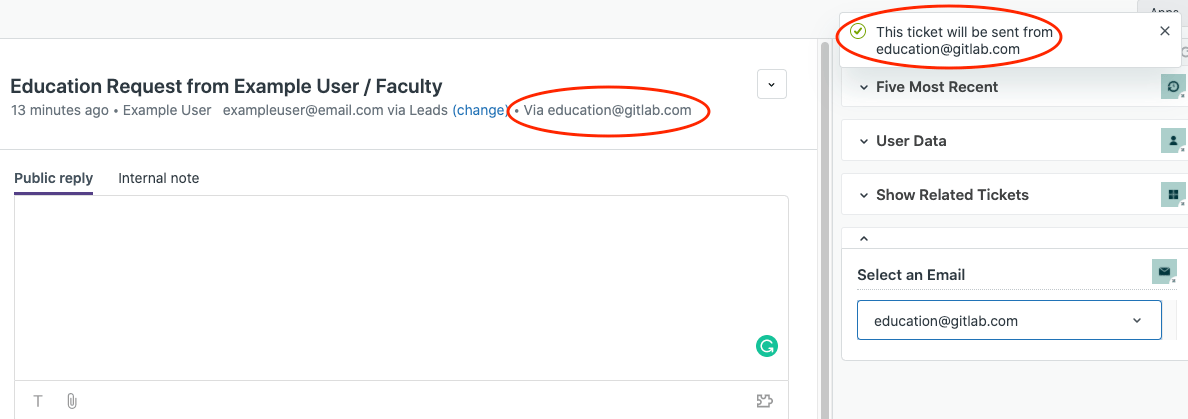
a68c0e2d)
