
Introduction
GitLab has [built-in continuous integration][doc-ci] to allow you to run a number of tasks as you prepare to deploy your software. Typical tasks might be to build a software package or to run tests as specified in a YAML file. These tasks need to run by something, and in GitLab this something is called a [Runner][doc-runners]; an application that processes builds.
In March we introduced [GitLab Runner 1.1][1_1] with the cool feature of autoscaling and a week later we announced that all [shared Runners on GitLab.com use autoscaling][autoscale-post]. The shared Runners can be used for free by any user with a GitLab.com account.
In this tutorial we will explore how easy it is to install and set up your own Runner on [DigitalOcean]; a Runner that will be 'specific' to your projects as we say in the GitLab lingo.
Prerequisites
We will use the Docker executor since it has the most supported features according to the [GitLab Runner executor compatibility chart][chart]. For this, we will need to install Docker on the server that will host the GitLab Runner.
Fortunately, DigitalOcean has a [one-click image with Docker][one-docker] pre-installed on Ubuntu 14.04 and this is what we will use.
Note: You are free to use any Linux distribution supported by DigitalOcean, even FreeBSD. GitLab Runner is supported on all Operating Systems.
Create a droplet
[Login to DigitalOcean][cloud] and from the Control Panel, click on the "Create Droplet" button that is visible from any page.

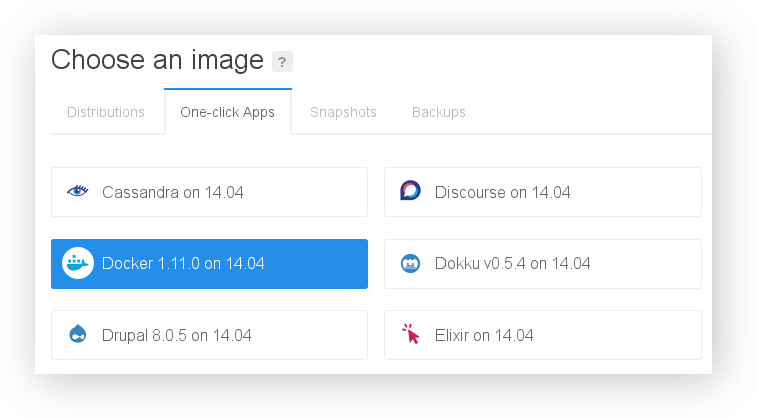
Under the "Choose an image" section, select the "One-click Apps" tab and click the "Docker" image (the version might differ).
The next step is to choose the droplet size and the region you would like to use. You are advised to use the 1 GB / 1 CPU droplet for quicker builds.

Add any SSH Keys, select any settings you'd like to use, and click "Create" at the bottom.
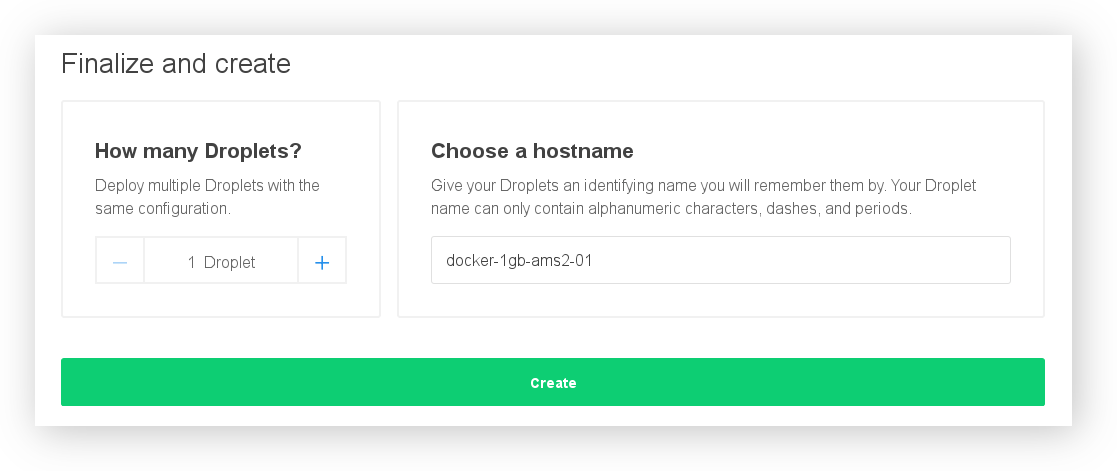
Your Docker droplet will be created and available in a few minutes!
Install the GitLab Runner
First, login to the new droplet via SSH and verify that Docker is installed with:
docker info
This should show a bunch of information about the Docker version, the number of images and containers, etc. With that set, we're ready to install GitLab Runner.
GitLab provides a repository where you can easily install and update GitLab Runner. The supported distros as Debian, Ubuntu and CentOS. Let's install the repository with this one-line:
curl -L https://packages.gitlab.com/install/repositories/runner/gitlab-runner/script.deb.sh | sudo bash
Feel free to read the script before you execute it if you want.
Now let's install GitLab Runner:
sudo apt-get install gitlab-runner
And verify it's installed:
gitlab-runner --version
Excellent! We're now ready to start using it.
Note: For other installation methods and Operating Systems, see the [installation documentation][doc-install].
Register the GitLab Runner
Registering a Runner is the process of tying it with a specific GitLab project. Each project on GitLab has a unique token that is used by the Runner in order to be able to talk to GitLab via its API.
When we installed GitLab Runner in the previous step, we installed GitLab Runner the service. Each GitLab Runner service can spawn as many Runner processes you want, so you can eventually register multiple Runners in a single droplet, each of which can be tied to a separate project.
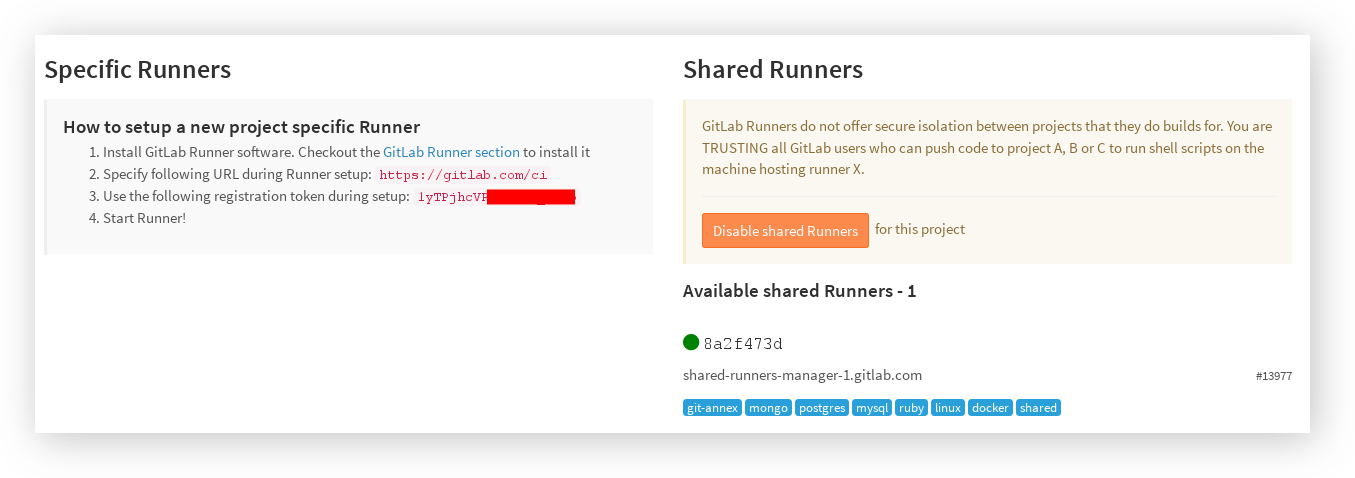
To register a Runner we first need to know the project's token. Go to your newly created project or pick one that already uses GitLab.com's shared Runners. Navigate to the project's Settings > Runners and notice that the shared Runners are enabled. In the left side you get detailed information on the steps needed to register a new Runner.
Now, let's get back to the droplet and start registering a Runner:
sudo gitlab-runner register
The command above is interactive, so you will be asked the information needed to register a new Runner.
- the gitlab-ci coordinator URL: Enter
https://gitlab.com/ci. - the gitlab-ci token for this runner: The token in the previous image.
- the gitlab-ci description for this runner: This is for your own accord, in case you have multiple Runners and want something to remind you what the Runner is about. If you don't enter a description, the hostname of the droplet will be used.
- the gitlab-ci tags for this runner: You can use tags in your
.gitlab-ci.ymlto limit jobs to specific Runners. Useful if for example you are running tests on different OSes. Enterdocker,digitaloceanfor this example. - enter the executor: Our executor will be
docker. - enter the default Docker image: The default Docker image that will be
used if you don't specify it in
.gitlab-ci.yml.
Once answered all questions, you can verify that the Runner is registered with:
sudo gitlab-runner list
Now if you head back in your project's Settings > Runners you will see that the Runner appeared in the list.
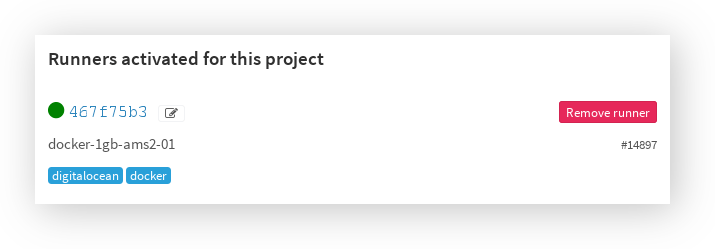
You can now start using this specific Runner for your project and you may disable the shared Runners.


