
What is interactive rebase?
Interactive rebase, or Git rebase interactive, is sometimes called the "Swiss Army Knife" of Git – because it contains so many different tools, for so many different use cases! However, there's one main, overarching use case: cleaning up your local commit history.
Mind the word "local": it should only be used for cleaning up your own, local commit history, for example before integrating one of your feature branches into a team branch. In contrast, it should NOT be used on commit history that has already been pushed and shared on a remote repository. Interactive rebase is one of those tools that "rewrite" Git history – and you shouldn't do this on commits that have already been shared with others.
With this little warning message out of the way, let's look at some practical examples!
Note: for easier visualization of the scenarios and workflows in this post, I’ve been using the "Tower" Git desktop GUI in some of my screenshots.
Correcting an old commit message with Git rebase interactive
Sometimes you notice a typo in an old commit message – or you've forgotten to mention something in the description that is noteworthy. If we were talking about the very last commit, we could have simply used the --amend option of the git commit command. But for older commits you will have to use interactive rebase to change them after the fact.
Here's an example of a commit message gone horribly wrong that we want to correct:
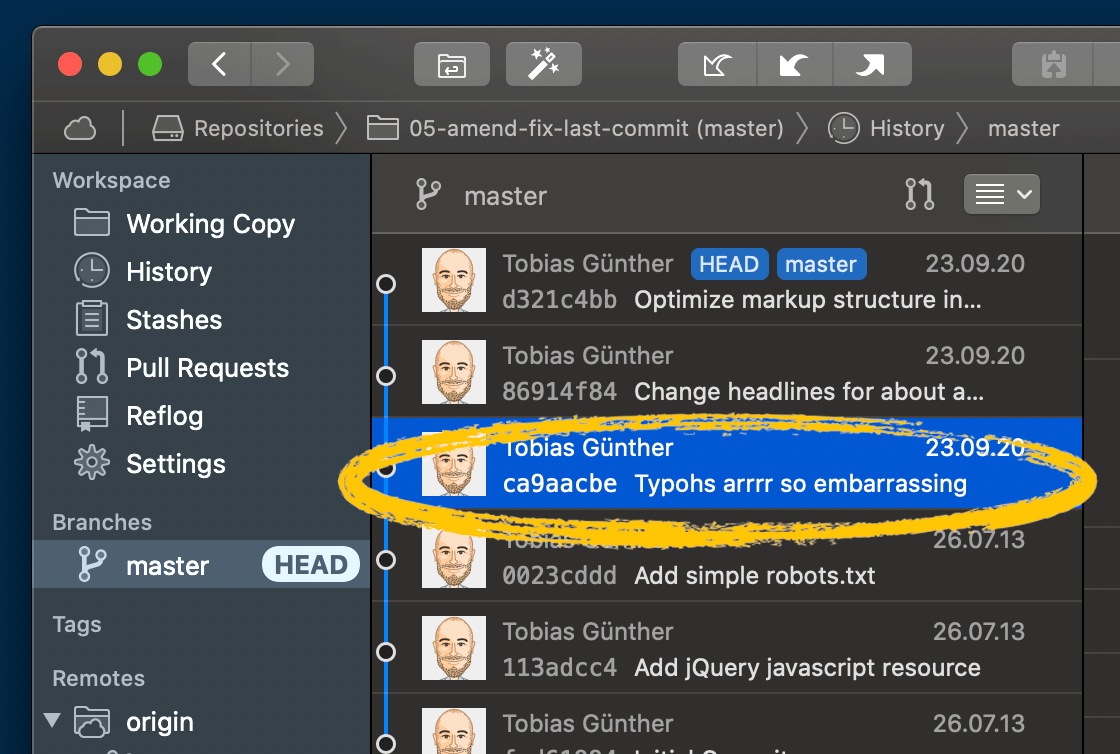 A bad commit message that needs correction
The first step in any Git interactive rebase session is to determine what part of commit history you want to manipulate. To again take the above example: in order to change this bad commit we have to start the session at its parent commit.
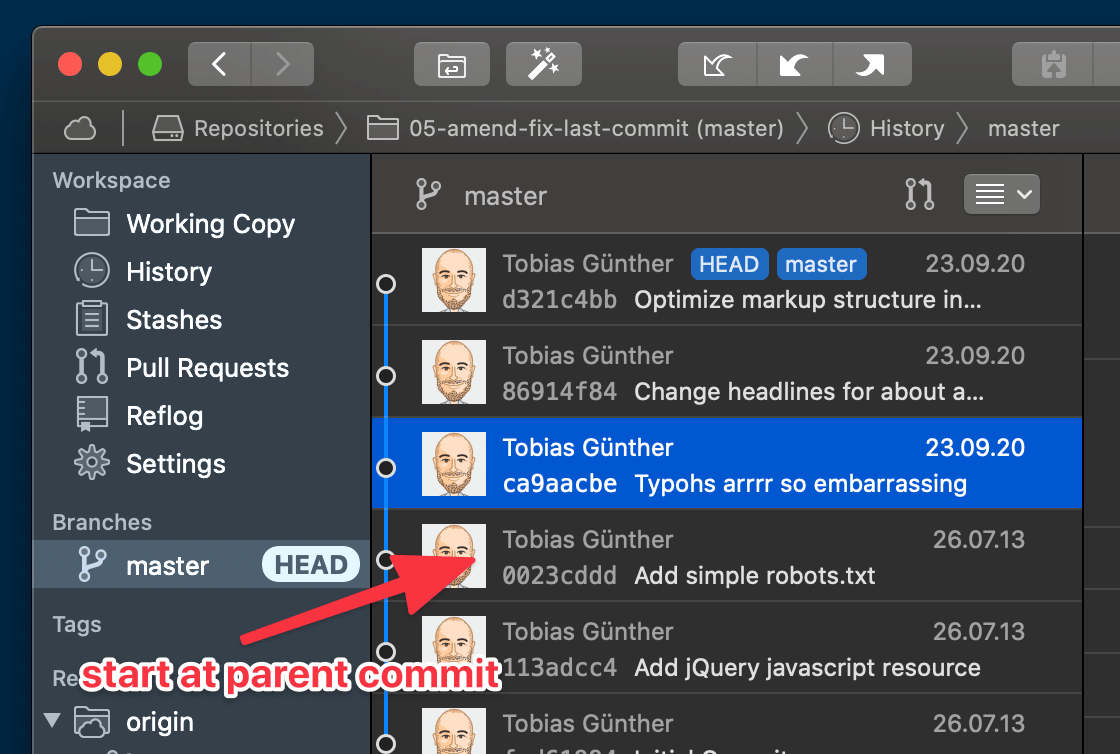 Starting our interactive rebase session
We can now feed this starting commit's hash to the Git rebase interactive command:
$ git rebase -i 0023cddd
An editor window will now open, containing a list of the commits that you just selected for manipulation. And don't be surprised because they are in reverse order: in an interactive rebase session, Git will reapply the old commits, item after item – which means that reversing the order is correct from Git's perspective.
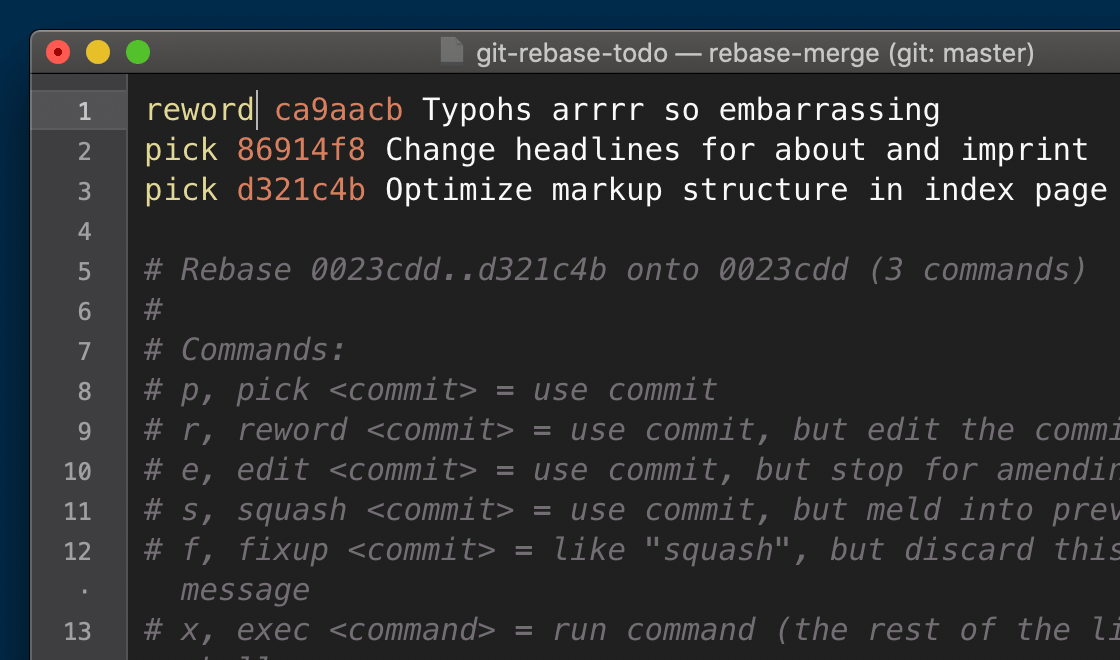 Editor window with the selected commits
One other important thing to note about this editor window: you don't perform the actual manipulations here! Or, in this concrete example, you do NOT go ahead and change the commit message here. Instead, you only mark the commit you want to change with an action keyword. In our case, because we want to change a commit’s message, we mark the line with "reword". If you then save and close this editor window, a new one will open, containing the old commit’s message. Now is the time to finally make your changes:
 Finally, we can make our changes
After saving and closing once more, the interactive rebase session is complete and our old commit message has been corrected!
Combining multiple commits into one using interactive rebase
Another use case for interactive rebase is when you want to combine multiple old comments into one. Although, of course, the golden rule of version control applies: in most situations, it's beneficial to create more and smaller commits instead of a few big ones. However, as with everything, we might find that we have overdone this and now want to meld two or more old commits into a single one.
To make a concrete example, let's say we want to combine the following selected commits into a single one:
 Let's combine multiple commits into one
Just like in our first case, we begin by starting the interactive rebase session at least at the parent commit of the one we want to manipulate.
$ git rebase -i 2b504bee
Again, an editor window will open, listing that part of our commit history that we want to manipulate:
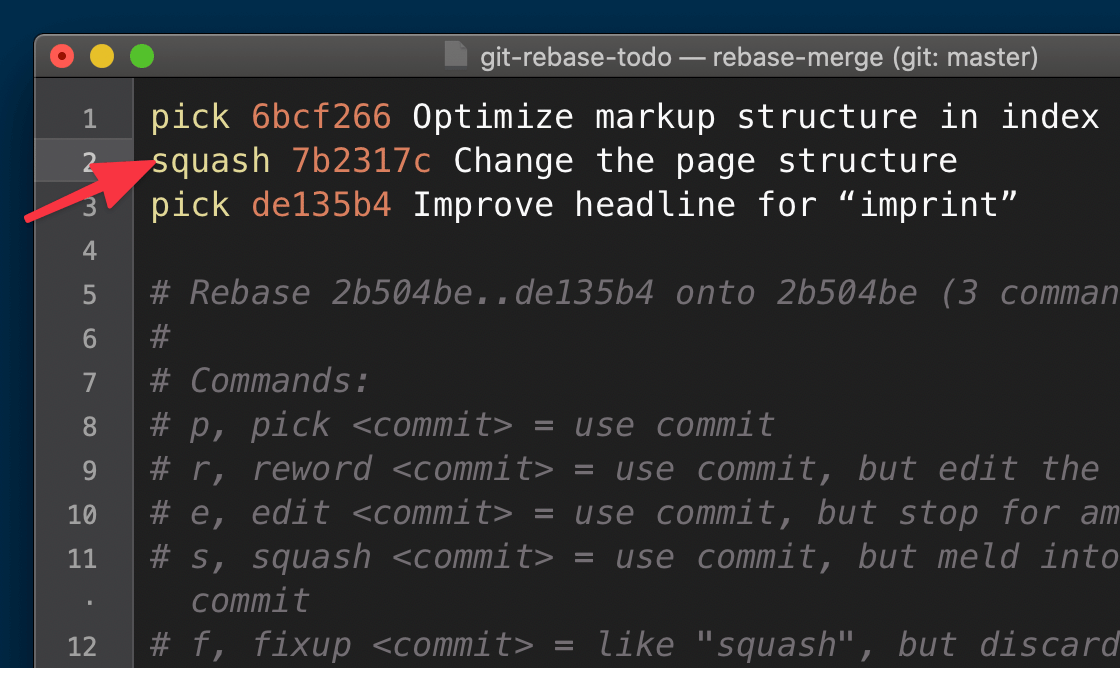 Marking lines with "squash"
The action keyword we are going to use here is called "squash." And there's only one important piece of information you need to know about squash in order to use it: the line we mark up with the "squash" keyword will be combined with the line directly above. That’s why, as you can see in my screenshot above, I’ve marked line #2 with "squash" in order to combine it with line #1.
We can now save and close the editor window and again watch and a new window appear: we are now asked to provide a commit message for the new commit that is created when combining those two old ones.
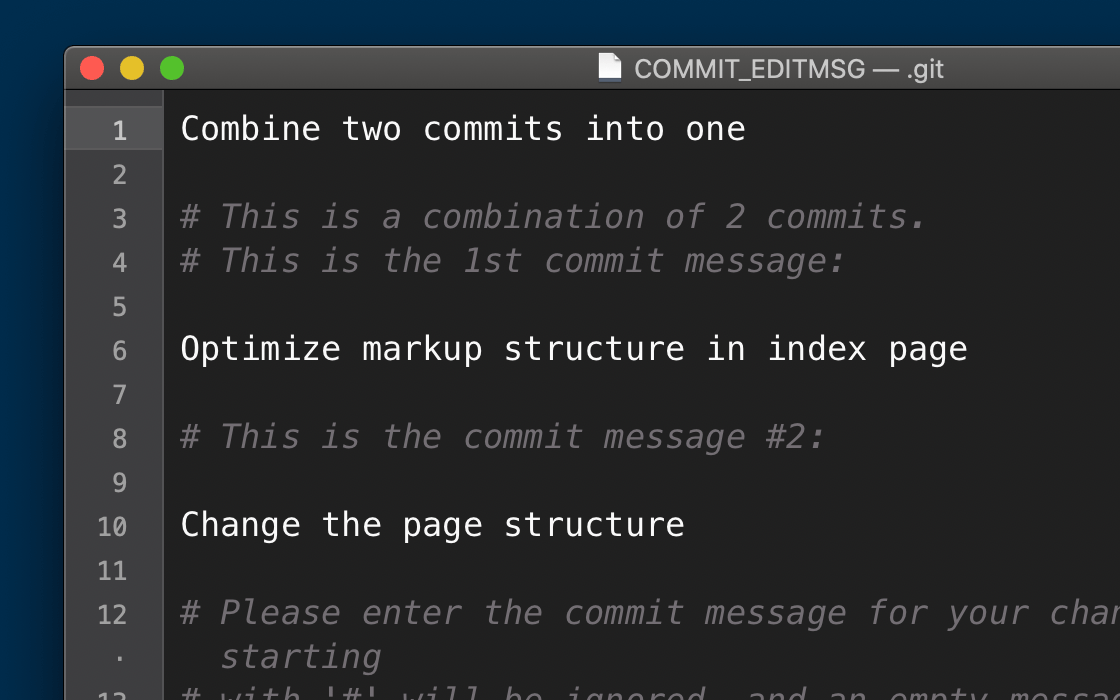 Entering a new message for the new, squashed commit
After saving and closing this editor window, you will see that a new commit was created that contains the changesets of both old commits. Voila!
Fixing a mistake with interactive rebase
Another use case for interactive rebase is when you found a mistake in one of your earlier commits. And it doesn't matter what exactly you messed up: you could have forgotten to add a certain change, should have deleted a file, or simply introduced a typo...
The natural tendency, in such a situation, is to simply create a new commit that corrects the mistake. But on the other hand, this will mess up our commit history: making an original commit, and then adding a "band-aid" commit just to fix some mistakes… that’s a messy way of working. Your commit history will soon become hard to understand, because it's littered with all those little "quick fix commits"!
This is where "fixup," one of the tools that come with interactive rebase, comes in very handy. Fixup takes this "quick fix" commit, applies its changes to the original commit (thereby correcting it), and then gets rid of the band-aid commit:
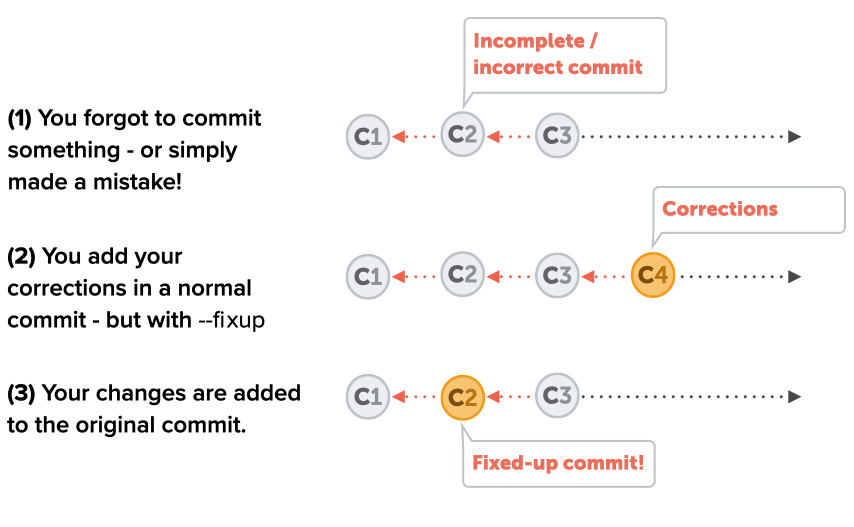 How "fixup" works
After we're done, it looks as if there had never been a problem with our original commit! So let's walk through this using a practical example.
The first step is to do whatever is necessary to fix the problem: this could mean adding a new file, making changes to existing ones, deleting obsolete files... you "just" need to produce the changes that correct the mistake.
The next step is to commit these changes to the repository – but with a little extra: when making the commit, we are going to use the --fixup flag and tell Git the commit hash of our bad commit:
$ git add corrections.txt
$ git commit --fixup 2b504bee
When you now take a look at the commit history, you will see that a pretty ordinarily looking commit has been created – probably not the magic and fireworks you would have expected. But if you take a closer look, you will see that something’s going on: the new commit has automatically been prepended with "fixup !" and the commit subject of our bad commit.
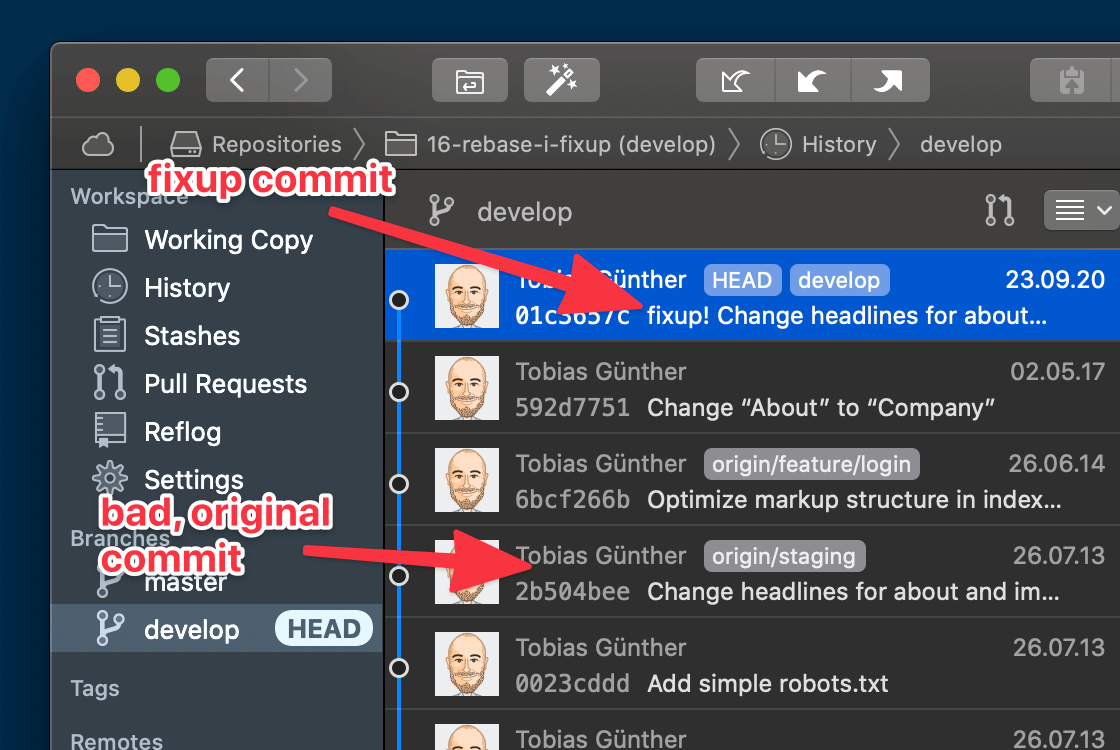 The original commit and the fix commit
The third step now is to start the interactive rebase session. Again, we choose the parent of our bad commit as the starting point...
$ git rebase -i 0023cddd --autosquash
... and as the second part of the secret sauce, we are using the --autosquash flag. This option makes sure that we don't have to do anything in the editor window that is now open. Take a close look at the situation:
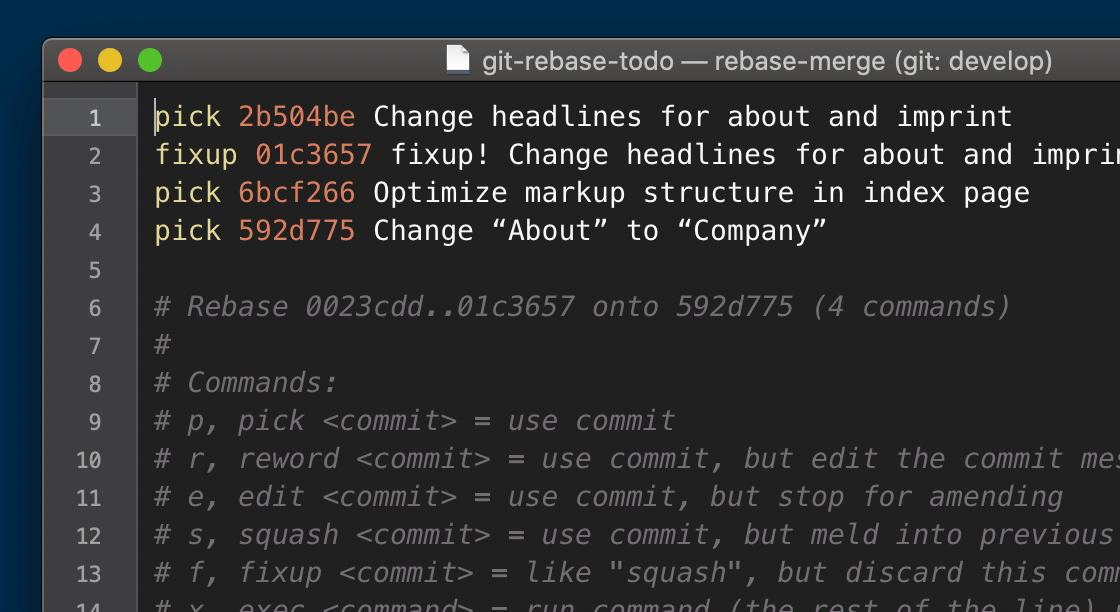 Our fix commit is marked "fixup" and sorted to the right position
You will see that Git automatically did two things for us:
- It marked our band-aid commit as "fixup."
- It re-ordered the lines so that our band-aid commit appears directly below our bad commit. This is because fixup works exactly like squash in that it combines with the line above.
In other words: there's nothing left to do for us but save and close the editor window.
Let's take another look at the commit history:
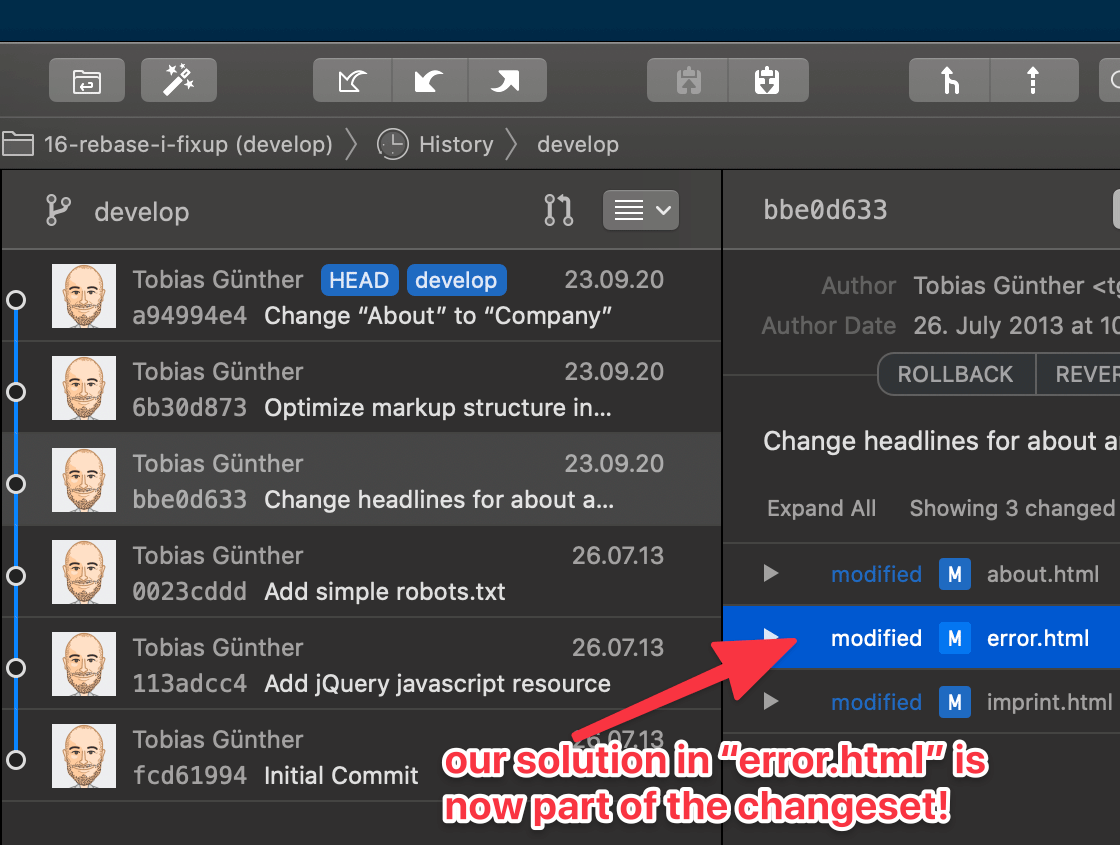 A happy ending!
Not only does our originally bad commit now contain the changes from our band-aid commit. But on top of that, the ugly band-aid commit has disappeared from the commit history! Everything is nice and clean, just as if there had never been a problem!
Discover the power of Git rebase interactive
There are lots of use cases for interactive rebase – and most of them in the department of “fixing mistakes”. For an overview of other useful things you can do, I recommend the free "First Aid Kit for Git": it’s a collection of short videos (2-3 min per episode) that help you learn to undo mistakes using interactive rebase and other Git tools.
Editor's note: I had to use interactive rebase when reviewing this very post! One of my commits included an image that was greater than 1MB which is against the rules for GitLab website project. I had to go back and fix that commit to include a correctly sized image instead. Thanks for the lesson, universe! 😁
More Git tips and tricks
- 15 Git tips to improve your workflow
- How Git Partial Clone lets you fetch only the large file you need
- Git happens! 6 Common Git mistakes and how to fix them
About the guest author
Tobias Günther is the CEO of Tower, the popular Git desktop client that helps more than 100,000 developers around the world to be more productive with Git.
Cover image by David Taljat on Pexels


