This year, Git celebrates its 15th anniversary, and we’ve been excitedly posting some thoughts about its creation and impact — from sharing our experience at Git Merge 2020, discussing the problem with Git flow, or highlighting the newest Git feature Partial Clone.
Whether you’re just getting started with Git, or you know your way around a command line, it’s always nice to brush up on your skills, which is why we’ve gathered 15 methods to improve your Git-based workflow.
1. Git aliases
One of the most impactful ways to improve your daily workflow is to create aliases for common commands to save you some time in the terminal.
You can use the following commands to create aliases for the most-used Git commands, checkout, commit and branch.
git config --global alias.co checkout
git config --global alias.ci commit
git config --global alias.br branch
Instead of typing git checkout master, you only need to type git co master.
You could also edit these commands or add more by modifying the ~/.gitconfig file directly:
[alias]
    co = checkout
    ci = commit
    br = branch
2. See the repository status in your terminal’s prompt
If you’d like to visualize the status of your repository, you can run git-prompt.sh
(you can download it and follow the
instructions to use it in your system). If you're using Linux
and have installed Git with your package manager, it may already be
present on your system, likely under /etc/bash_completion.d/.
You can replace your standard shell prompt with something a bit more exciting:
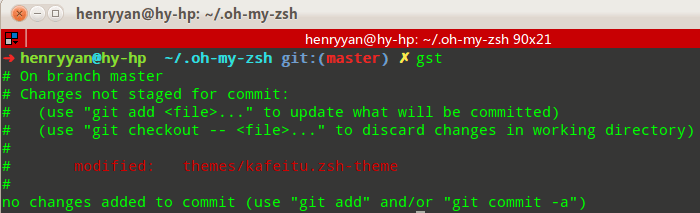
Taken from oh-my-zsh's themes wiki.
3. Compare commits from the command line
A simple way to compare the differences between commits or versions of the same file is to use the git diff command.
If you want to compare the same file between different commits, you run the following:
$ git diff $start_commit..$end_commit -- path/to/file
If you want to compare the changes between two commits:
$ git diff $start_commit..$end_commit
These commands will open the diff view inside the terminal, but if you prefer to use a more visual tool to compare your diffs, you can use git difftool. Meld is a useful viewer/editor to visually compare diffs.
To configure Meld:
$ git config --global diff.tool git-meld
To start viewing the diffs:
$ git difftool $start_commit..$end_commit -- path/to/file
# or
$ git difftool $start_commit..$end_commit
4. Stashing uncommitted changes
If you’re ever working on a feature and need to do an emergency fix on the project, you could run into a problem. You don’t want to commit an unfinished feature, and you also don’t want to lose current changes. The solution is to temporarily remove these changes with the Git stash command:
$ git stash
The git stash command hides changes, giving you a clean working directory and the ability to switch to a new branch to make updates, without having to commit a meaningless snapshot in order to save the current state.
Once you’re done working on a fix and want to revisit your previous changes, you can run:
$ git stash pop
And your changes will be recovered. 🎉
If you no longer need those changes and want to clear the stash stack, you can do so with:
$ git stash drop
5. Pull frequently
If you’re using GitLab Flow, then you’re working on feature branches. Depending on how long your feature takes to implement, there might be several changes made to the master branch. In order to avoid major conflicts, you should frequently pull the changes from the master branch to your branch to resolve any conflicts as soon as possible and to make merging your branch to master easier.
6. Autocomplete commands
Using completion scripts, you can quickly create the commands for bash, tcsh and zsh. If you want to type git pull, you can type just the first letter with git p followed by Tab will show the following:
pack-objects   -- create packed archive of objects
pack-redundant -- find redundant pack files
pack-refs      -- pack heads and tags for efficient repository access
parse-remote   -- routines to help parsing remote repository access parameters
patch-id       -- compute unique ID for a patch
prune          -- prune all unreachable objects from the object database
prune-packed   -- remove extra objects that are already in pack files
pull           -- fetch from and merge with another repository or local branch
push           -- update remote refs along with associated objects
To show all available commands, type git in your terminal followed by
Tab+ Tab.
7. Set a global .gitignore
If you want to avoid committing files like .DS_Store or Vim swp files,
you can set up a global .gitignore file.
Create the file:
touch ~/.gitignore
Then run:
git config --global core.excludesFile ~/.gitignore
Or manually add the following to your ~/.gitconfig:
[core]
  excludesFile = ~/.gitignore
You can create a list of the things you want Git to ignore. To learn more, visit the gitignore documentation.
8. Enable Git’s autosquash feature by default
Autosquash makes it easier to squash commits during an interactive rebase. It can be enabled for each rebase using git rebase -i --autosquash, but it's easier to turn it on by default.
git config --global rebase.autosquash true
Or manually add the following to your ~/.gitconfig:
[rebase]
  autosquash = true
9. Delete local branches that have been removed from remote on fetch/pull
You likely have stale branches in your local repository that no longer exist in the remote one. To delete them in each fetch/pull, run:
git config --global fetch.prune true
Or manually add the following to your ~/.gitconfig:
[fetch]
  prune = true
10. Use Git blame more efficiently
Git blame is a handy way to discover who changed a line in a file. Depending on what you want to show, you can pass different flags:
$ git blame -w  # ignores white space
$ git blame -M  # ignores moving text
$ git blame -C  # ignores moving text into other files
11. Add an alias to check out merge requests locally
A merge request contains all the history from a repository, and the additional commits added to the branch associated with the MR. You can check out a public merge request locally even if the source project is a fork (even a private fork) of the target project.
To check out a merge request locally, add the following alias to your ~/.gitconfig:
[alias]
  mr = !sh -c 'git fetch $1 merge-requests/$2/head:mr-$1-$2 && git checkout mr-$1-$2' -
Now you can check out a merge request from any repository and any remote. For example, to check out the merge request with ID 5 as shown in GitLab
from the upstream remote, run:
git mr upstream 5
This will fetch the merge request into a local mr-upstream-5 branch and check
it out. In the above example, upstream is the remote that points to GitLab
which you can find out by running git remote -v.
12. An alias of HEAD
Breaking news: @ is the same as HEAD. Using it during a rebase is a lifesaver:
git rebase -i @~2
13. Resetting files
You’re modifying your code when you suddenly realize that the changes you made are not great, and you’d like to reset them. Rather than clicking undo on everything you edited, you can reset your files to the HEAD of the branch:
$ git reset --hard HEAD
Or if you want to reset a single file:
$ git checkout HEAD -- path/to/file
Now, if you already committed your changes, but still want to revert back, you can use:
$ git reset --soft HEAD~1
14. The git-open plugin
If you’d like to quickly visit the website that hosts the repository you’re on, you’ll need git-open.
Install it and take it for a spin by cloning a repository from
GitLab.com. From your terminal, navigate to the
repository and run git open to be transferred to the project’s page on
GitLab.com.
The plugin works by default for projects hosted on GitLab.com, but you can also use it with your own GitLab instances. In that case, set up the domain name with:
git config gitopen.gitlab.domain git.example.com
You can open different remotes and branches if they have been set up. You can learn more by checking out the examples section.
15. The git-extras plugin
If you want to elevate Git with more commands, try out the
git-extras plugin, which includes git info (show
information about the repository) and git effort (number of commits per file).
Learn more about Git
We’re excited to announce that Brendan O’Leary, senior developer evangelist, will create 15 videos to celebrate Git's anniversary over the next several months. He’ll focus on a variety of topics, from rebasing and merging to cherry-picking and branching. Take a look at the first video in the series. 🍿
Cover image by Brooke Lark on Unsplash