Published on: January 14, 2021
4 min read
A quick guide to GitLab Dependency Scanning
A walk through of creating a quick example project in order to see Dependency Scanning in action.

Are you curious about our Secure offerings? They are easy, and free, to try out!
I suggest you create a free demo project to check them out and see if it's something you might want.
Did you know? If you have a public project on GitLab.com you can enable our Secure scanning functionality. Please note that educational institutions and open-source projects can also request free licenses.
In this blog I will walk you through creating a new demo project, adding Dependency Scanning, and reviewing the results of the scan. Following the steps below should take you 15 minutes.
Create a test project
Let's grab a test project and enable Dependency Scanning.
- Sign in to your GitLab account.
- Create a new project by clicking "New project" on your project list.

- Select the "Create from template" option.
- Select a project template. Be sure to choose one that is written in one of our supported languages and package managers. I have chosen a Ruby on Rails template.

- Click the "Use template" button.
- You need to name your project. I named mine "mytestrubyonrails". Be sure to set the Visibility level to "Public".

- You now have a new project.

Configure Dependency Scanning to run in the pipeline
Create a new file in your project
- Click "New file".

- You have two choices to populate the file - Template or Advanced.
Use the template to fill .gitlab-ci.yml
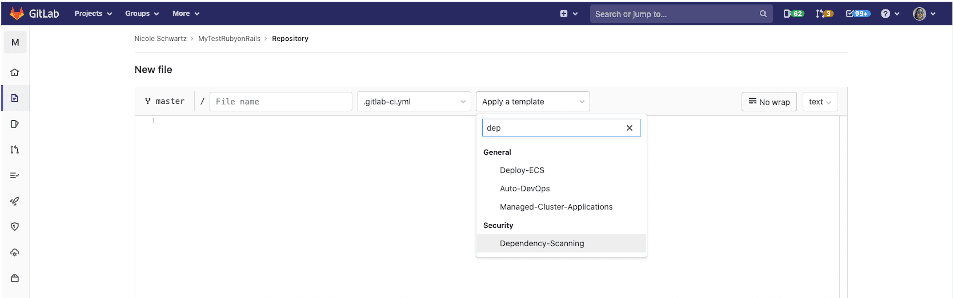
- On the
New filepage choose "Select a template type > .gitlab-ci.yml".
- Select "Apply a template > Dependency-Scanning".
Advanced - manually enter data into .gitlab-ci.yml
- On the
New filepage name the file.gitlab-ci.yml. - Insert the necessary lines of code per our user documentation.
   stages:
   - test
   - qa

   include:
   - template: Dependency-Scanning.gitlab-ci.yml

   dependency_scanning:
   stage: test
   variables:
     CI_DEBUG_TRACE: "true"

Commit the file
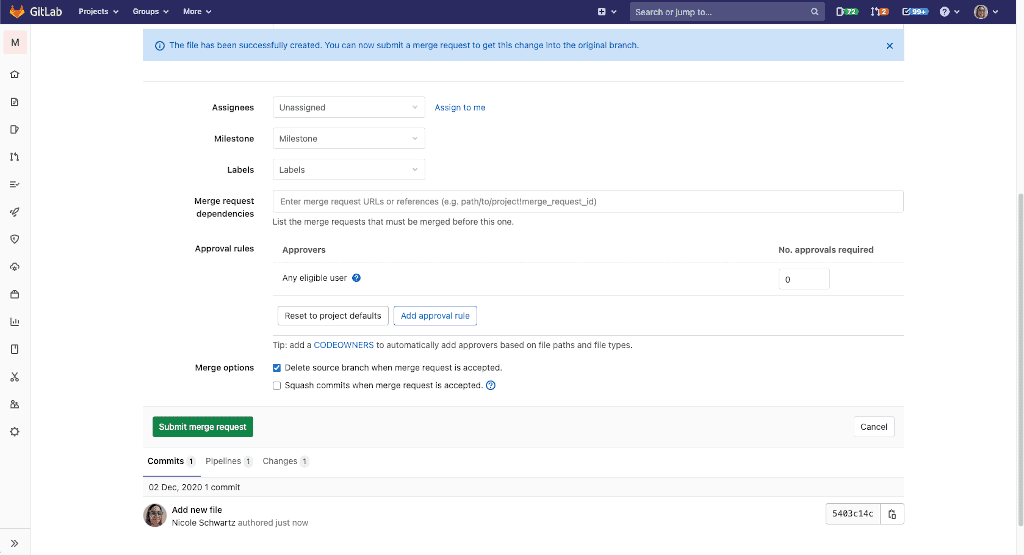
- Add a commit message if you want.
- Change the "Target Branch" from "master" to something else - for example "add-ds", and leave the "Start a new merge request with these changes" box checked.

- Click "Commit changes".
- A "New Merge Request" page will load. Scroll to the bottom and click "Submit merge request".

- The pipeline will now run.
View pipeline results
Now that you have your first pipeline, this and any future pipeline will run the Dependency Scanning jobs. You can review the results after a pipeline completes by:
- View the Merge request - look at the security MR report area.
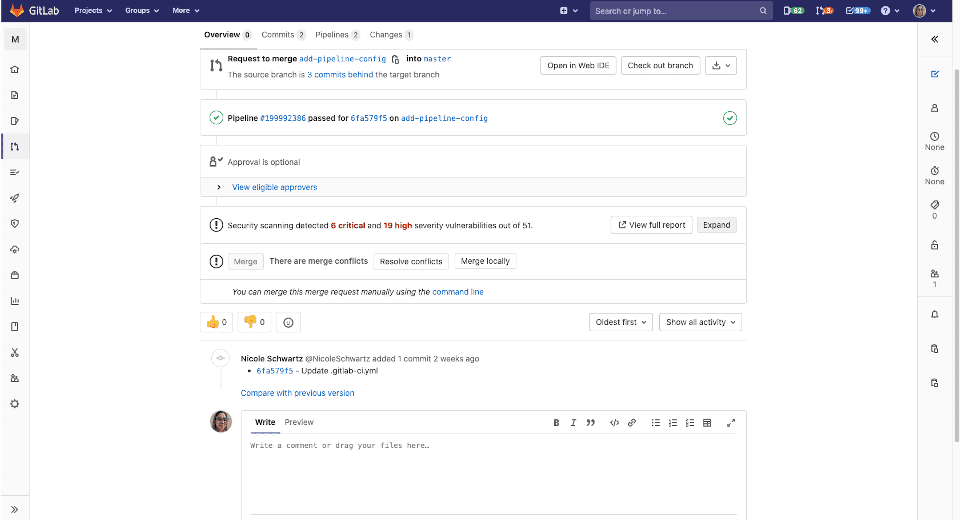
- Click expand to see the details.

- You can also view the Security tab in the pipeline.

Note: For this example we are going to decide not to act on the findings as part of the merge request, and we have not configured security merge request approvals so findings do not require additional approvers before you are permitted to merge.
You can see my example merge request.
View results outside of the merge request
First, merge this request in to master for your test project. The results will not show outside of the merge request until this is done.
Now you can see the findings by navigating to the Security Dashboard.

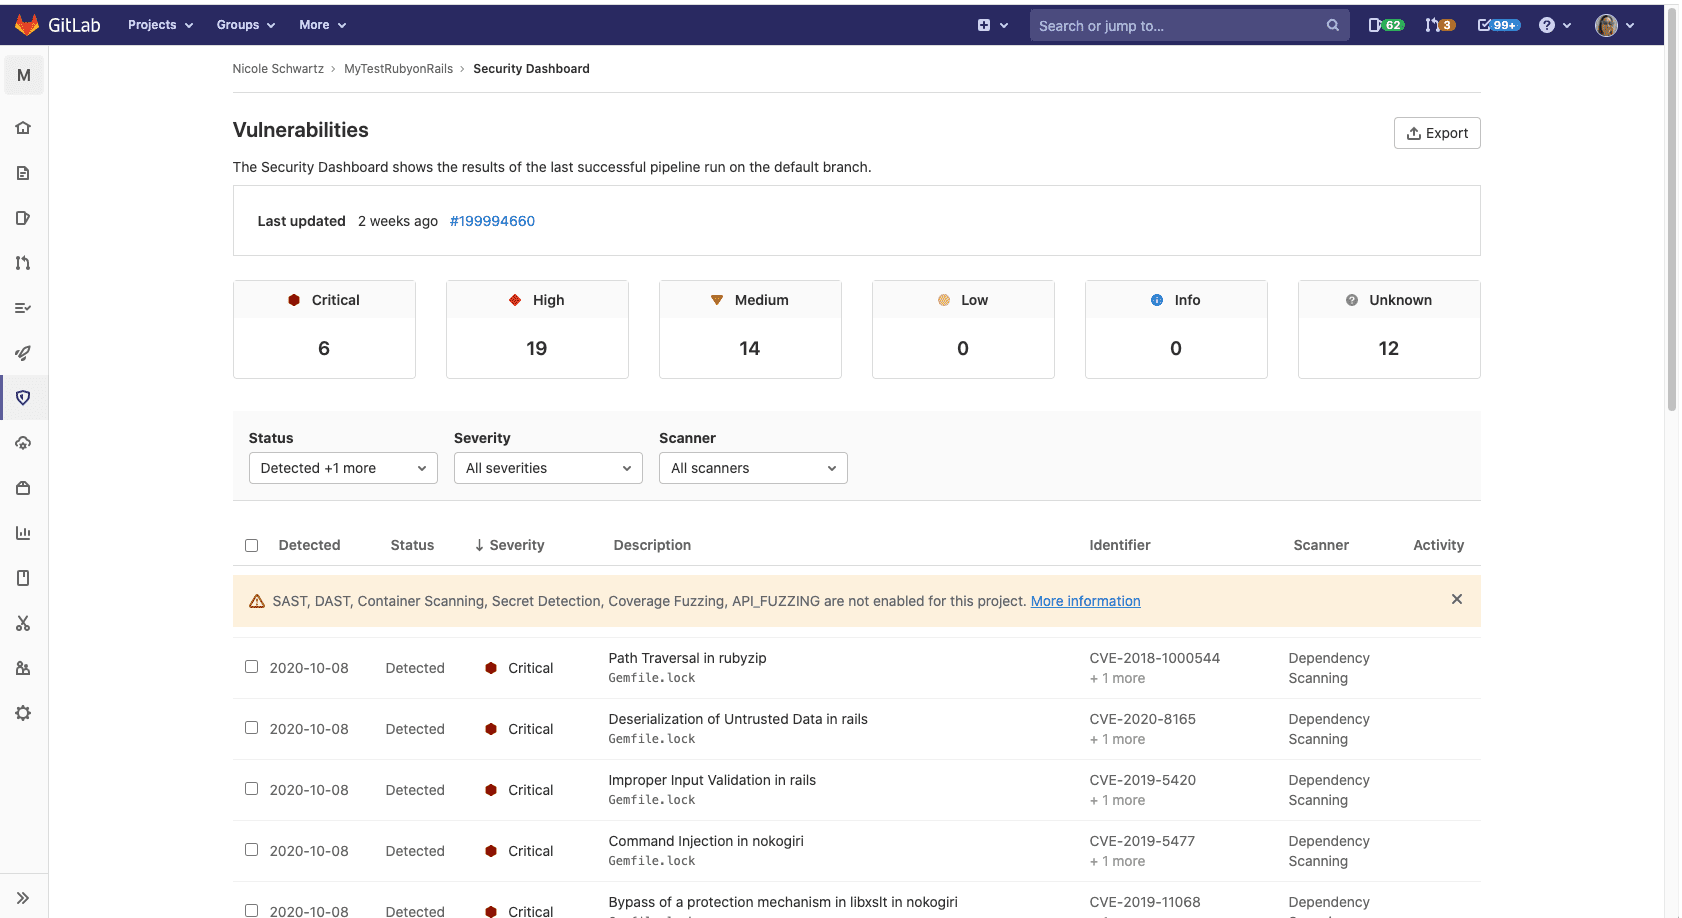
You can view just the dependencies and their found issues by viewing the Dependency List.


 You can see my dependency list.
You can click on a finding in the dashboard to see more details. This takes you to the vulnerability's page.
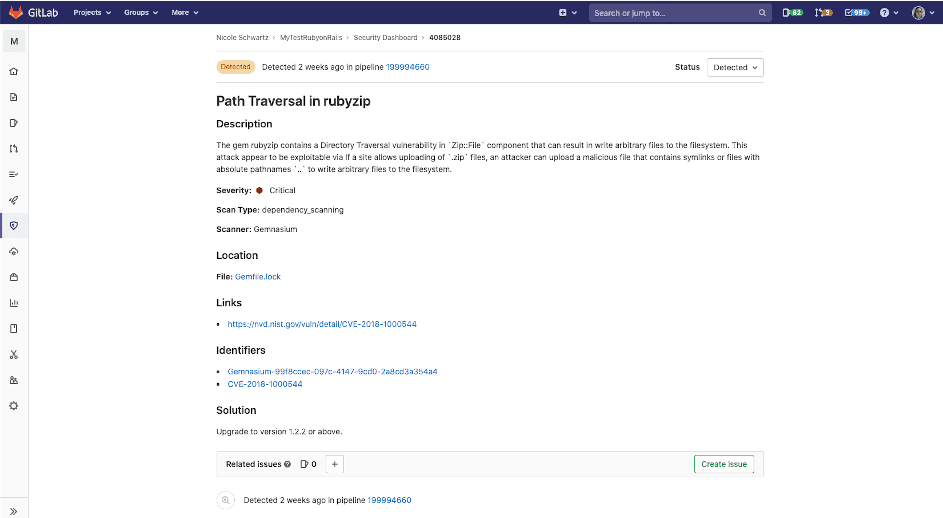
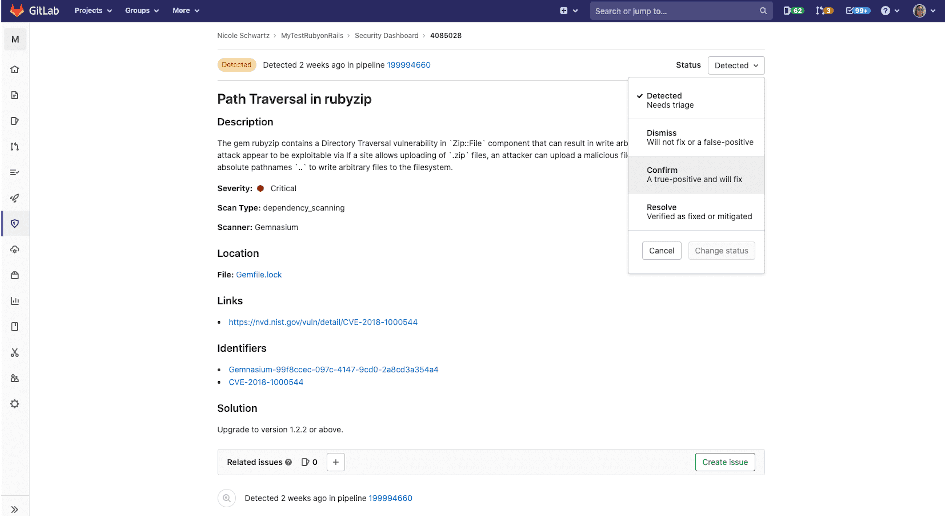
On the vulnerability's page you can decide to set the status (dismiss, confirm, resolve) after triaging.
 You can see my example finding.
You can create an issue from a vulnerability.
 You can see my example issue.
Now go on and try it yourself!
If the above blog walkthrough of creating a demo project and running Dependency Scanning got you curious you can read more about Dependency Scanning in our user documentation.
If you would rather try a different type of Secure scanner - they are all just as easy to set up read more about our Secure scanning tools in our user documentation.
Cover image by Alan Light, licensed under Attribution 2.0 Generic (CC BY 2.0)
More to explore
View all blog posts

We want to hear from you
Enjoyed reading this blog post or have questions or feedback? Share your thoughts by creating a new topic in the GitLab community forum.
Share your feedback