
Remix has had a significant impact in the frontend space. After eons of backend frameworks providing some sort of frontend options that are more or less hated by frontend engineers, followed by frontend frameworks that required a separate API for the most simple tasks that were a pain to maintain, now suddenly there are frontend frameworks that you can write backend code with.
This is ideal as an application scales: Remix offers the comfort of writing server-side code, but should the business logic start to exceed the capabilities of Remix, it's easy to move code to an API on a per-request basis. This comes without the need to rewrite the entire application logic, while still retaining server-side-rendering or even pre-rendering capabilities!
The most performant way to deploy a Remix app is to the edge. This means that small instances of your Remix app are run on a server close to the requesting user. An edge network consists of hundreds of servers all over the world, so you can be sure the network latency for the user stays low.
Currently the most popular edge service capable of running Remix apps are Cloudflare Workers. Not only does Cloudflare offer a generous free tier, Workers are also extremely easy to deploy using GitLab CI/CD. Here's how to create a Remix app and then deploy it to Cloudflare Workers.
Create your Remix app
Create your Remix app locally using:
npx create-remix@latest <my-app-name>
The CLI will now guide you through a series of questions. Some of those you may answer as you prefer, but answer the following questions as indicated below:
? What type of app do you want to create?
> choose "Just the Basics"

? Where do you want to deploy? [...]
> choose "Cloudflare Workers"

? Do you want me to run `npm install`?
> answer "Yes"
Initialize the repository and add the first commit:
git init
git add .
git commit -m "initial commit"
Create the project in GitLab
You can't push the code as we have yet to set up the remote repository. Visit GitLab and create a new project. When asked, select "Create blank project."
In the project setup dialog, select Edge Computing as the Deployment target. Choose the visibility level however you like as this affects your
source code visibility.
Make sure you unset the checkbox next to Initialize repository with a README, otherwise GitLab will begin a new Git history that you will have to reconcile with your existing local one.
Once the project is set up, follow the instructions on how to add an existing repository – if you've followed the above instructions to the letter you don't have an existing remote yet, so you can run this simplified set of commands:
git remote add origin <git-project-url>
git push -u origin main
Configure Cloudflare
Now set up your Cloudflare account to enable deployments from GitLab. Login or create an account.
Subscribe to a Workers plan
If you are creating a Worker for the first time, you will have to sign up for a Workers plan in Cloudflare.
In the Cloudflare dashboard's left sidebar click the entry Workers. Let Cloudflare guide you through the setup.
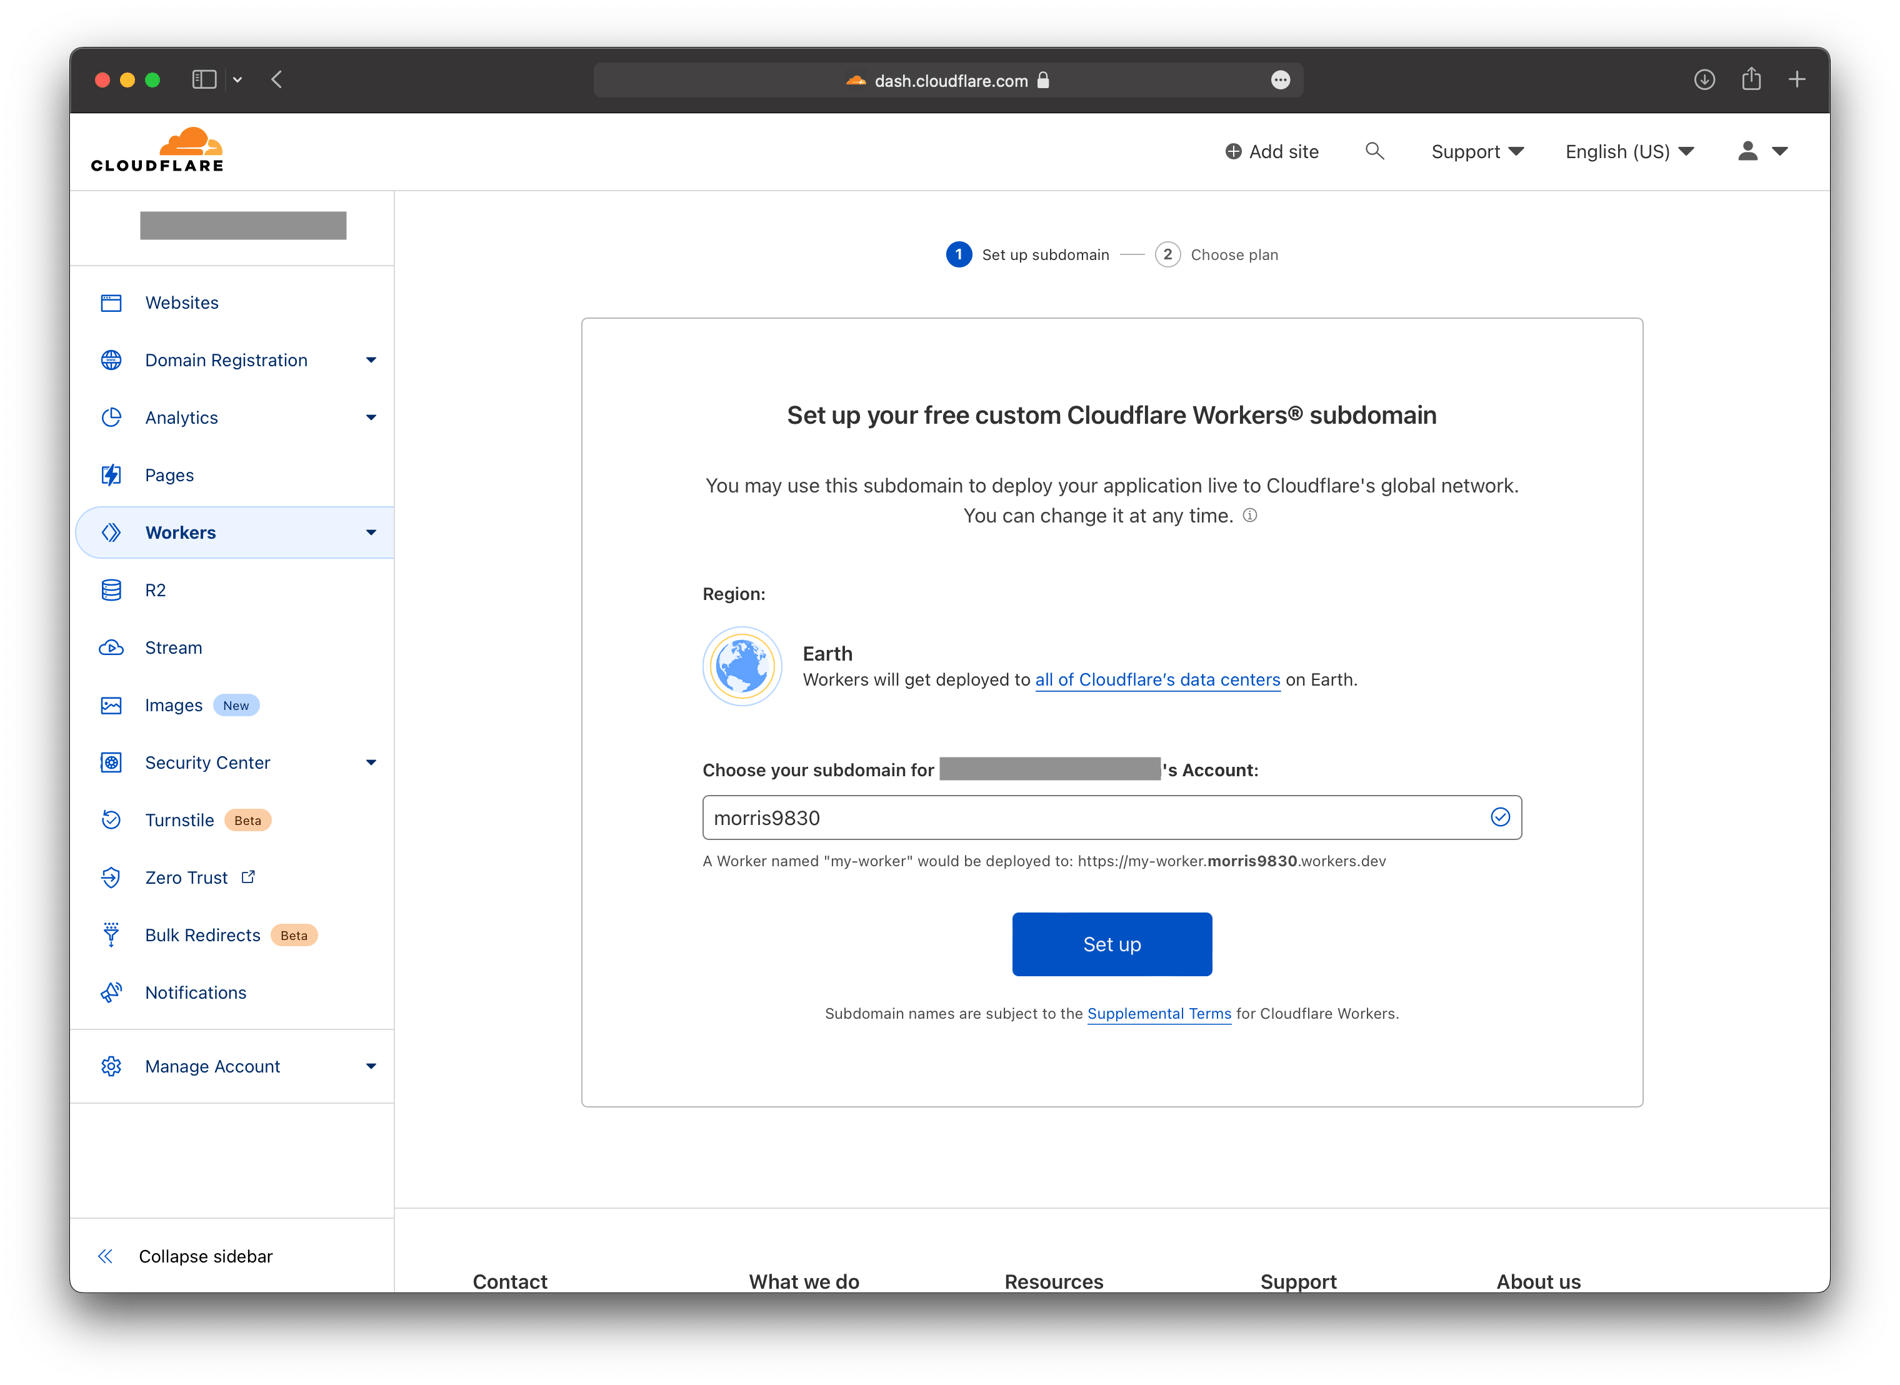
Once you're back to the Workers overview page, continue below.
Obtain an API token
To be able to deploy your Cloudflare Worker from a GitLab pipeline you will need an API token. To do so, log in to the Cloudflare dashboard, then open the API tokens page (or find it manually via the user icon > My Profile > Api Tokens).
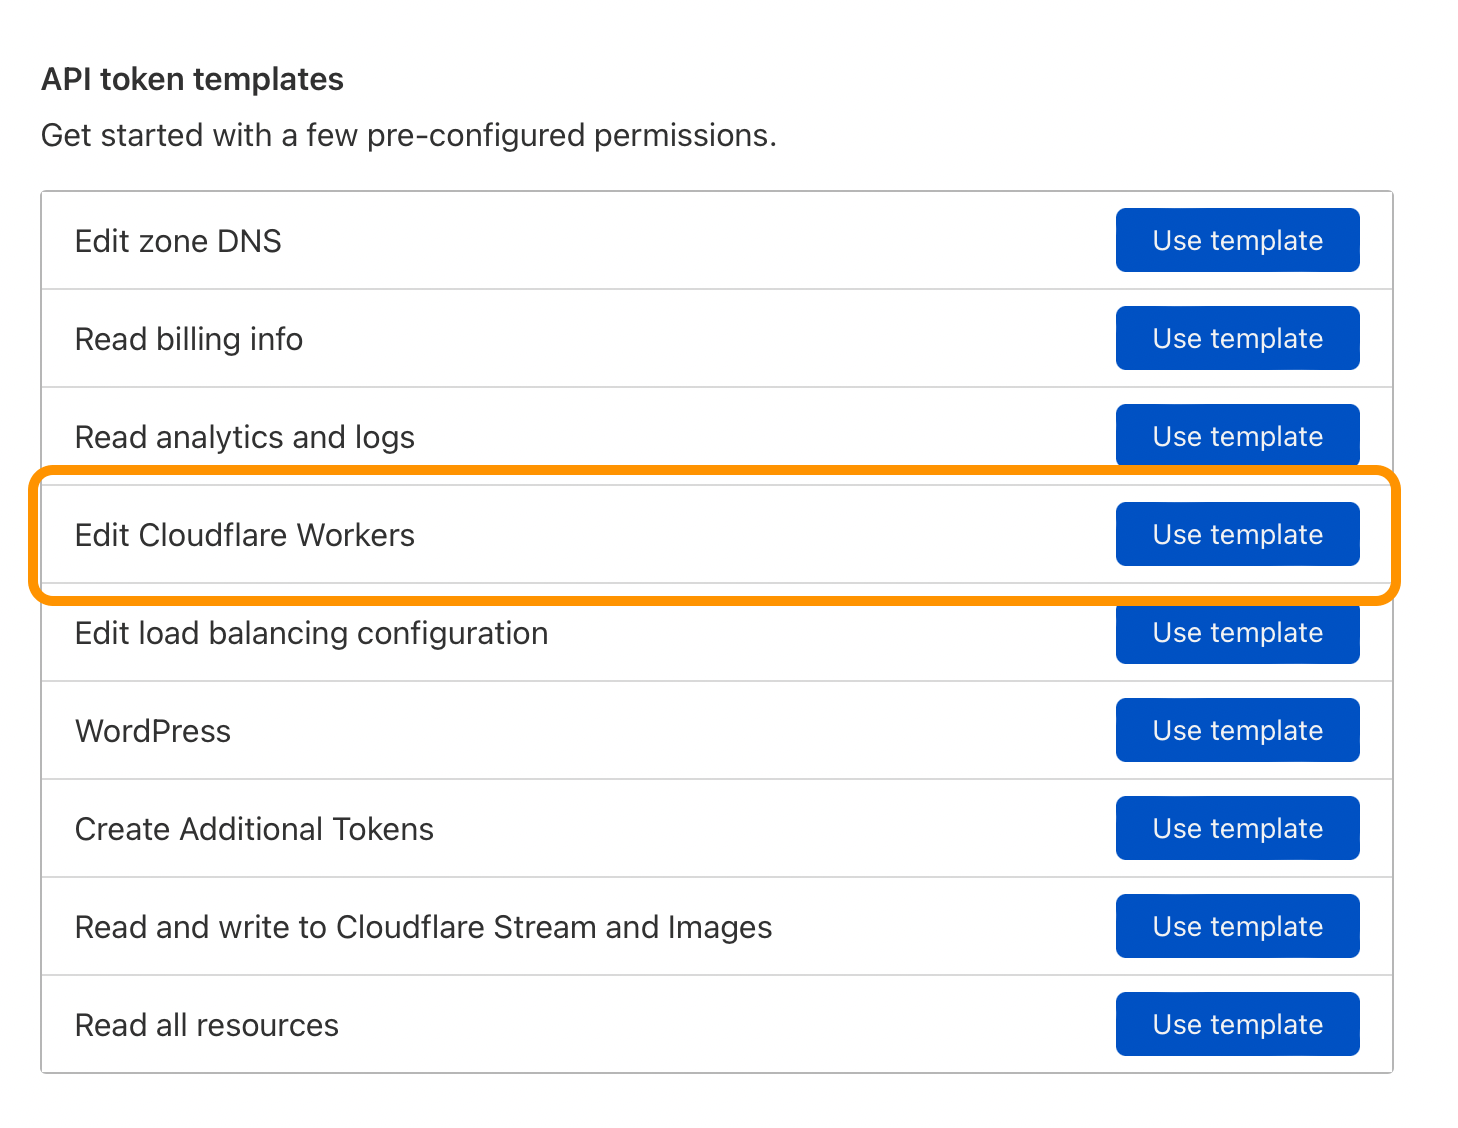
Click Create Token. Find Edit Cloudflare Workers, click use template.
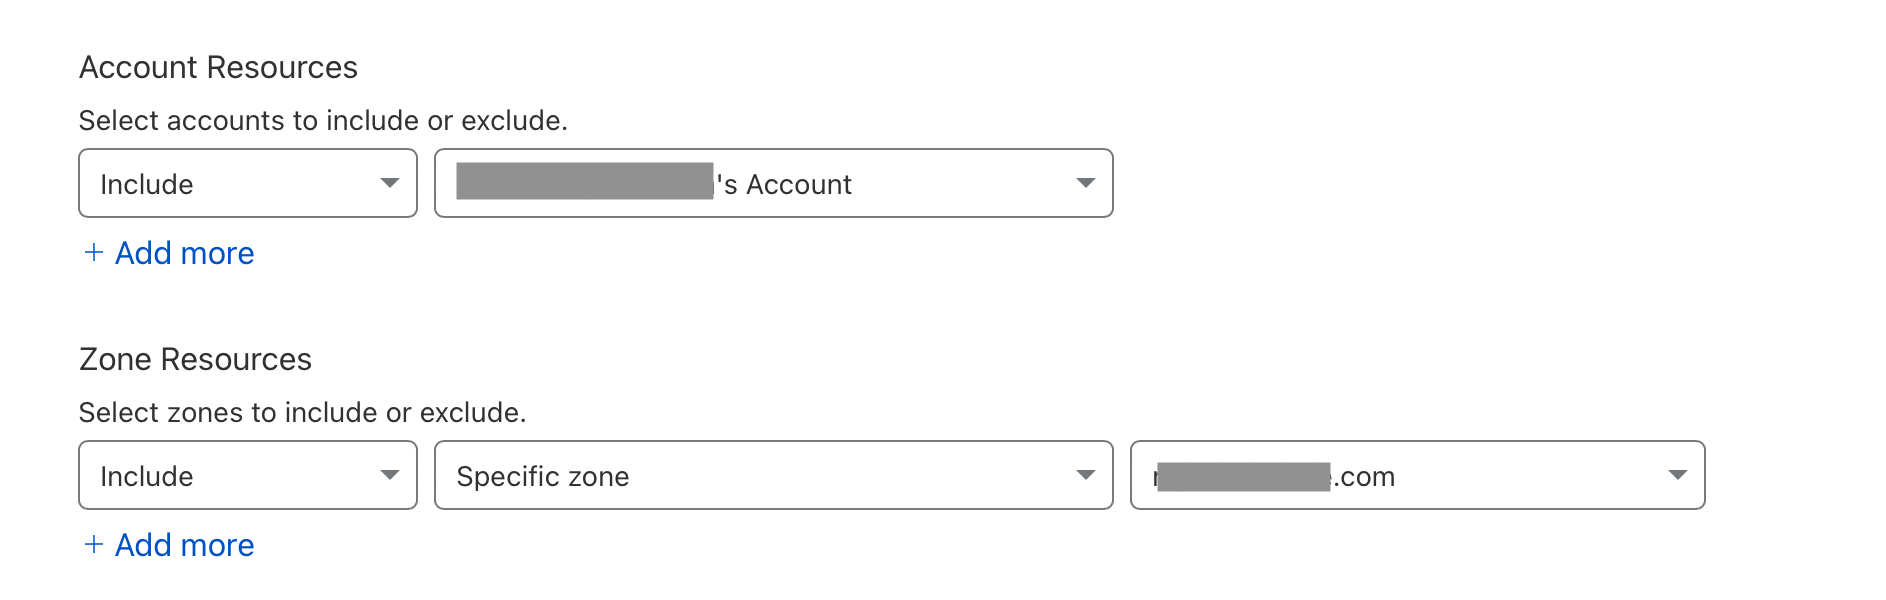
Under Account Resources choose Include and your account name.
Under Zone Resources choose Include, Specific Zone and your site's domain. If you haven't set up a domain, you can use a less specific rule such as All zones from an account, although we don't recommend doing this; the API token could potentially be used beyond its scope if you add more zones to your Cloudflare account later.
Note: If you have more than one account associated with the API token used
during deployment, you will have to update your project's wrangler.toml file
to use the correct account. Read more in the Cloudflare documentation.
Once you're done setting up the API token, click Continue to summary, and verify your selections. It should look like this:
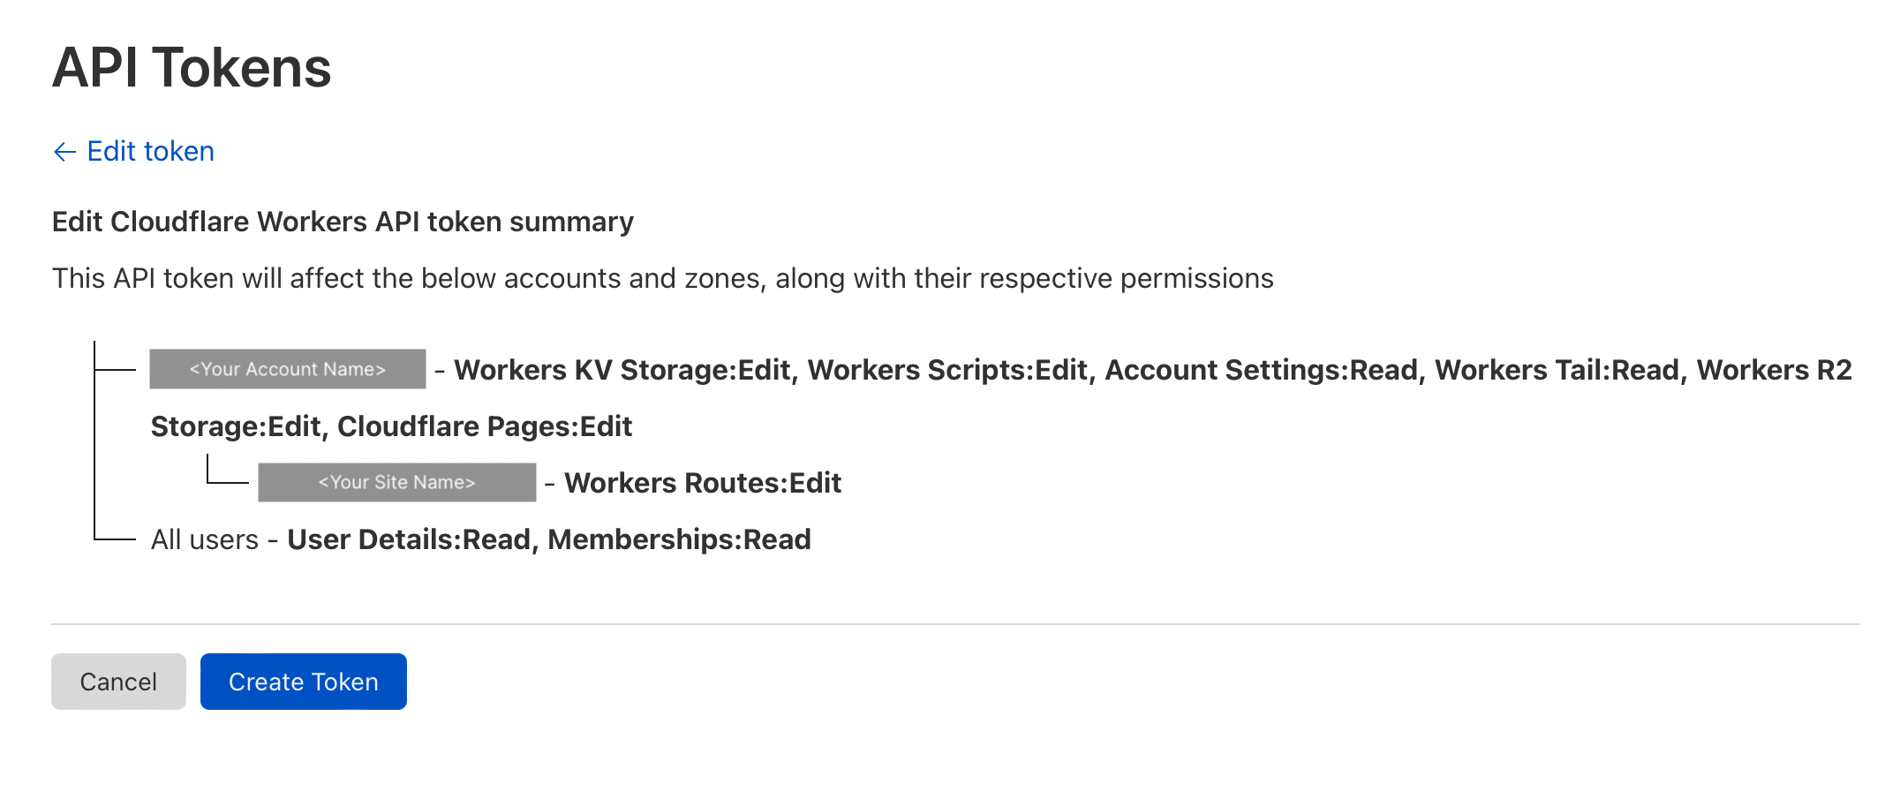
If you're happy, click Create Token. Cloudflare will then show you the new token.
Copy the token and save it in GitLab: Open your project in GitLab, then visit Settings > CI/CD. Find Variables and click Expand. Click Add Variable.
In the Key field, enter CLOUDFLARE_API_TOKEN.
In the Value field, paste the API token from Cloudflare.
Now make sure your token isn't leaked in any logs: Check both Protect and Mask. When done, click Add Variable.
Create the deployment pipeline
The last step is to create a GitLab pipeline. In your local repository root
folder, create a file named .gitlab-ci.yml and add the following content:
stages:
- deploy

deploy-worker:
    image: node:lts
    stage: deploy
    environment: production
    before_script:
      # install dependencies
      - npm ci
    script:
      - npm run deploy
    rules:
      # This rule triggers this job after any push to the default branch
      - if: $CI_COMMIT_REF_NAME == $CI_DEFAULT_BRANCH
To learn more about how to configure your GitLab pipeline, read our documentation.
Now add the file to the repository:
git add .gitlab-ci.yml
git commit -m "Add Deployment Pipeline"
git push
This last push will immediately run this pipeline. To monitor the pipeline progress, open GitLab. In the left sidebar, find CI/CD > Pipelines. Once the pipeline is marked as passed, your Remix site is live!
If you've used the create-app instructions from this blogpost, your app should
have been configured to use the app name as the Worker's name. Check the
name setting in your project's wrangler.toml.
Go to https://<worker-name>.<cloudflare-account-name>.workers.dev to see
your Remix site in action. Congratulations!
In your Cloudflare dashboard, you can monitor your new app by selecting Workers from the left sidebar and then clicking on the Worker with the name of your app.
From now on, any push to your repositories default branch will automatically be built and deployed to Cloudflare.
Use a custom Domain for your app
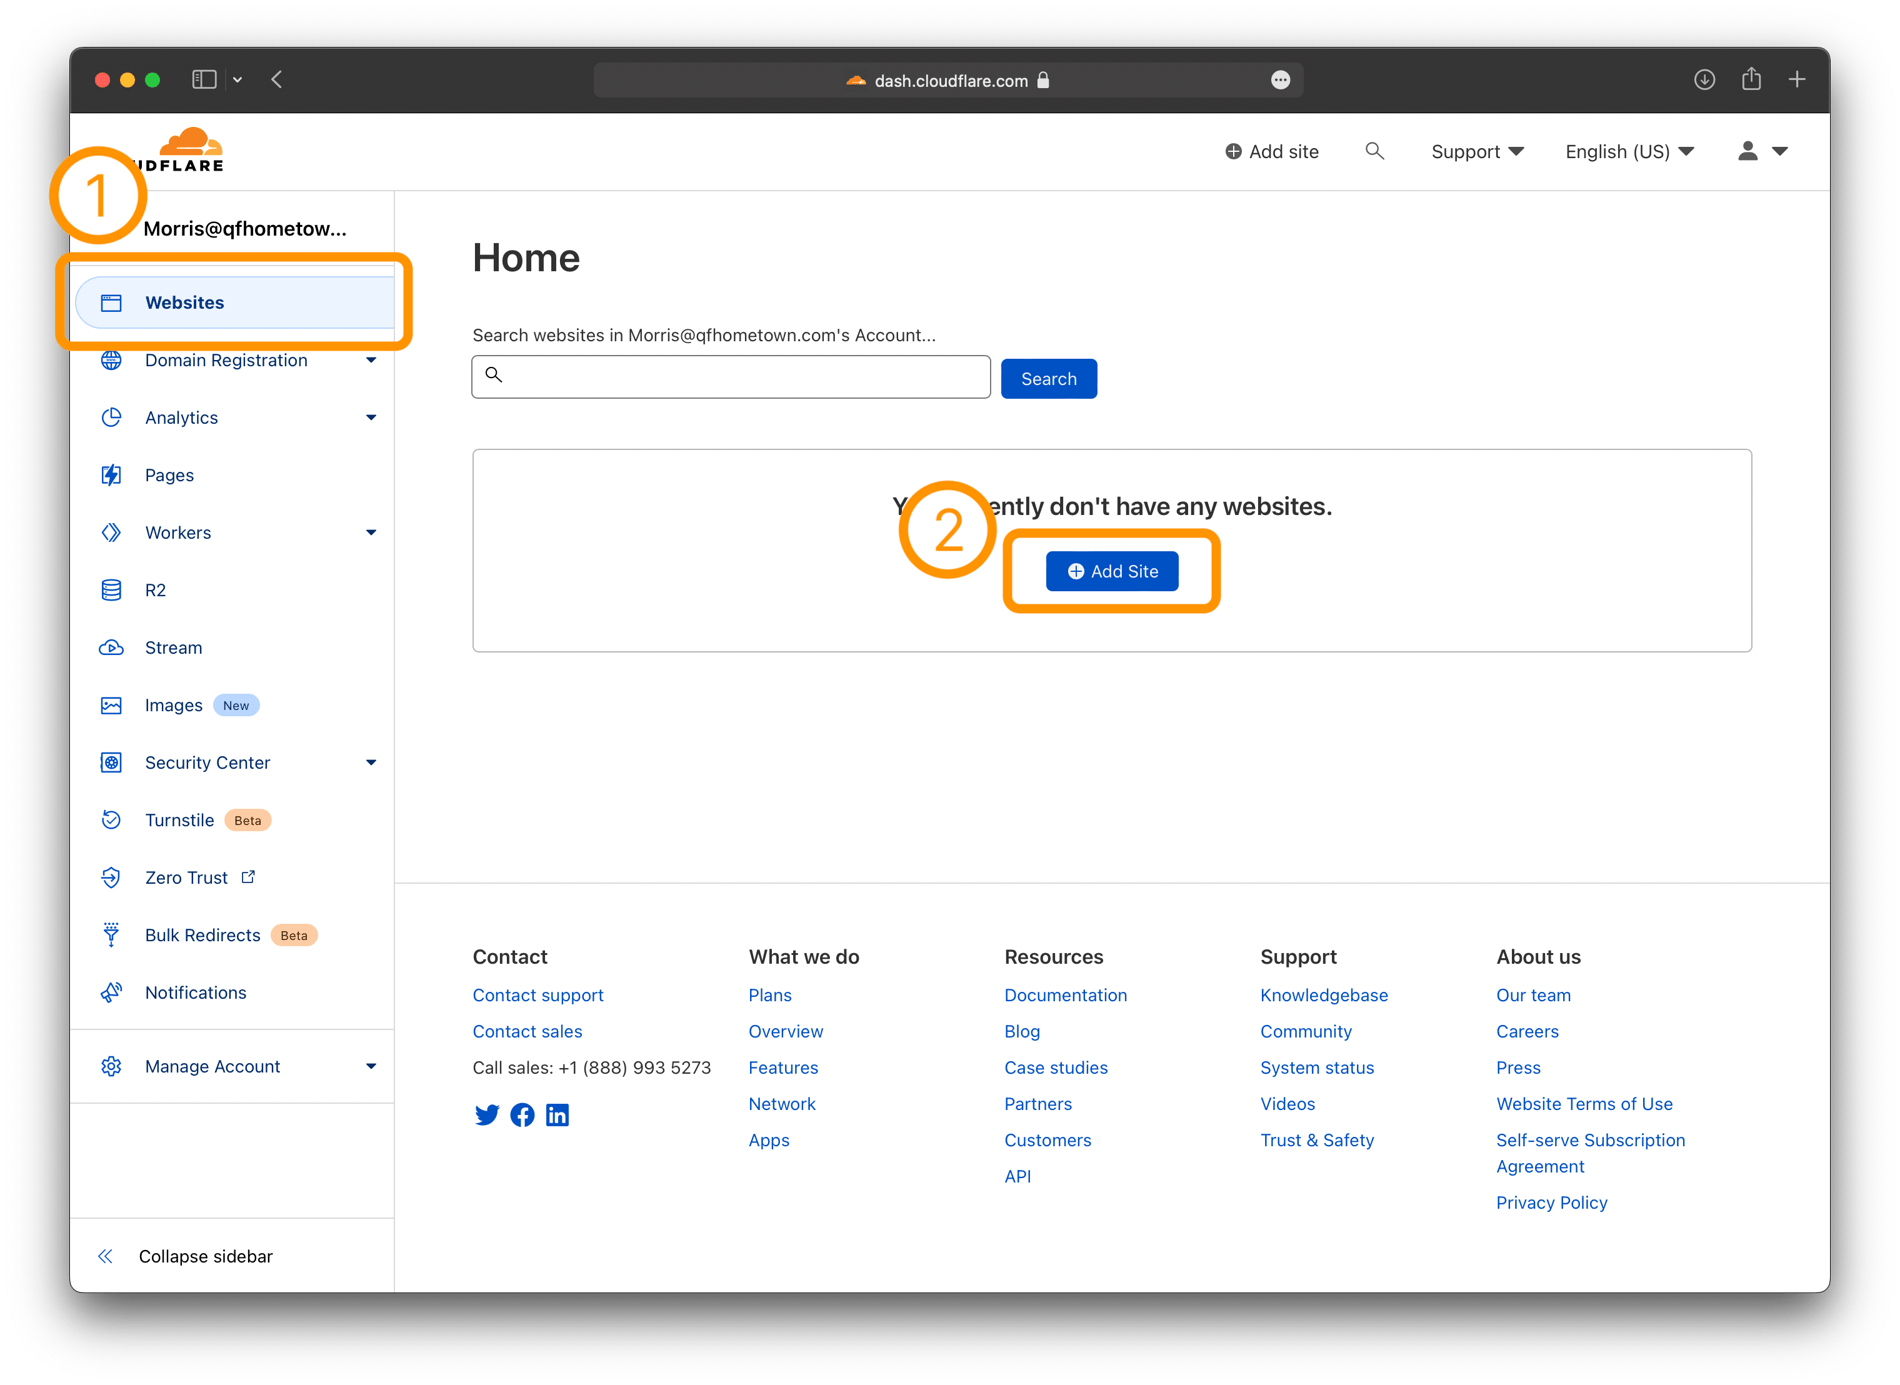
If you want to use your own domain, set up your website as a resource now.
In the left sidebar, click on Websites. In the main window, find and click the Add Site button.
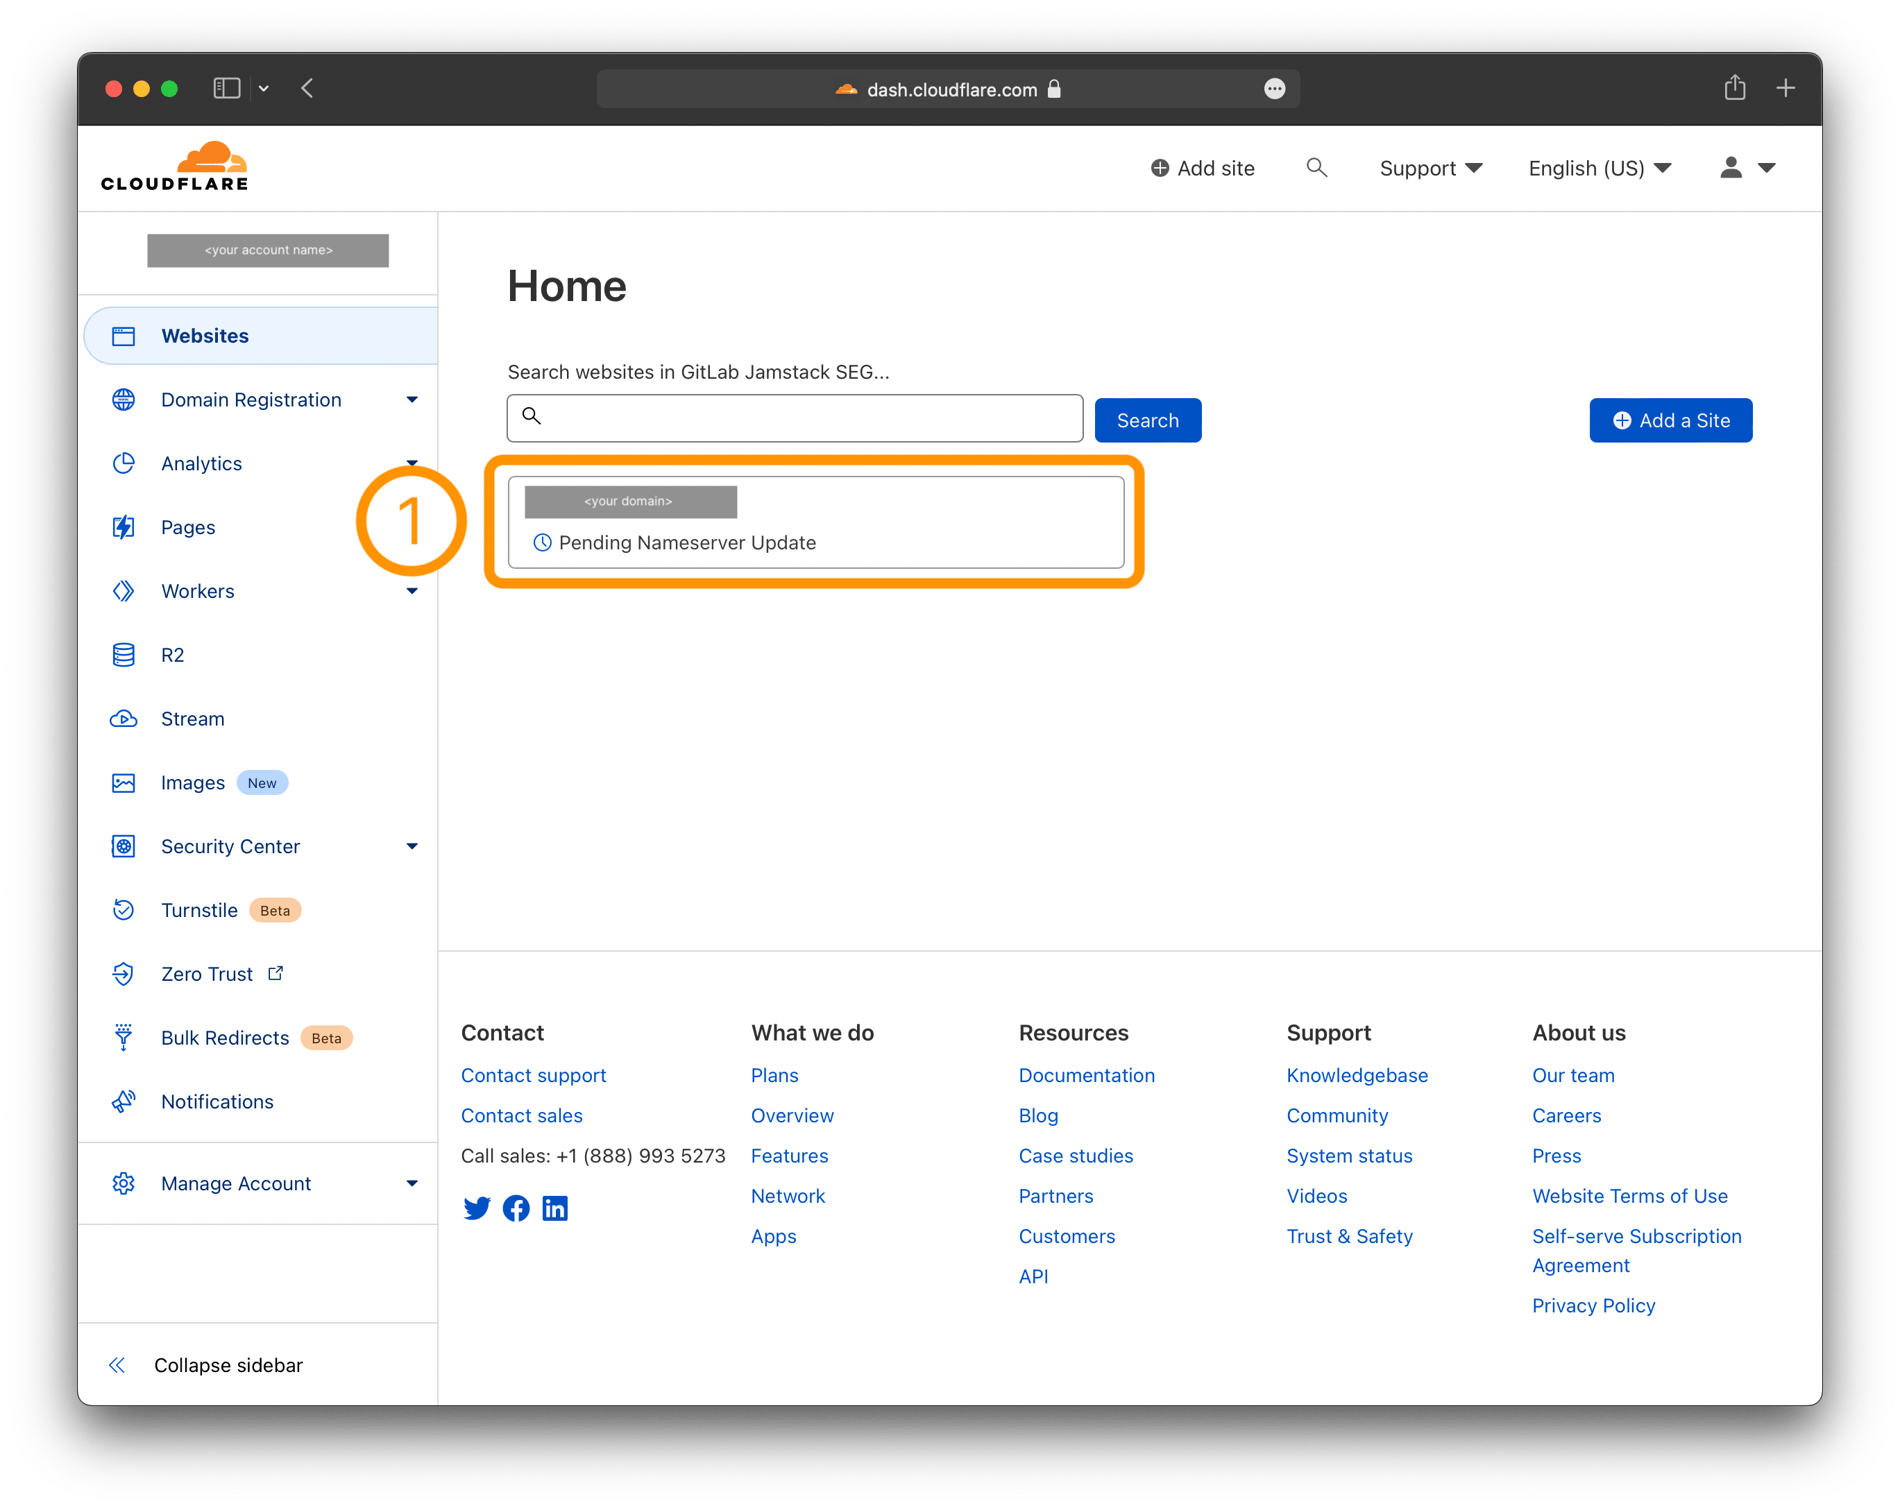
Now enter your site's domain. Select a plan that suits your needs. Follow the DNS setup instructions provided on the following pages.
Once you have set up your domain as a website in Cloudflare, go to the website settings. (In the left sidebar click Websites, then select your site).
The left sidebar now shows the detail navigation for the selected website. Click Workers Routes, then click Add Route.

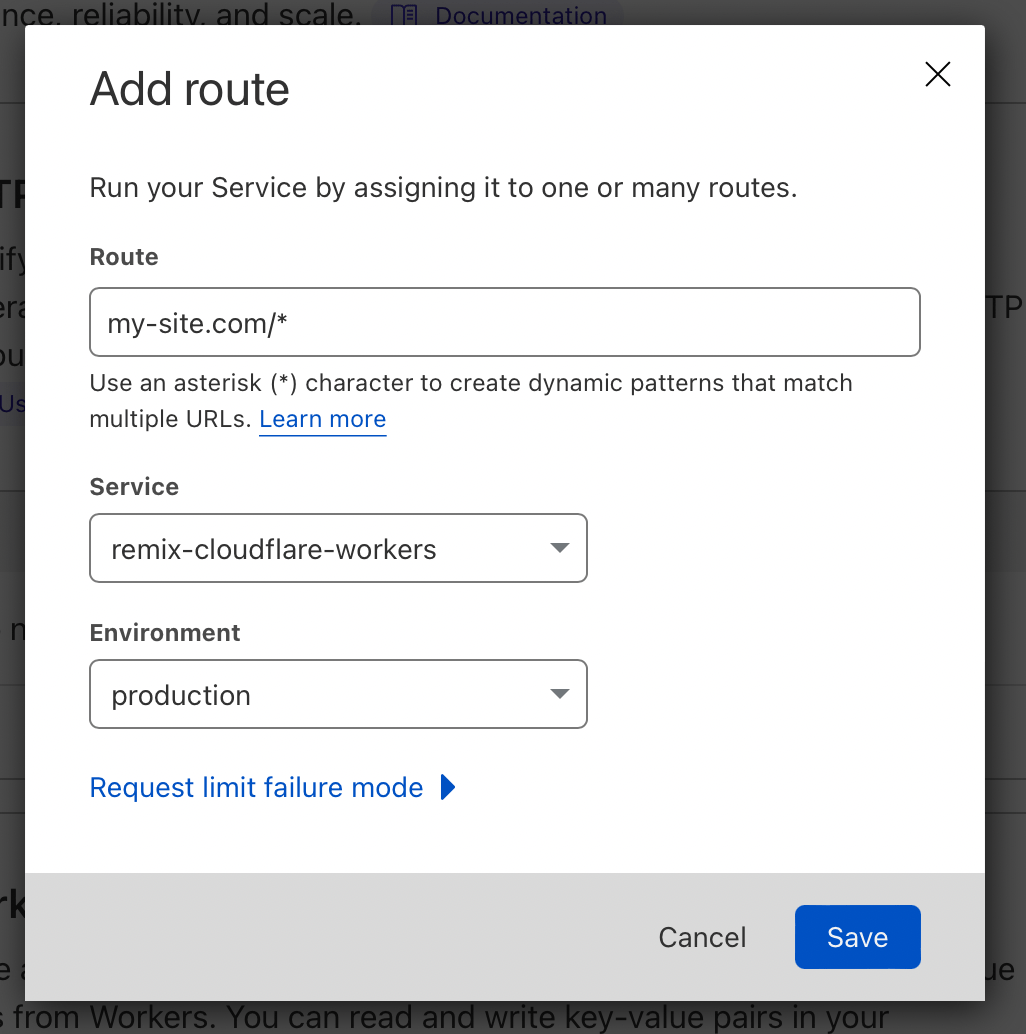
In the Add Route Modal you can add a dynamic pattern to let Cloudflare know which requests to route to your Worker.
For Remix apps that's usually all of them, so if your site's domain is
my-site.com, use my-site.com/*. You can also redirect all subdomain
requests to the worker by using *.my-site.com/* (this is useful if you
would like to also serve your site at www.my-site.com).
Under Service, select your newly created Worker. Under Environment, select production.
Click "Save".
Once the DNS servers are updated, your Remix site should be accessible with your custom domain.


