Published on: September 12, 2017
5 min read
How to use GitLab CI/CD for Vue.js
Learn how to get the most out of GitLab CI/CD with this guide.

Continuous Integration allows you to:
- Deploy your app instantly, when new code is pushed into a repo
- Build your app (in our case
npm run build) - Trigger test scripts (and block deployment if a test fails)
It is definitely worth the effort if you update your app regularly.
GitLab is a service that started as an open-source GitHub competitor, mostly to host code in Git repositories, and evolved into an amazing tool that I won’t introduce here, as it isn’t related to Vue.js. One thing though, they were one of the first major companies to use Vue.js for their user interface.
Docker has to be mentioned as well. It is the most popular containerization service. It basically means you get to execute code in a secure environment, configured exactly like your dev/prod. Very useful when you need to make sure your code is executed with all its dependencies.
Each of these tools would require many posts to be covered. We’ll focus on setting up CI/CD for your Vue.js project. We’ll assume you have no knowledge in the matter.
GitLab CI/CD is free for personal projects, I don’t know any other tool with such a beautiful UI that does that. If you do, please let me know.
The .gitlab-ci.yml file
Create a .gitlab-ci.yml file at the root of your repo. GitLab will check for this file when new code is pushed. If the file is present, it will define a pipeline, executed by a GitLab Runner. Click the links if you are curious, or keep reading to see a working example.
Default stages of a pipeline are:
- build
- test
- deploy
Again, you don’t need to master this, but this is the most common use case. You may not have set up unit tests, and if you haven’t, you may remove this step from the file, GitLab won’t mind.
Here is our file, you may copy/paste it in your repo:
      build site:
  image: node:6
  stage: build
  script:
    - npm install --progress=false
    - npm run build
  artifacts:
    expire_in: 1 week
    paths:
      - dist

unit test:
  image: node:6
  stage: test
  script:
    - npm install --progress=false
    - npm run unit

deploy:
  image: alpine
  stage: deploy
  script:
    - apk add --no-cache rsync openssh
    - mkdir -p ~/.ssh
    - echo "$SSH_PRIVATE_KEY" >> ~/.ssh/id_dsa
    - chmod 600 ~/.ssh/id_dsa
    - echo -e "Host *\n\tStrictHostKeyChecking no\n\n" > ~/.ssh/config
    - rsync -rav --delete dist/ [email protected]:/your/project/path/
Test our file
Now commit and push the .gitlab-ci.yml file to your GitLab repo.
Here is how it will look in the Pipelines tab of GitLab UI:
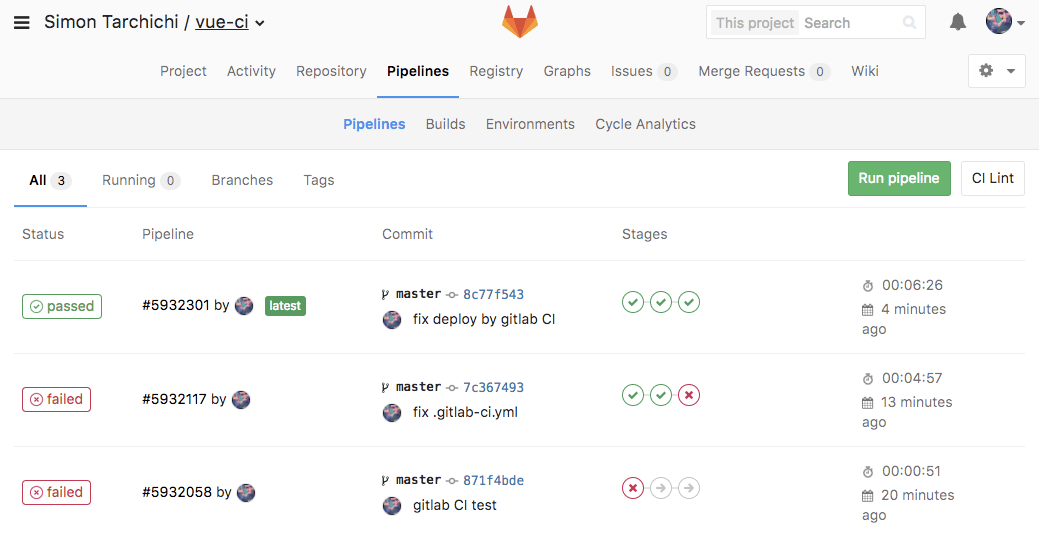
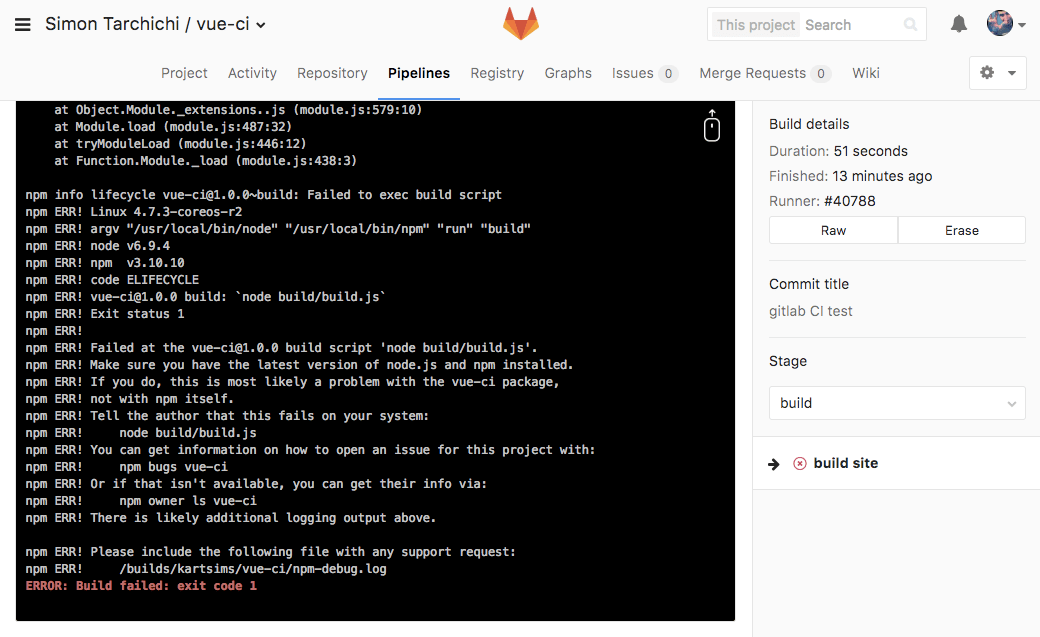
The green checkmark indicates that the step has succeeded and you can see the logs when clicking it.
In the second example, the tests have failed, click the red mark to read the logs and understand what went wrong.
File anatomy
imageis the link to the Docker image. I have chosen to use public official images, but you may use one from the Docker Hub or a private registry.stageshould bebuild,testordeployif you use defaults. But that can be customized.scriptare command lines executed inside our build environment.artifactsdescribes a path to the build result. The files in this path can be used in the next build steps (indeployin our example). You can download artifacts from Gitlab UI.
More about the .gitlab-ci.yml file options in the docs.
About the deployment script
I have described my use case here, but it may not be the simplest. Relevant examples for deployment to Amazon S3 or other services can be found online.
To get it working, you’ll need to provide GitLab with a private SSH key. If you are no security expert, then it is time to take advice from one. The bottom line is do not give it your private SSH key, create one that is used only by GitLab.
      # create gitlab user
adduser gitlab

# generate a DSA SSH key
su -l gitlab
ssh-keygen -t dsa

# authorize the key to log in using the public key and output the private one
cd .ssh
mv id_dsa.pub authorized_keys
cat id_dsa && rm id_dsa
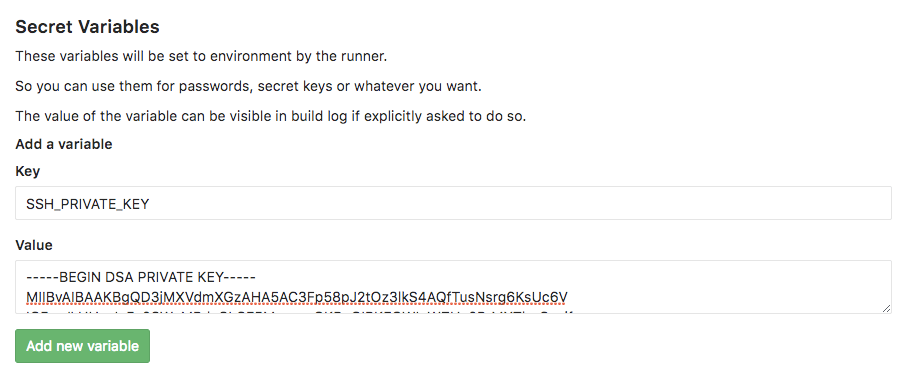
Then go to GitLab UI “Settings” (the gear icon), then “Variables” and copy/paste the content of your terminal in “Value”. The “Key” should be SSH_PRIVATE_KEY. This private key will be used to do the rsync.
Links
If you need more information, leave a comment I’ll be happy to help you if I can.
"Golden Gate Bridge Vista Point" by Tiger Robinson on Unsplash
More to explore
View all blog posts


We want to hear from you
Enjoyed reading this blog post or have questions or feedback? Share your thoughts by creating a new topic in the GitLab community forum.
Share your feedback