Published on: May 5, 2020
6 min read
How to deploy your application to a GitLab-managed Amazon EKS cluster with Auto DevOps
A Kubernetes tutorial: Use GitLab AutoDevOps to deploy your applications to Amazon EKS.

Deploying an application onto Amazon EKS doesn't have to be painful. In fact, GitLab's Auto DevOps function makes it easy for developers to deploy applications from GitLab onto any cloud. In this tutorial, I break down how to deploy a simple ruby Hello, World application onto our GitLab-managed Amazon EKS cluster, which we created earlier (read part one to learn how). For the tutorial, I integrated GitLab with Amazon EKS in a GitLab group I created purposely for this, so all the projects created in the group can use the integration without any extra configuration.
In the previous blog post, we saw how seamless it is to create a Kubernetes cluster on Amazon EKS in GitLab with the right permissions. Developer productivity is greatly improved because there is no more need to manually set-up clusters and the same cluster can be used for multiple projects when Amazon EKS is integrated with GitLab at the group and instance levels, thus making onboarding new projects a breeze.
In this tutorial, we will be deploying a simple ruby Hello World application to our GitLab-managed Amazon EKS cluster. For the purpose of this tutorial, I have integrated GitLab with Amazon EKS at the group level on a group I own on GitLab.com, this way all projects created in the group can make use of the integration with no extra configuration.
A few things to note about AutoDevOps
Auto DevOps provides pre-defined CI/CD configuration which allows you to automatically detect, build, test, deploy, and monitor your applications. All you need to do is push your code and GitLab does the rest, saving you a lot of effort to set up the workflow and processes required to build, deploy, and monitor your project.
You'll need to execute the following steps for GitLab AutoDevOps to work seamlessly:
- A base domain name needs to be provided on GitLab’s integration page for Amazon EKS.
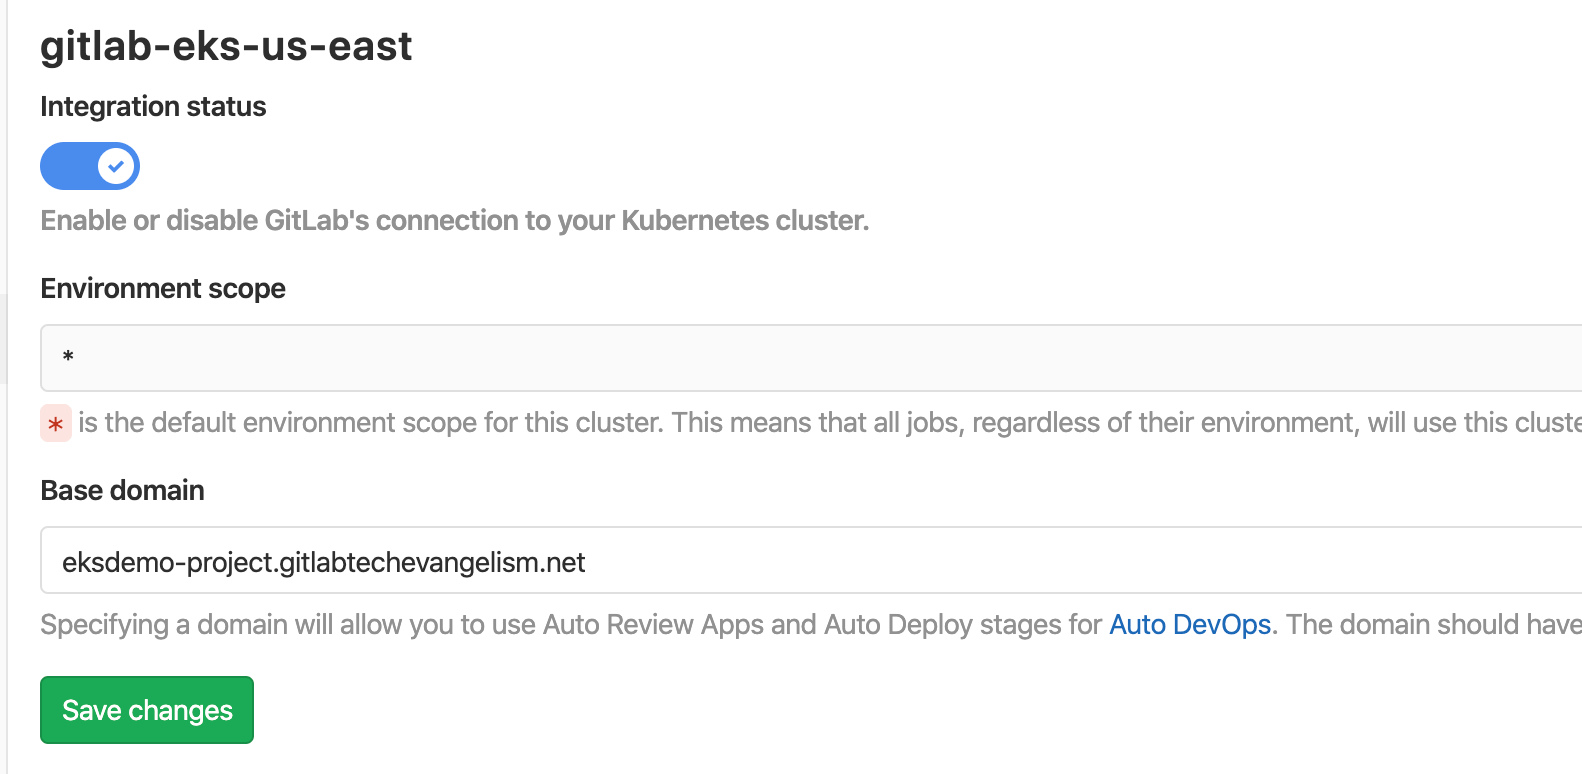 Setting the base domain for Auto DevOps
- GitLab creates subdomains for every project that is deployed using the project slug, project ID and the base domain name. For example, the link
https://abubakar-te-demos-minimal-ruby-app-2.eksdemo-project.gitlabtechevangelism.net/is automatically created whereabubakar-te-demos-minimal-ruby-appis the project slug and the project ID of two, both prepended to the base domain name,eksdemo-project.gitlabtechevangelism.net. - Create a wildcard A-record for the base domain and point it to the Ingress endpoint created during the integration in the public-hosted zone of your domain name on Route53. Selecting the ALIAS option in Route 53 will present a list of resources you have already created. You will see your Ingress endpoint in the list of elastic load balancers. Alternatively, you can copy and paste from GitLab’s integration page.
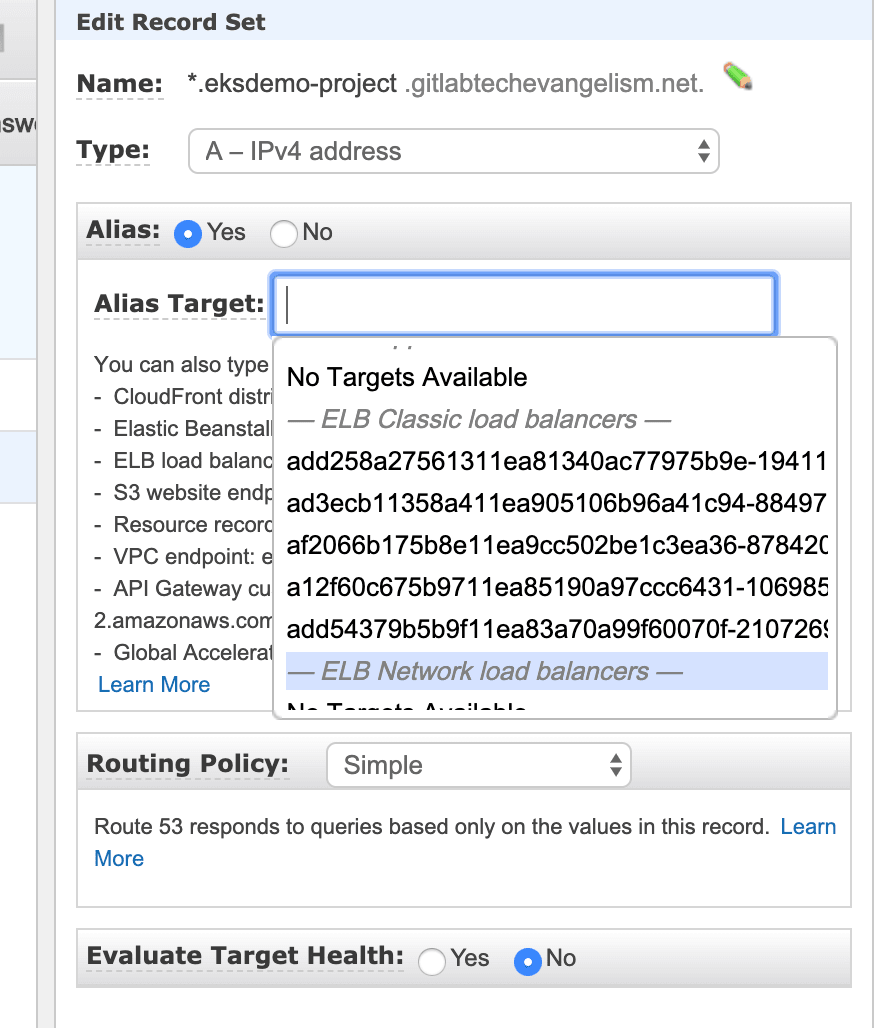 Set-up alias for base domain using the generated Ingress endpoint.
- Install the pre-defined Kubernetes certificate management controller, certmanager on the GitLab - EKS integration, to ensure every URL created for your application has a Let’s Encrypt certificate.
Now, lets deploy our application
How to set-up the project
It takes five simple steps to set-up the project for your application.
First, create a GitLab project from an existing sample, in this case, GitLab’s Auto DevOps example called Minimal Ruby App. There is nothing special about this application, it's just a ruby application you can use to try out the integration. If you integrated Amazon EKS at the group level on GitLab, you can just go ahead to create the project in the group. At the project level, you will have to perform the integration after creating the project.
Next, copy the URL from the “Clone with HTTPS” field of the sample project, Minimal Ruby App:
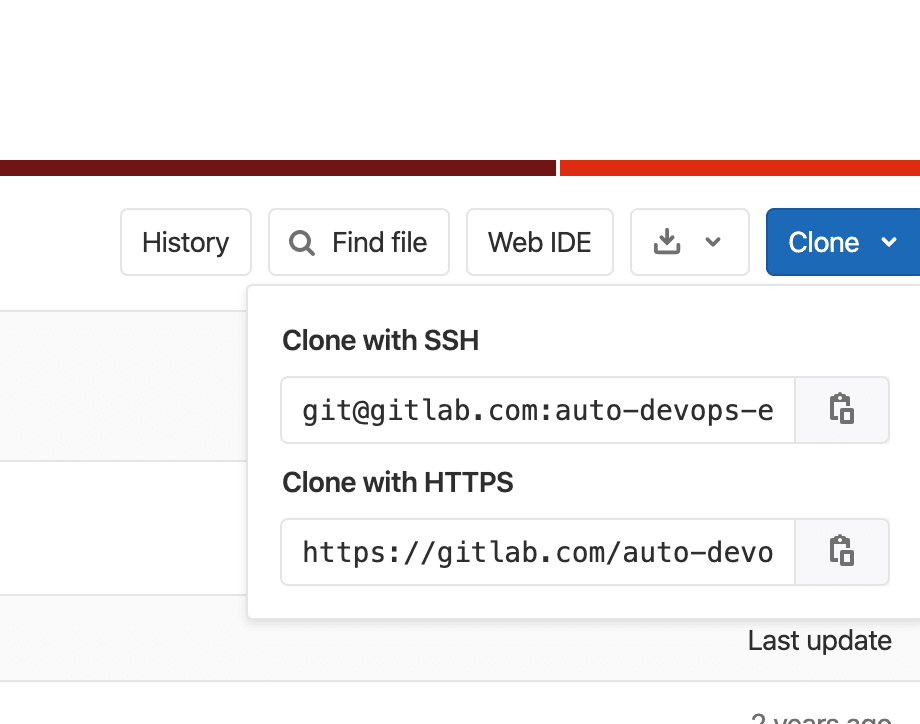 The clone sample project.
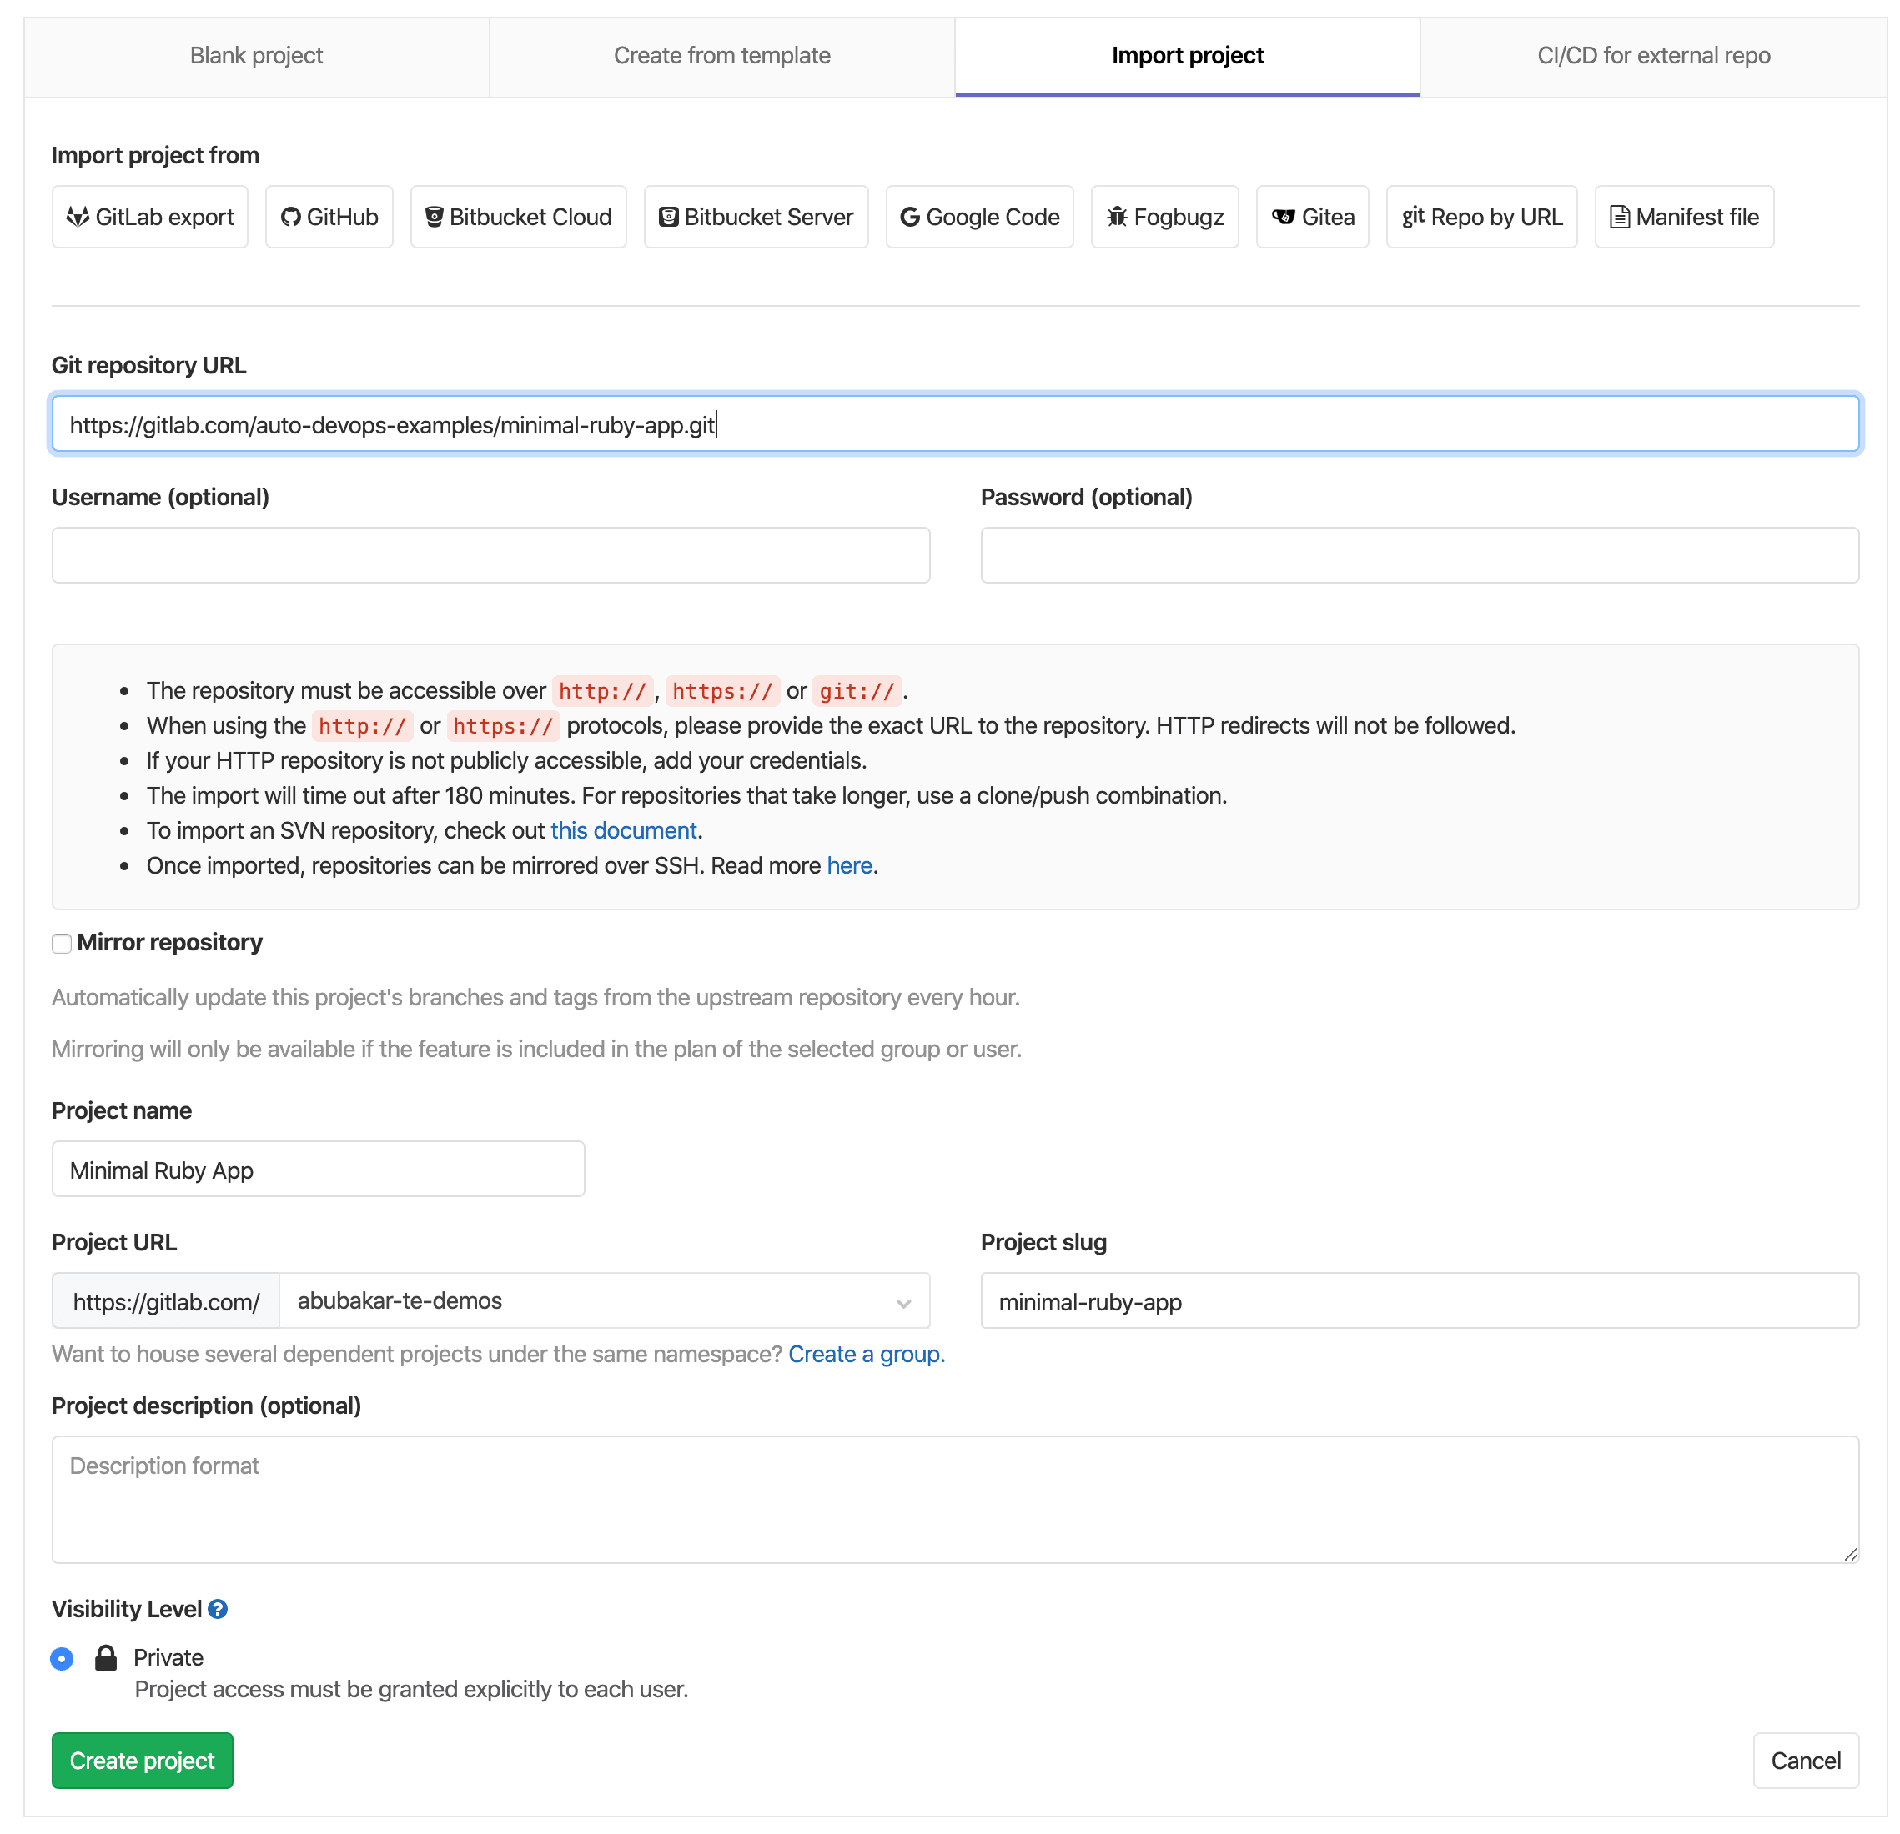
Third, click the "import project" tab on the new project page, then click on the "repo by URL" button. Paste the URL you copied earlier in the text box for "Git repository URL" and click on "create project"
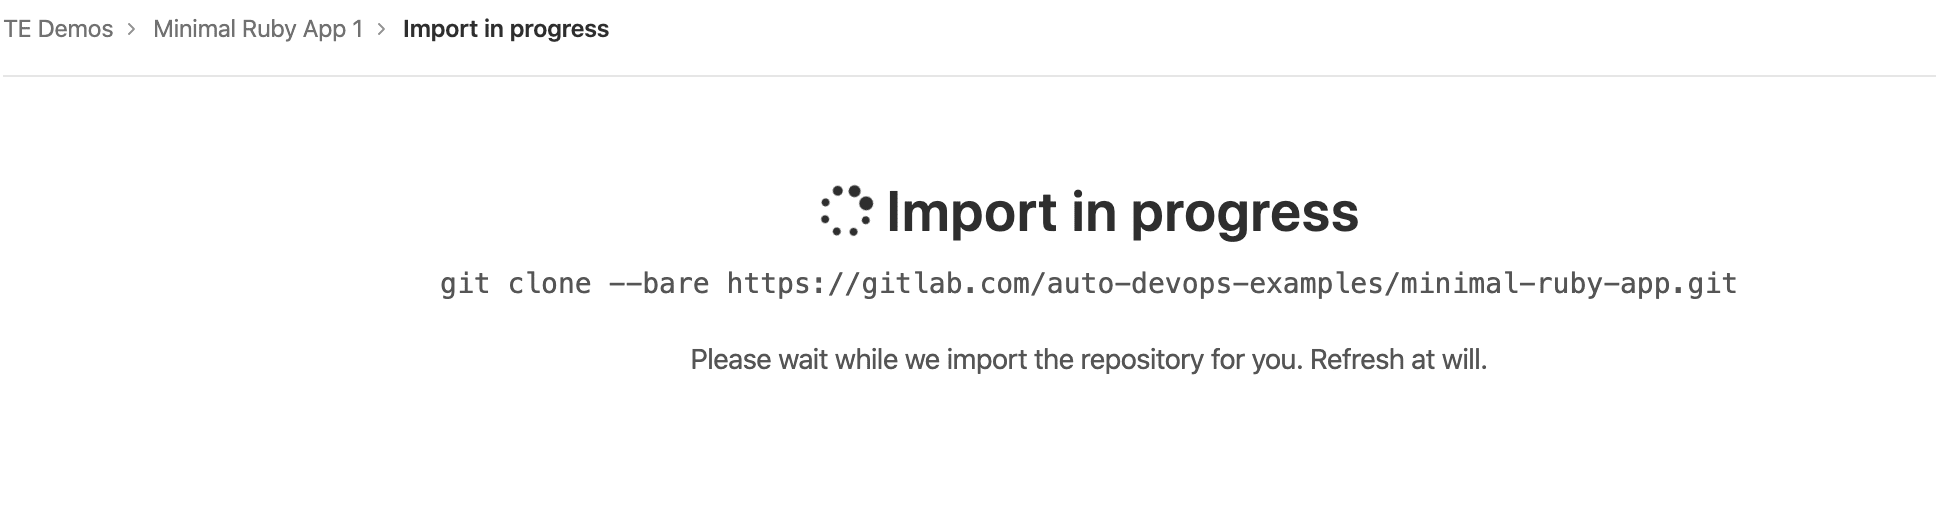
 The progress of the sample project import.
Next, the project will be imported and all the files from the sample will be available in your new project.
 The project import is completed.
Finally, go to project settings > CI/CD > Auto DevOps and enable “Default to Auto DevOps pipeline”
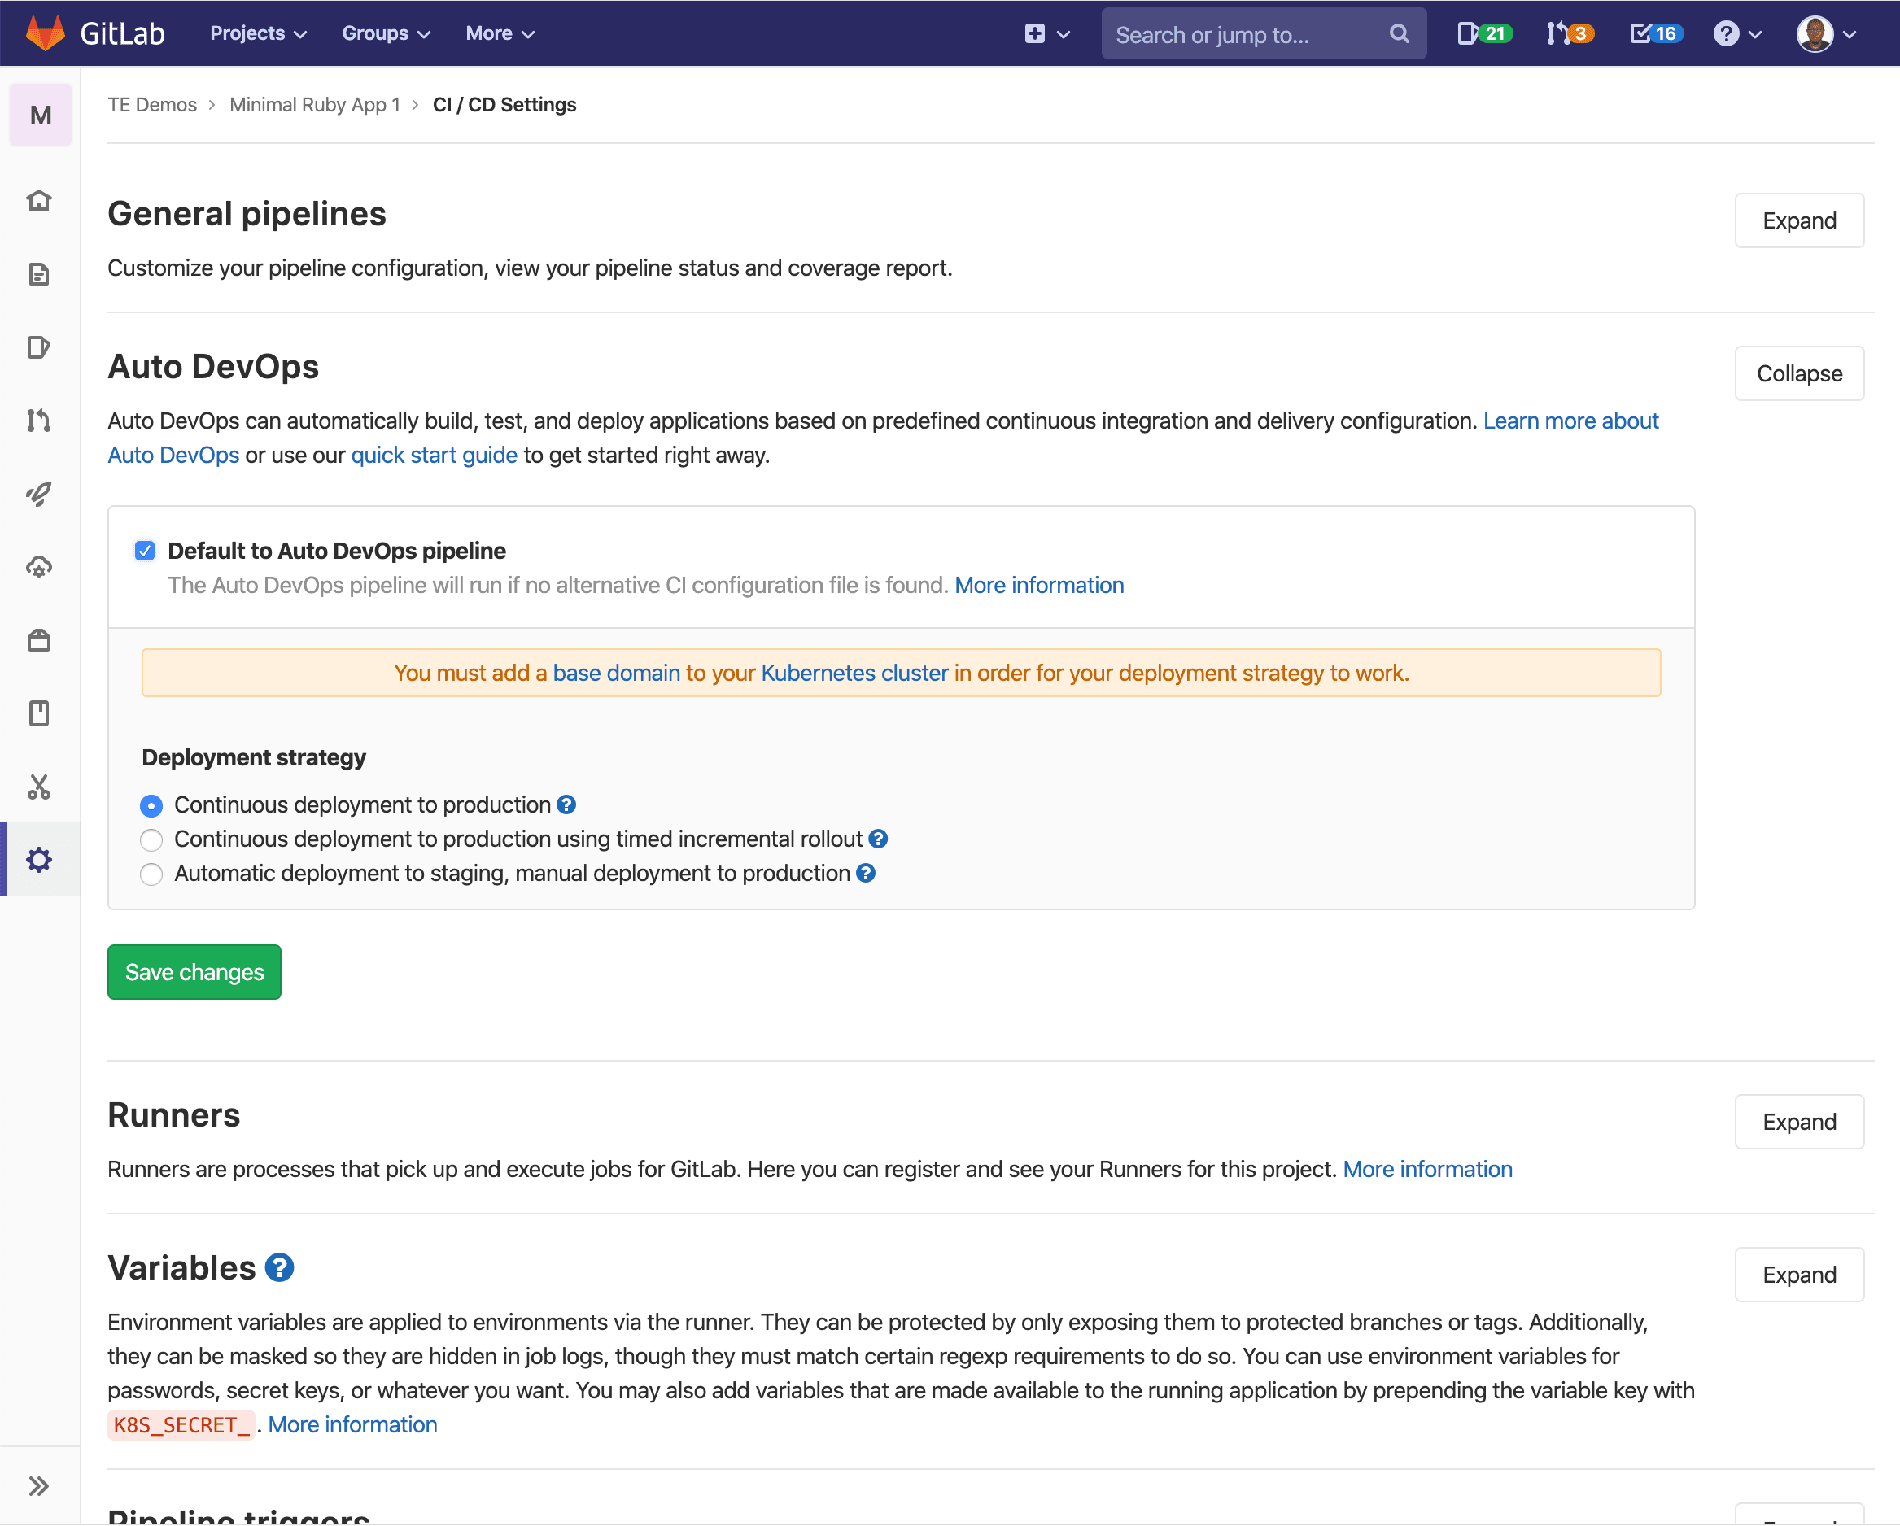 Enable the Auto DevOps pipeline.
How to deploy your application
- Now a pipeline is created and the project built, tested and deployed to production using the default AutoDevOps CI files.
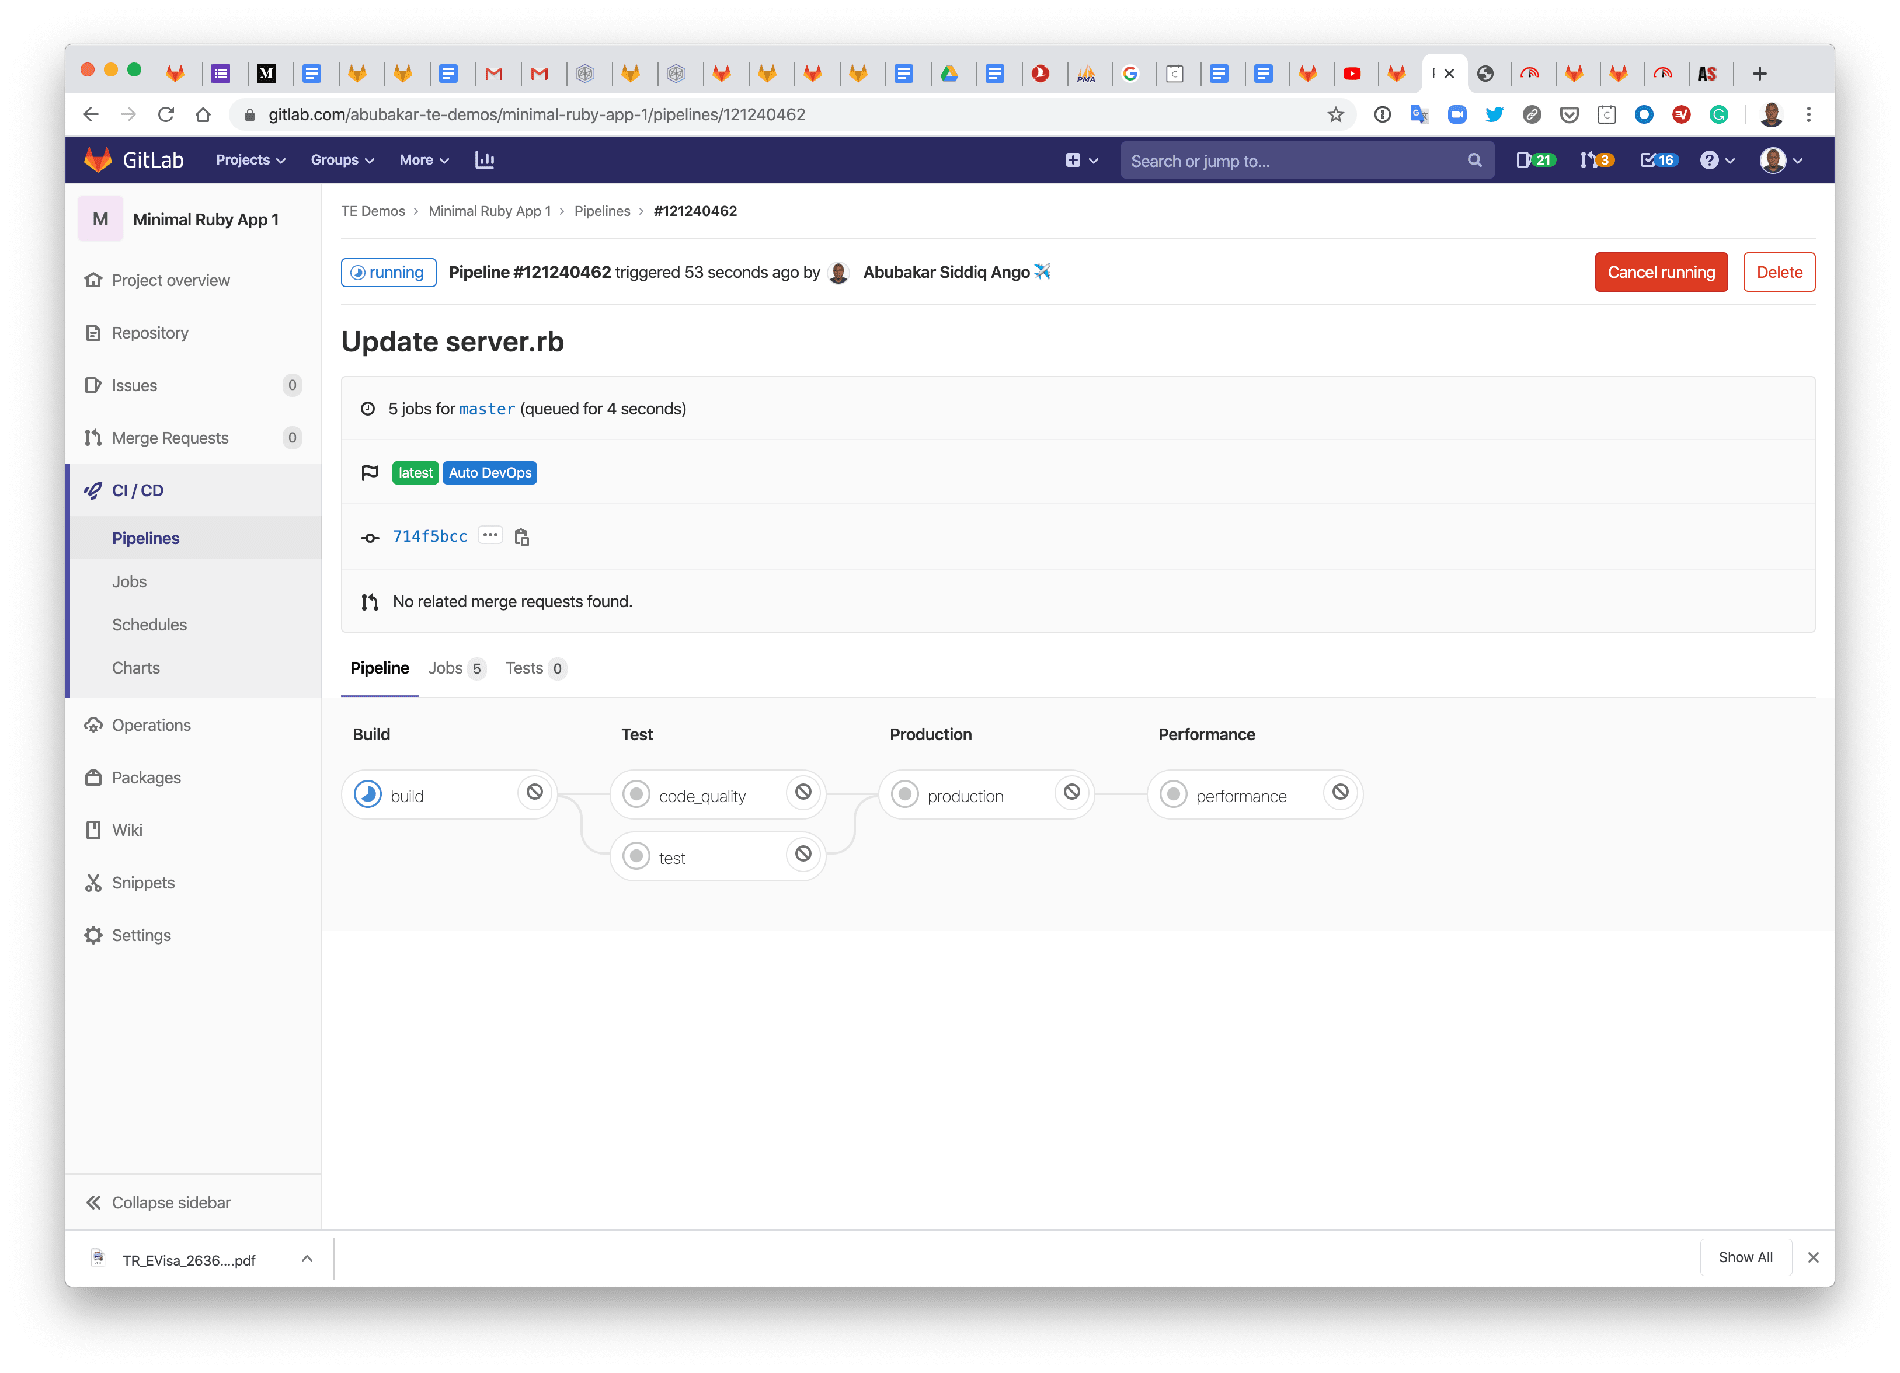 The first Auto DevOps pipeline.
 - Look inside the pipeline output to see the "deployment to production" line. This is where the URL is to access your application.
 Next, link to the deployed application.
 - In the image above, you can see the application has been deployed and can be accessed at
https://abubakar-te-demos-minimal-ruby-app-1.eksdemo-project.gitlabtechevangelism.net/
And it should show a “Hello World” message:
 The deployed application with "Hello World" message.
How to make changes to the deployed application
If any new changes are pushed, a different set of jobs is run to build, test, and review the changes before they can be merged to the master branch. I changed the "Hello World" text in the previous deployment to an HTML text in a new Git branch called amazon-eks-html using the GitLab WebIDE tool, and committed the changes.
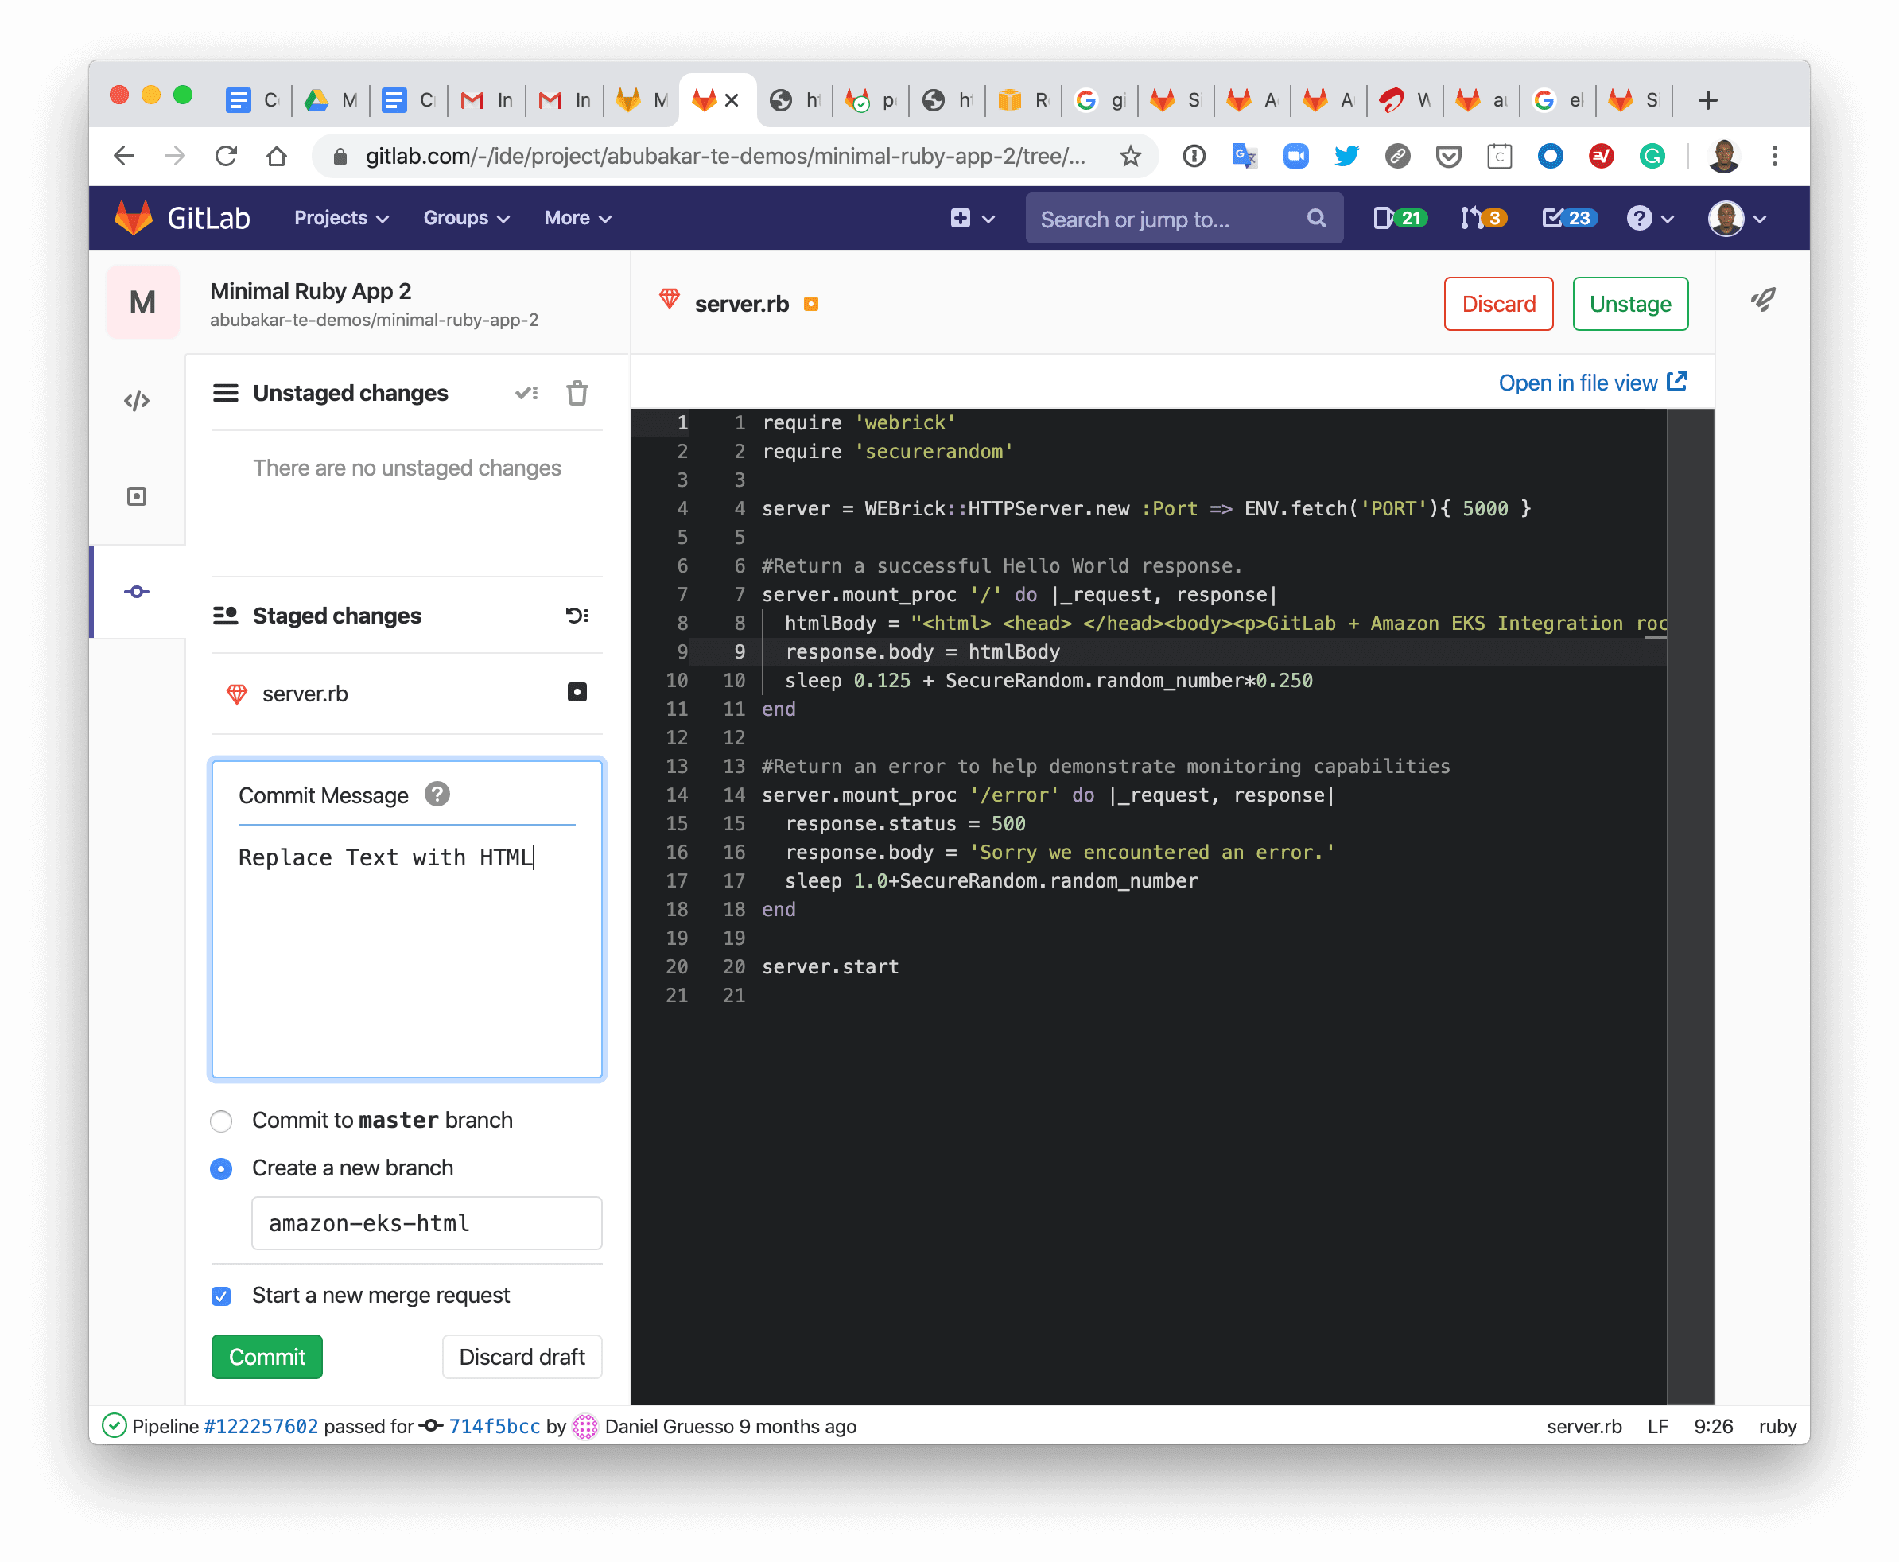 Making new changes to application.
While committing the changes, I selected "start a new merge request (MR)," which took me to the MR page where I added more information about the changes in a new MR.
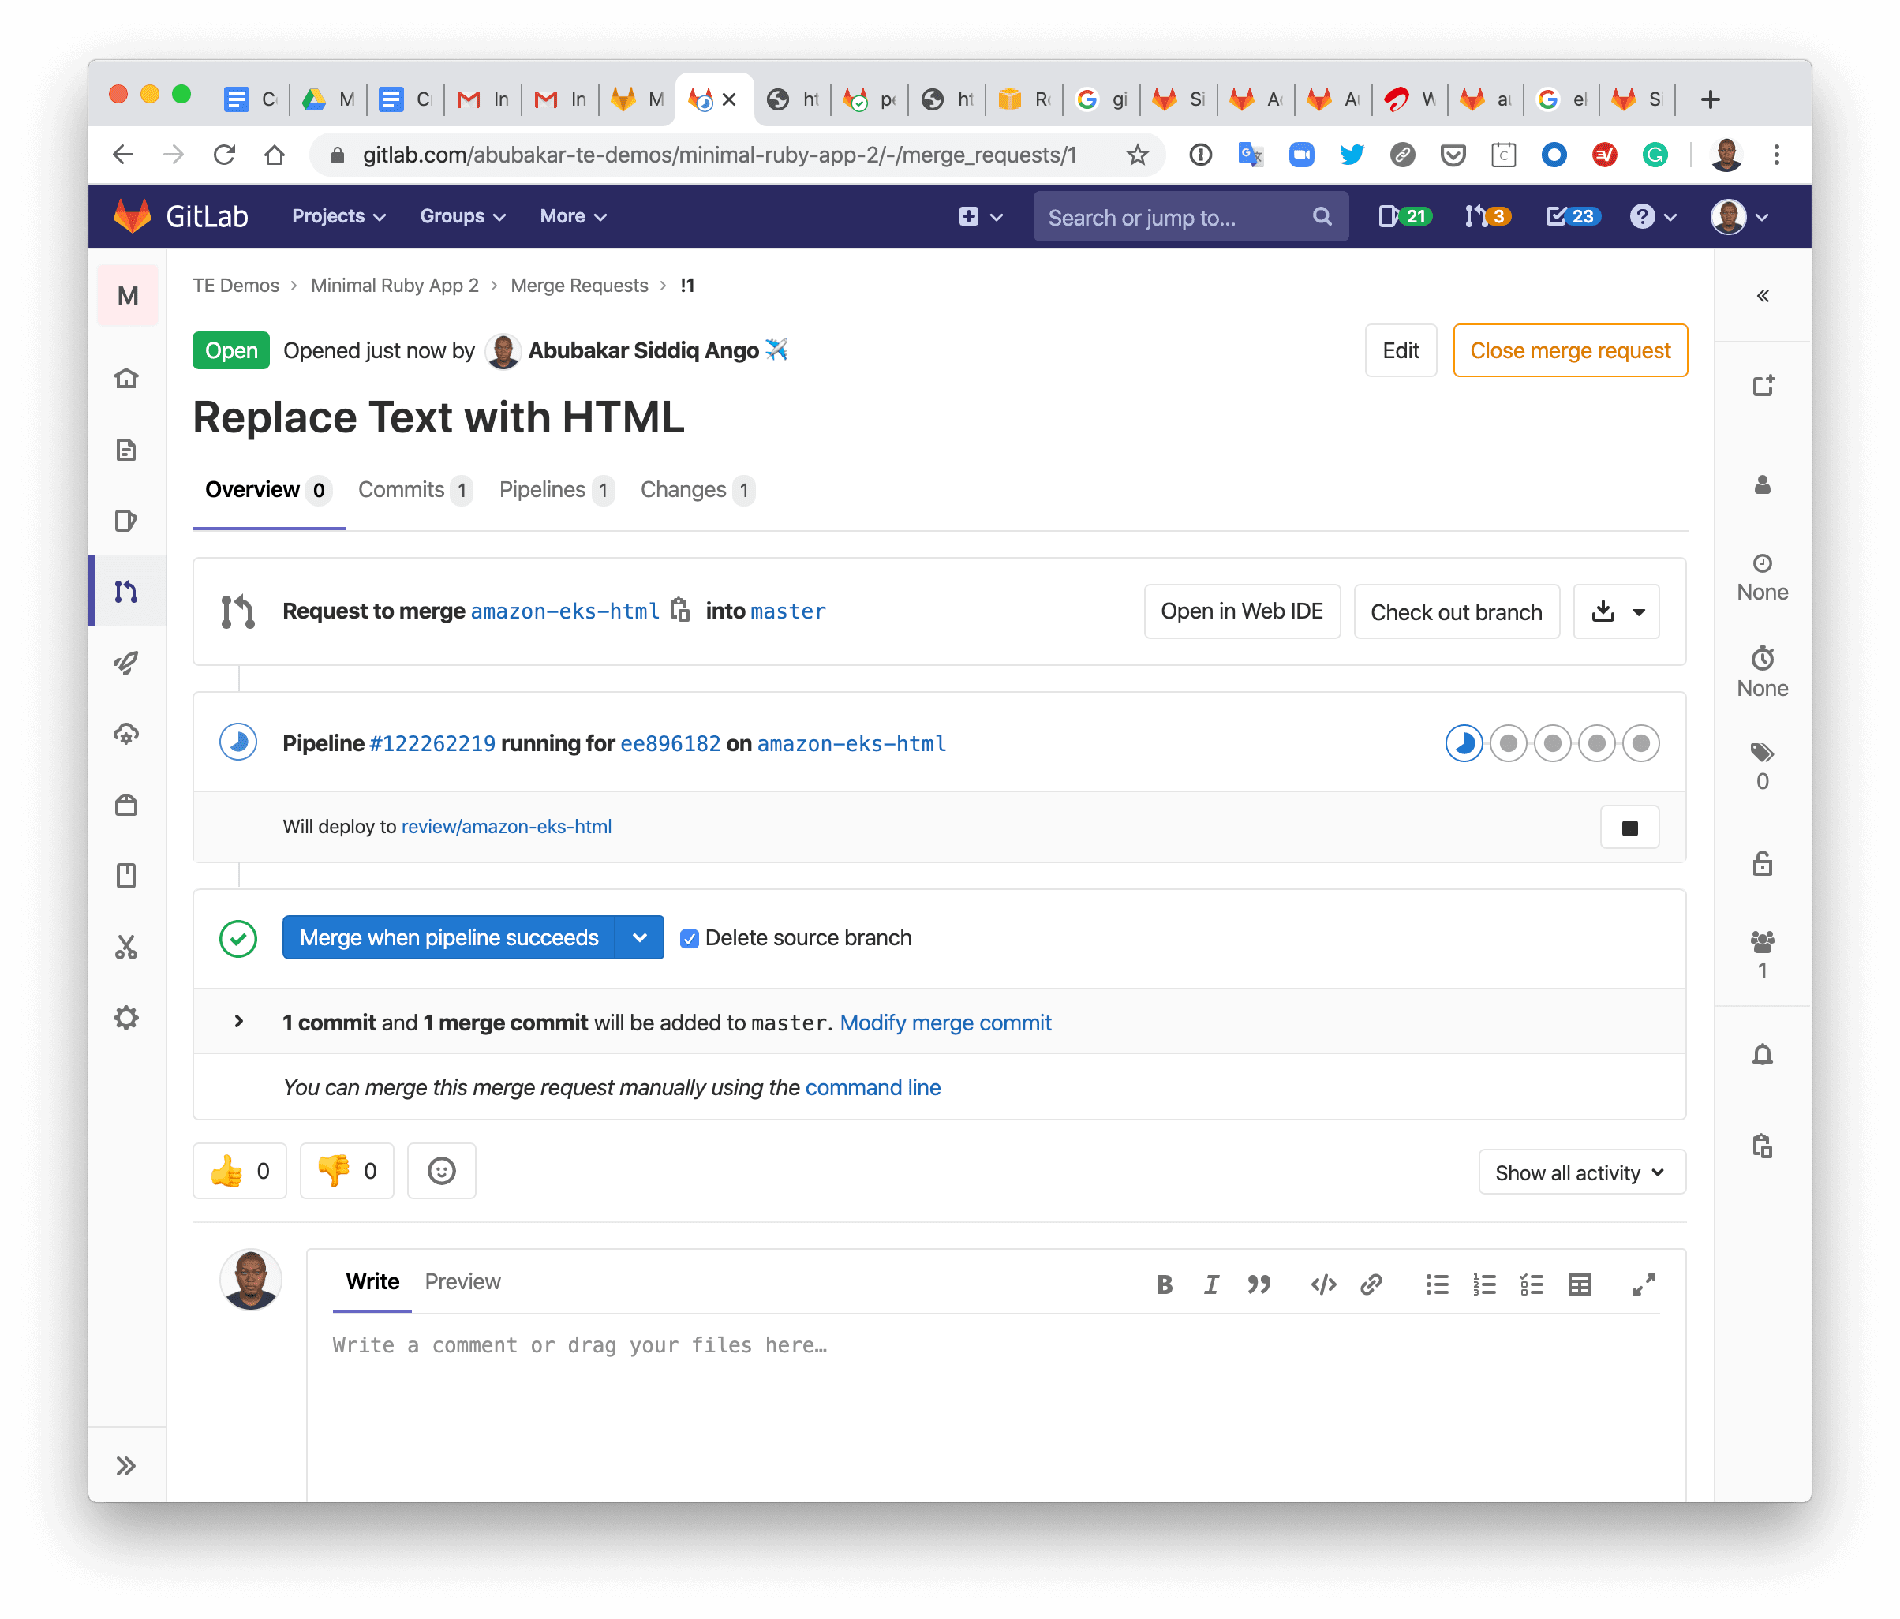 The MR to deploy the new application.
In the image above, you can see a pipeline is created to build, test and deploy using Review Apps to allow you review the changes before deploying to production.
 MR with Review Apps
Once the review is finished, the application is deployed to a dedicated namespace in the Amazon EKS cluster for you to review before deploying to production. A URL for the Review App is provided, as shown in the image below.
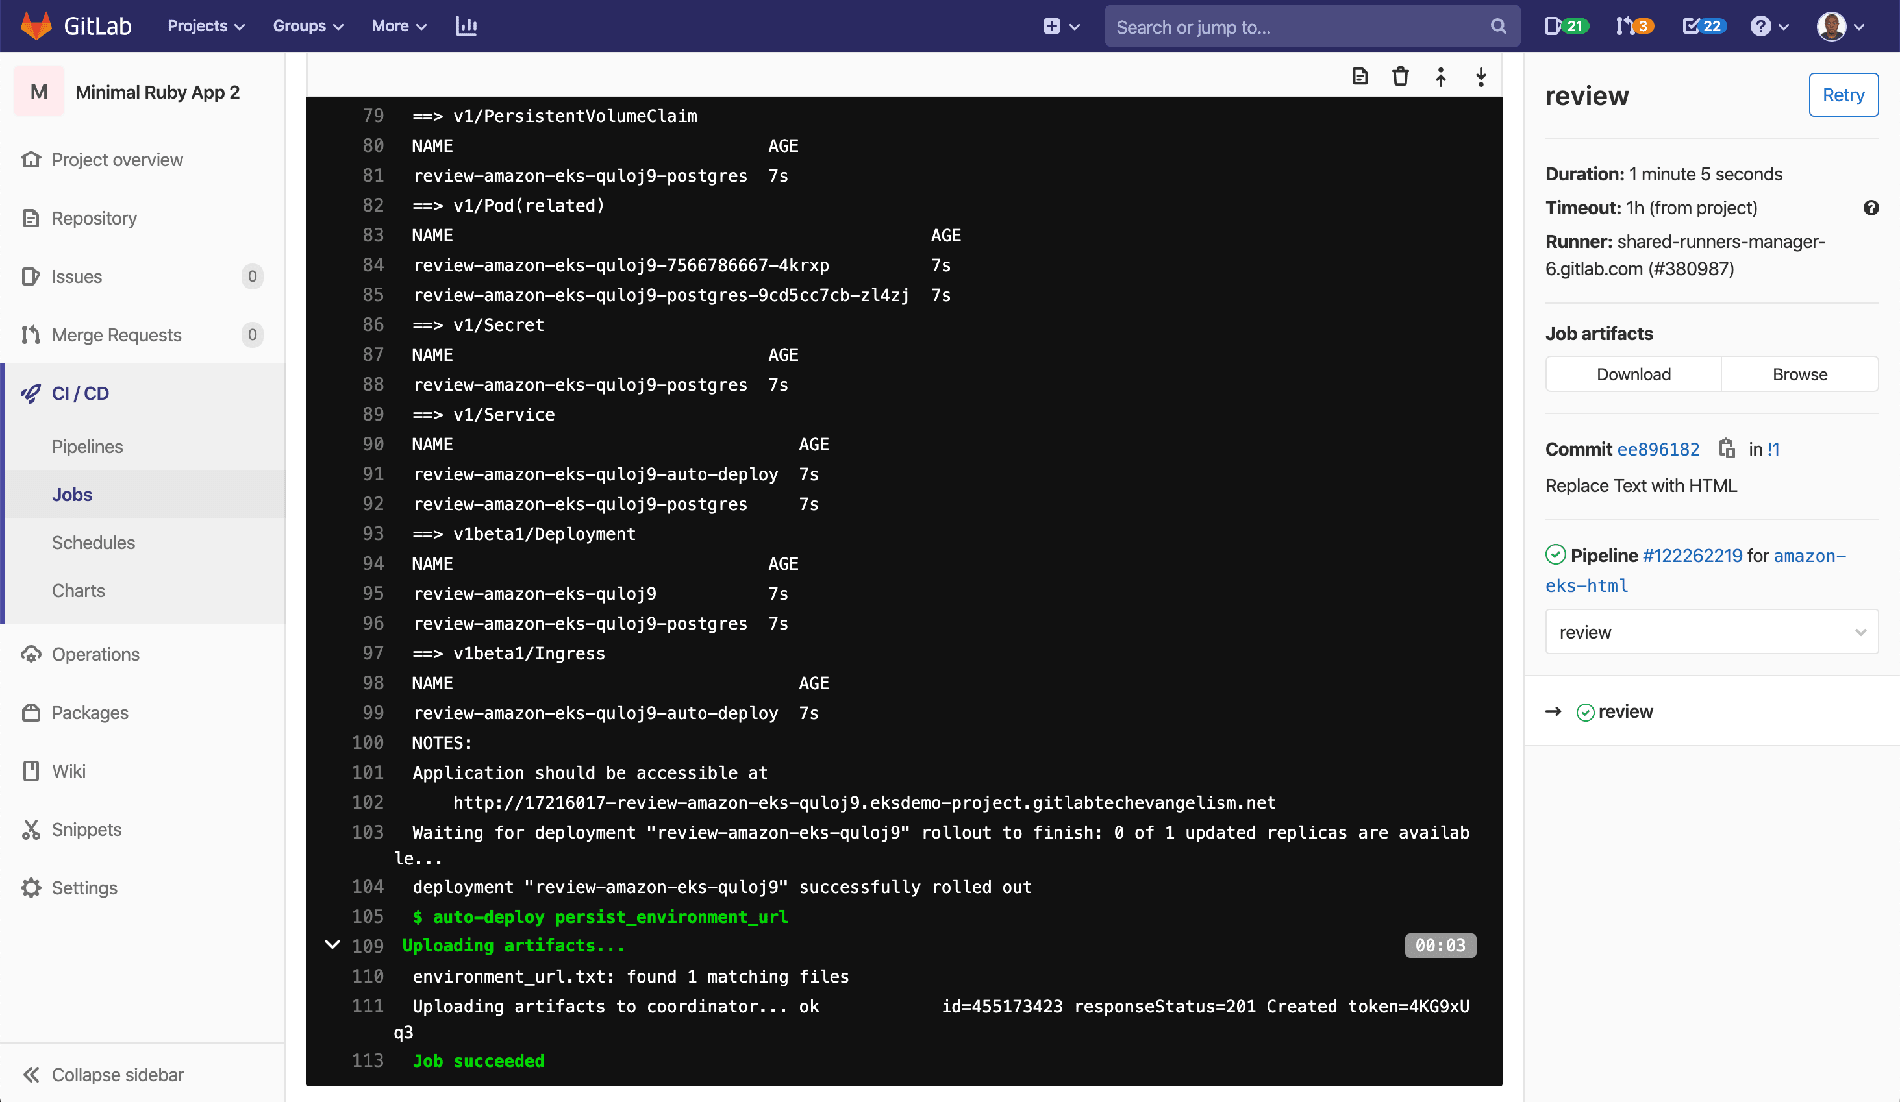 The application in the Review App.
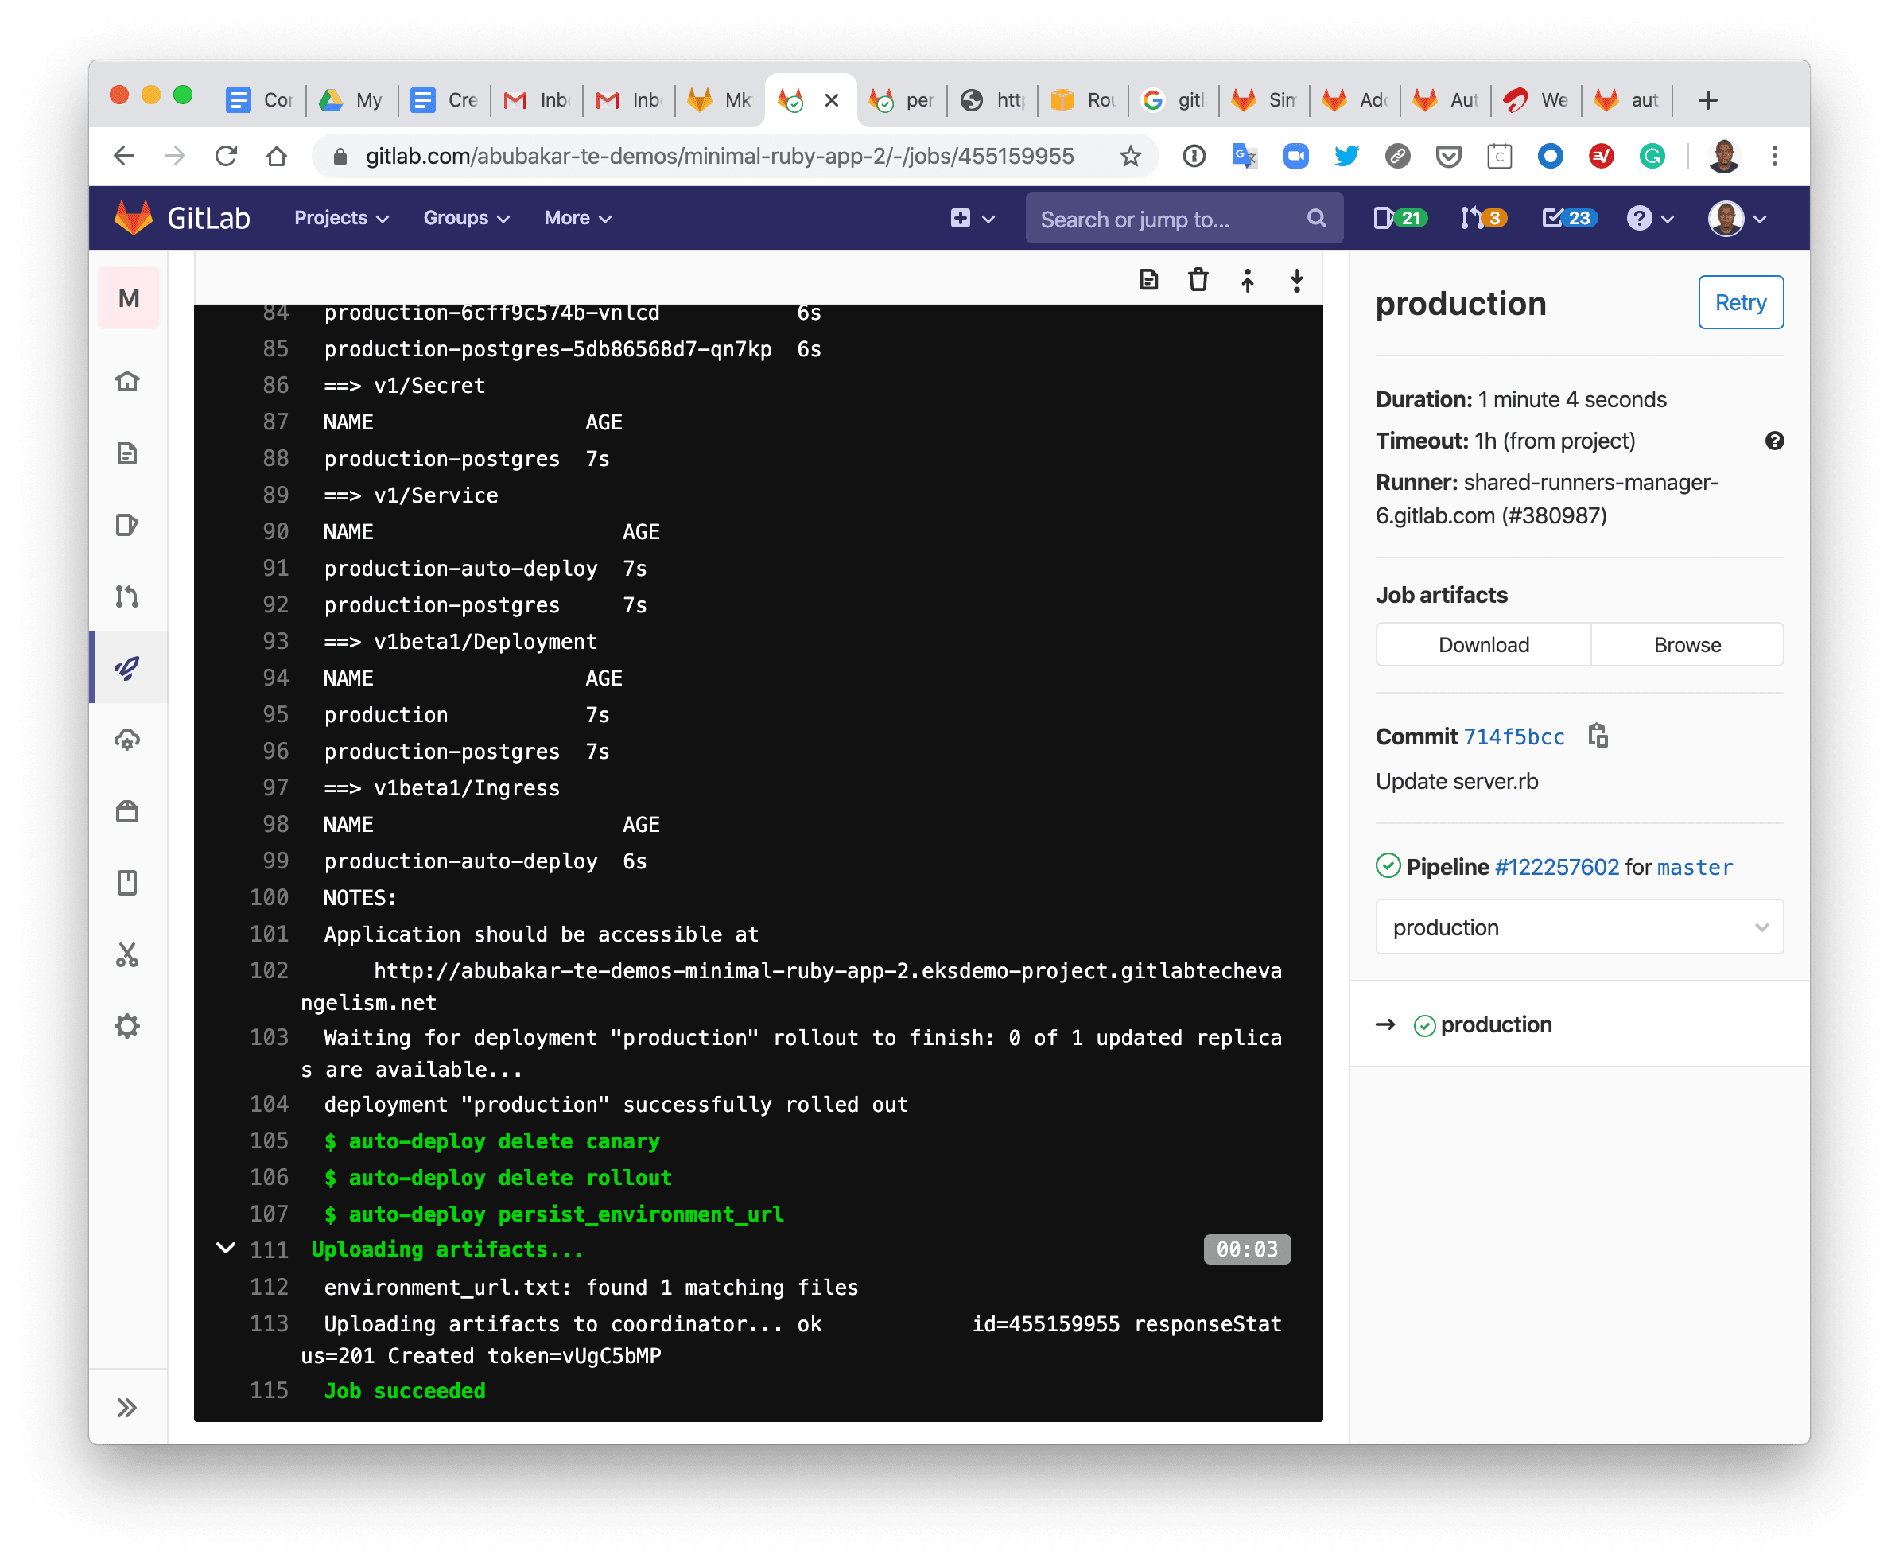
The stop_review job cleans up the Review App once the review is done. If MR approvals are required, the MR must be approved before being merged into the master branch. Once merged to master, the project is built, tested, and deployed to production.
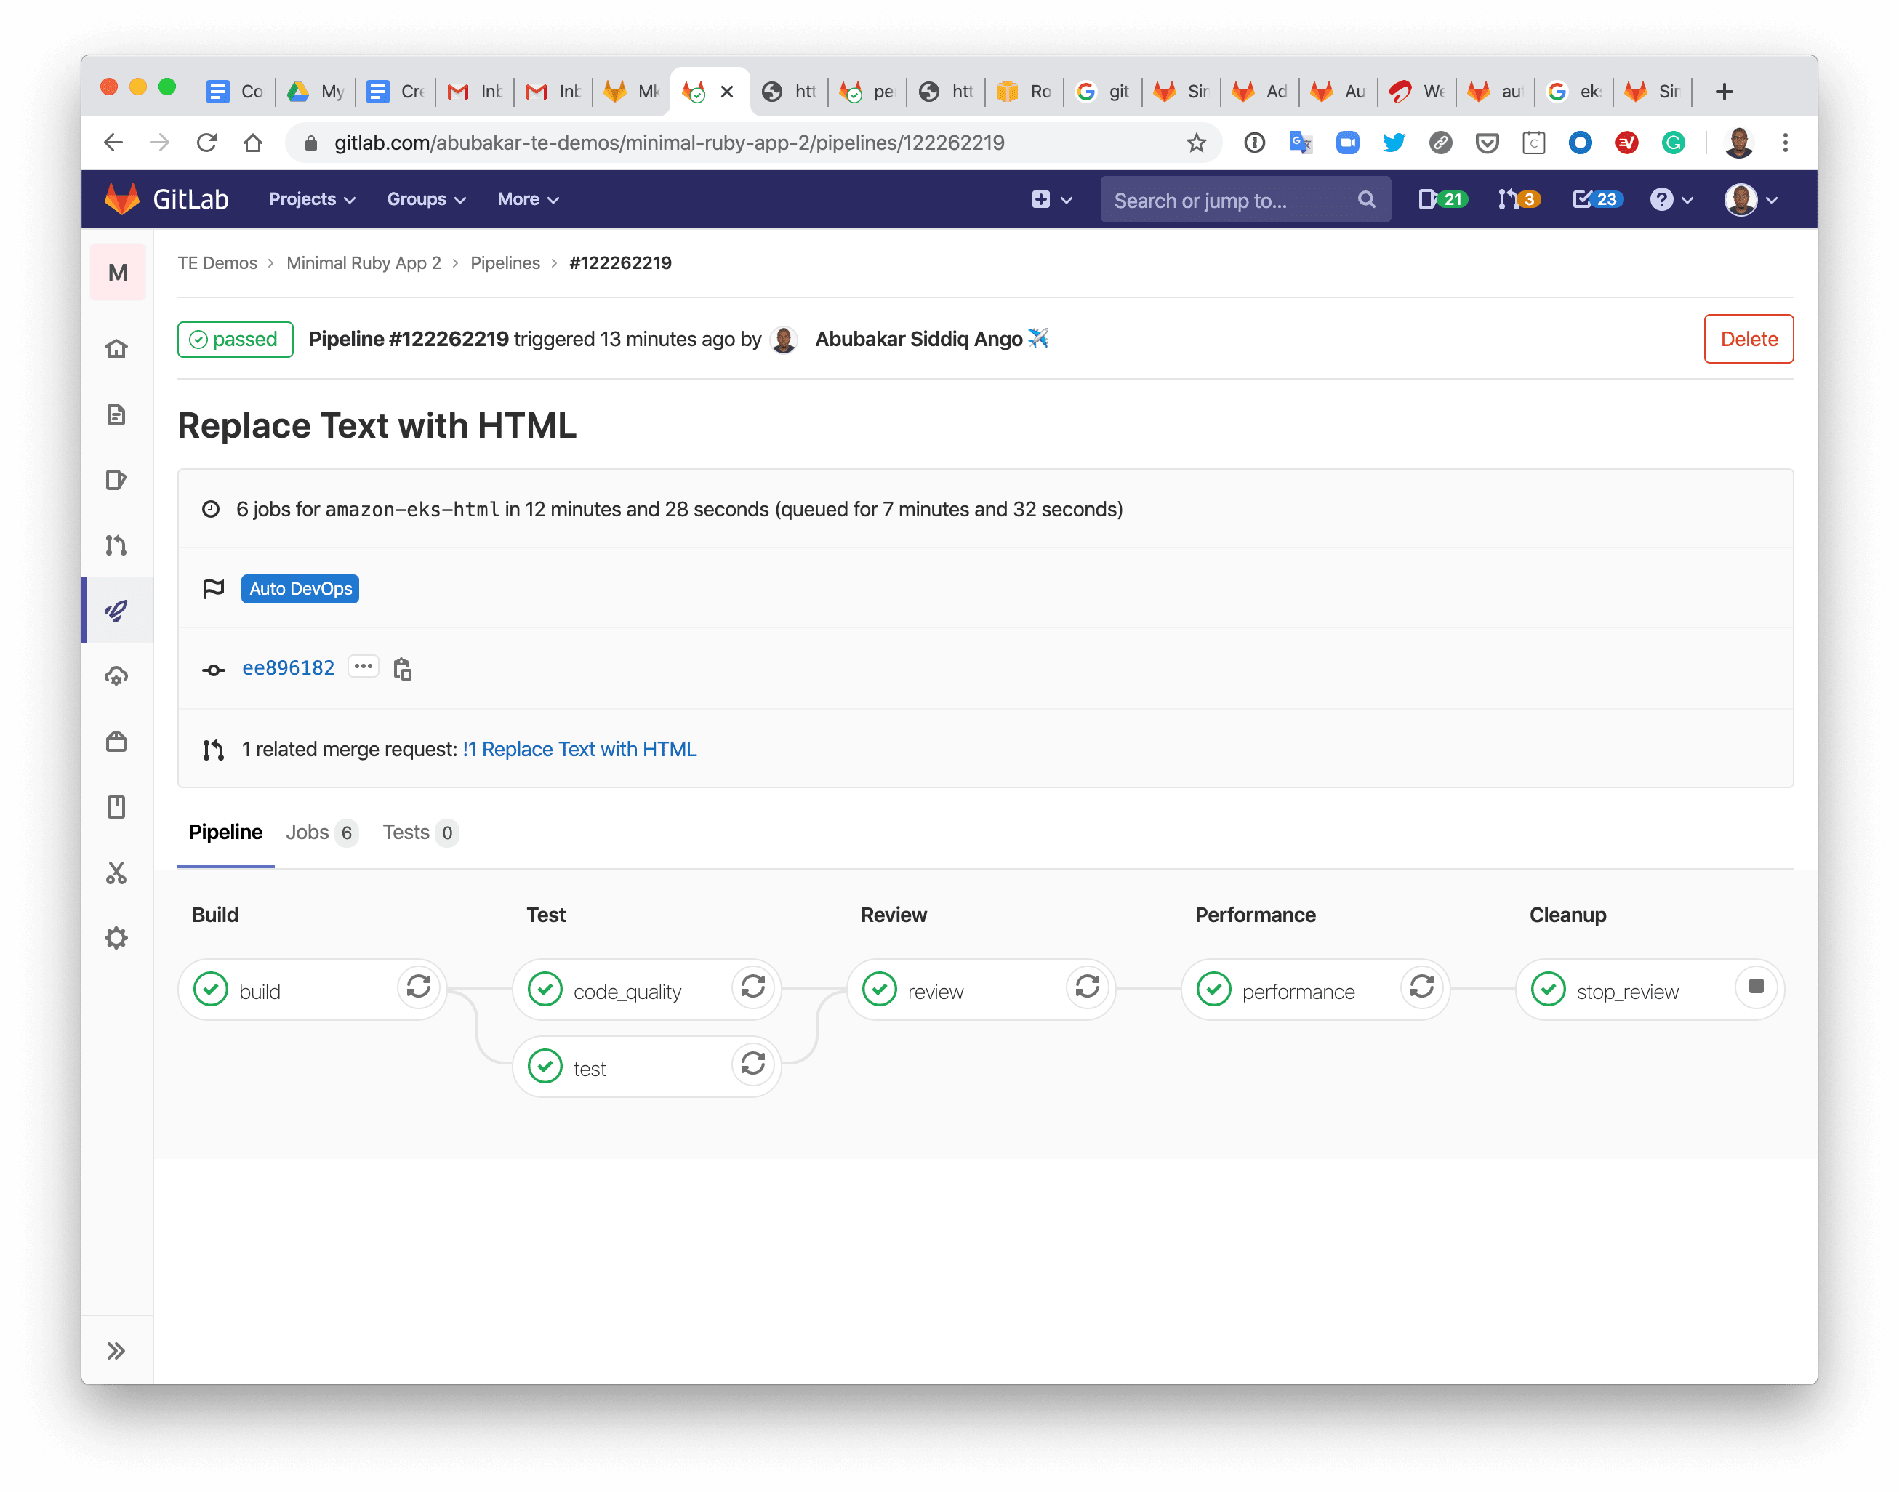
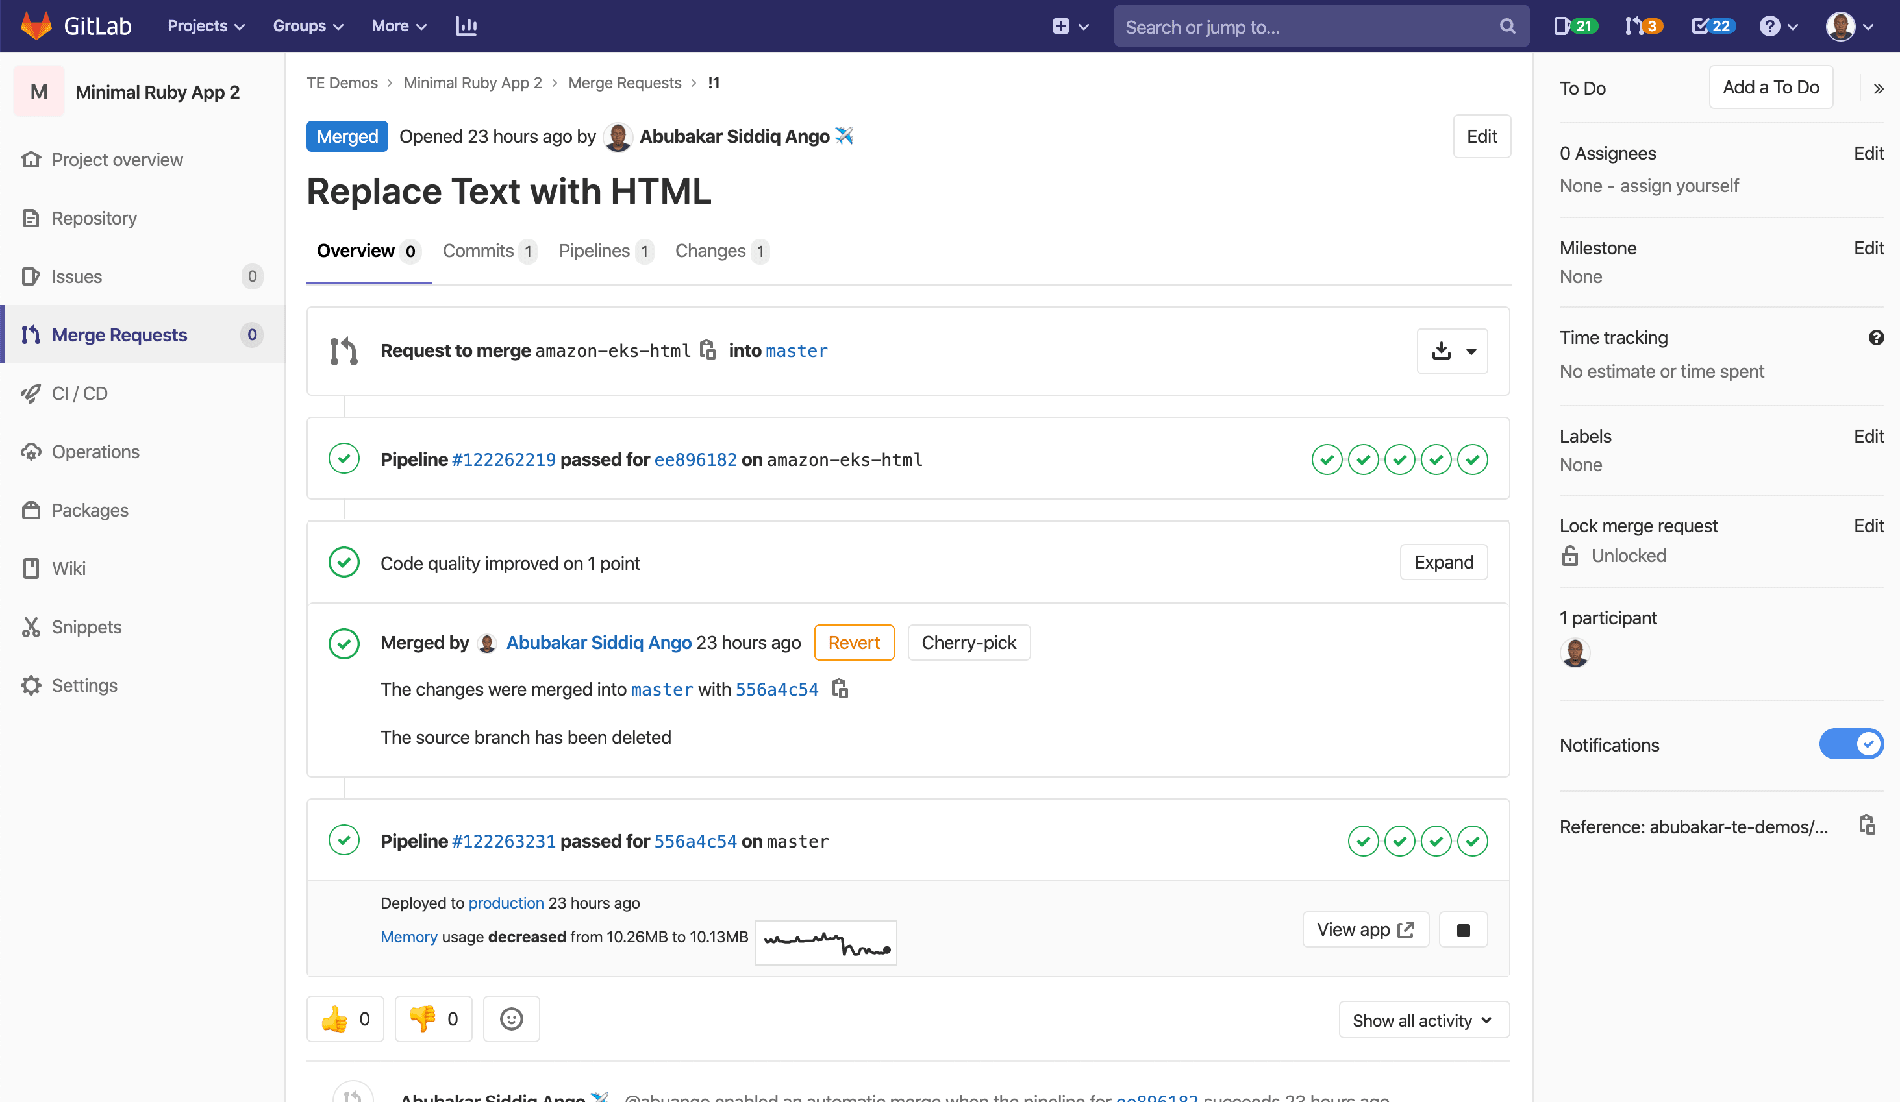 Deploying changes to production.
The image above shows that a second pipeline ran after the MR was merged. Once completed, a button is provided to view app and also see memory consumption as the app runs. The view app"` button will open the application on the project's subdomain.
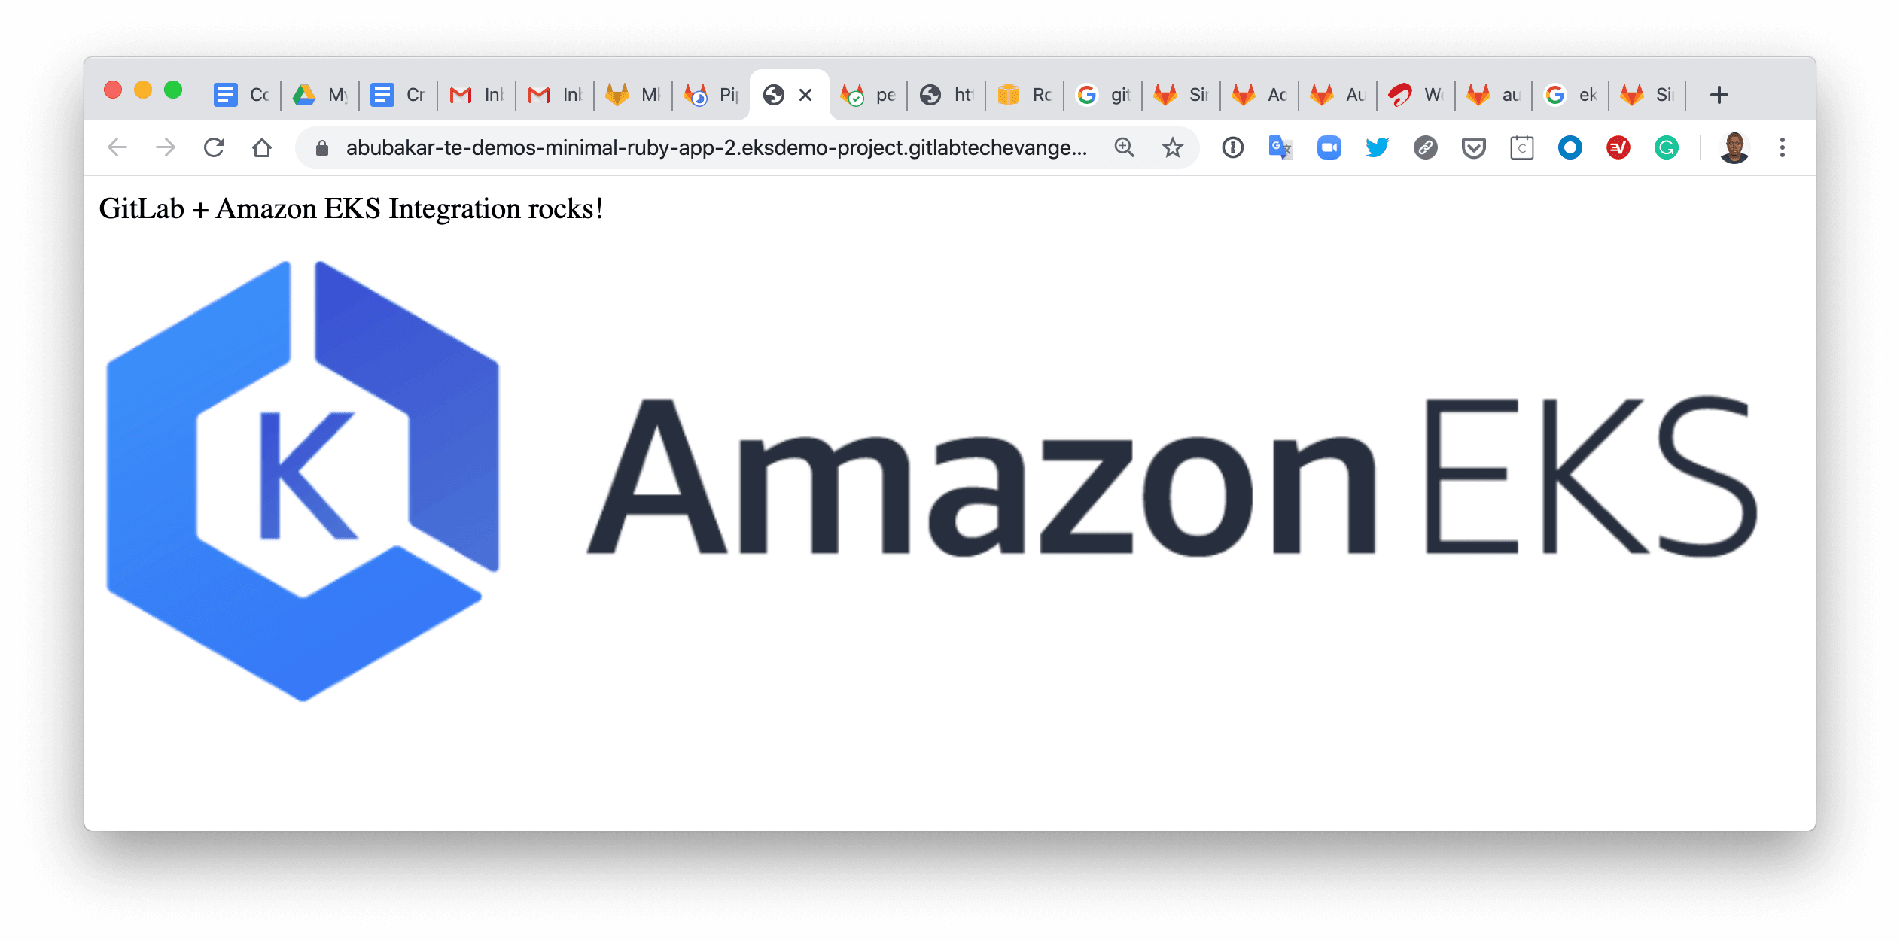 Changes deployed to production.
Deploy to Amazon EKS with Auto DevOps
The Auto DevOps function at GitLab makes deploying an application to the Amazon EKS cluster quite simple. Really, all you need to do is push code, and Auto DevOps automatically detects the programming language and uses the necessary buildpack to test, build, and deploy your application. GitLab also takes making changes to your application a step further using Review Apps, which deploys your app to a temporary environment for you to review the app before deploying to production.
If you have questions about how to integrate GitLab with Amazon EKS to create a Kubernetes cluster, revisit the first blog post.
More to explore
View all blog posts


We want to hear from you
Enjoyed reading this blog post or have questions or feedback? Share your thoughts by creating a new topic in the GitLab community forum.
Share your feedback