If you use MITRE ATT&CK for classifying cybersecurity incidents, you may want to visualize your coverage across a matrix. This blog will show you how to do this automatically with GitLab by deploying the ATT&CK Navigator web application pre-populated with your own annotated matrices.
We make this easy by providing a fully working example project for you to fork and customize. When you're finished, you'll have an interactive visualization tool that displays your coverage of techniques across the ATT&CK framework.
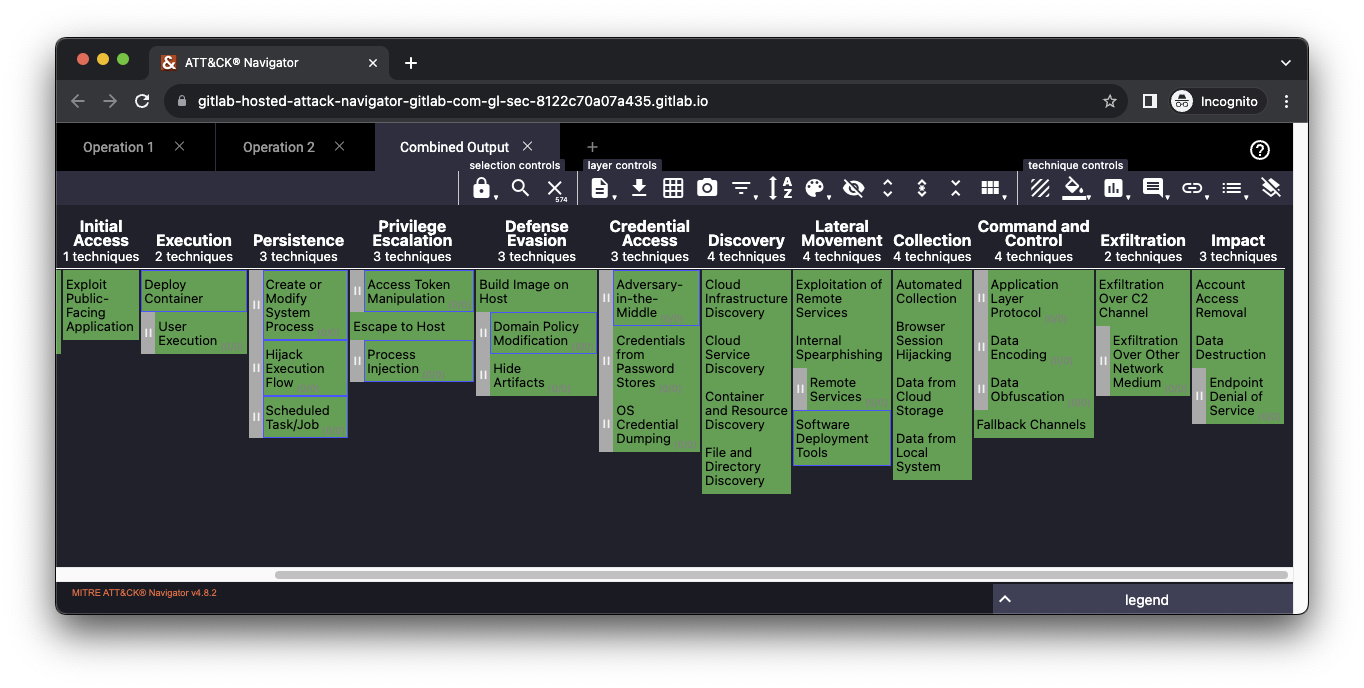
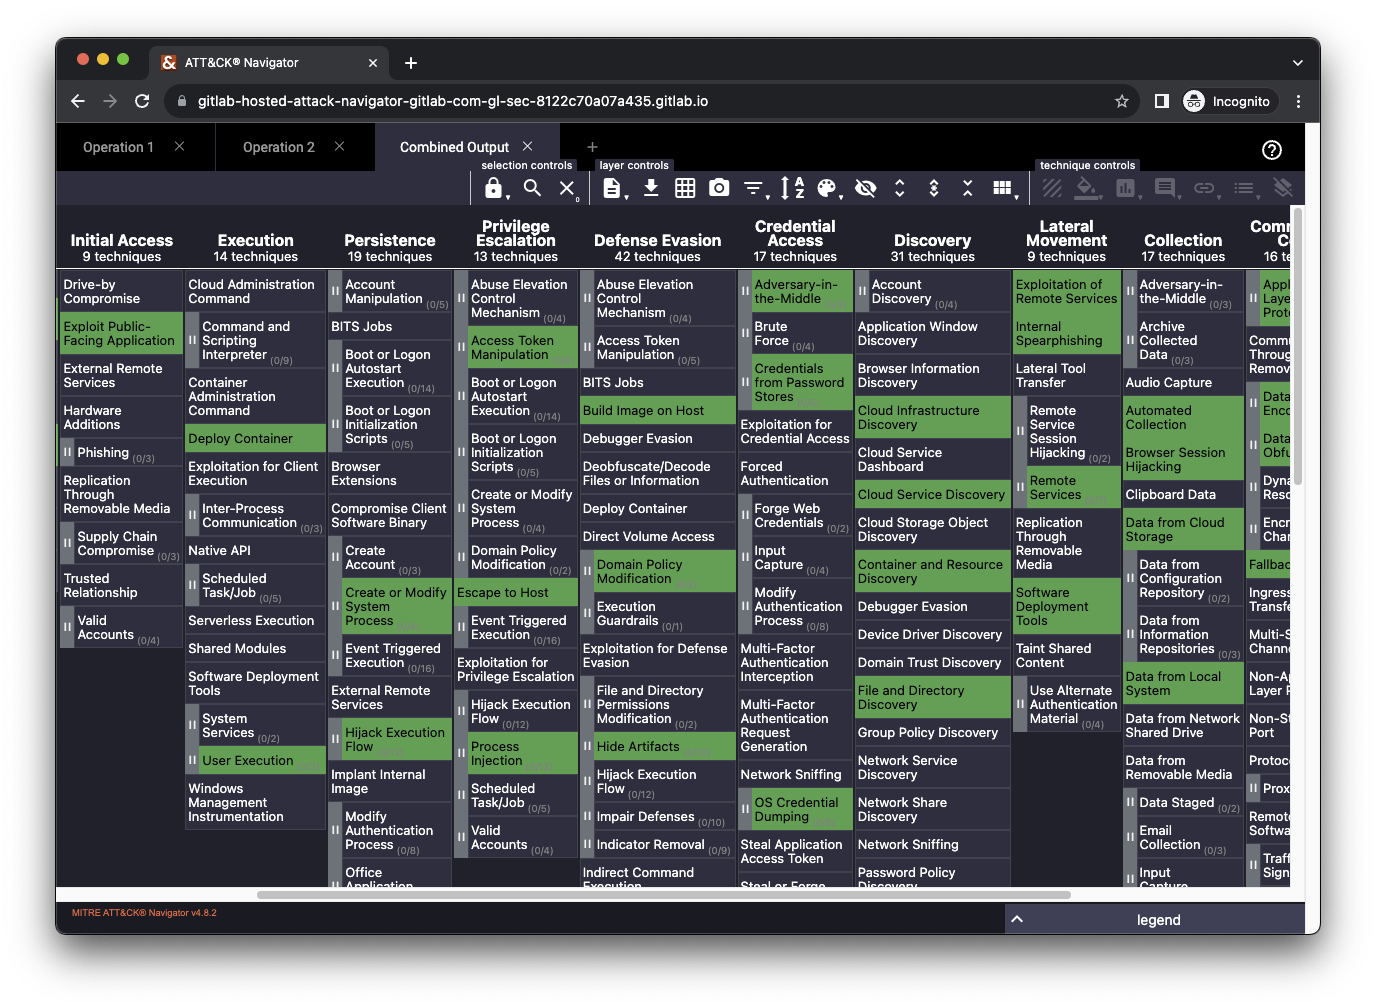 ATT&CK Navigator deployed from our example project
About MITRE ATT&CK framework
MITRE ATT&CK is a framework to classify and describe cybersecurity attacks based on real-world observations. It provides a common language that can be used by different groups inside a security organization to collaborate on security initiatives.
For example, when a company's Red Team emulates an attack based on the techniques of a relevant adversary, they deliver a report that includes a list of the specific technique IDs involved in the exercise. The team in charge of detecting and responding to these attacks can use those IDs to research and implement improved defensive capabilities.
Both of these groups may want to track their coverage of offensive and defensive capabilities across one of MITRE's ATT&CK matrices. These matrices are charts that visualize attack tactics and techniques relevant to specific industries and technologies. For example, a company like GitLab may be interested in understanding which techniques in the Cloud matrix we have emulated to test our detection and response capabilities.
MITRE provides a free interactive web application, ATT&CK Navigator, to visualize, annotate, and explore these matrices.
At GitLab, our Red Team produces a new Navigator matrix at the completion of each operation. The matrix highlights which attack techniques we've conducted. We find it useful to view all of these matrices in a single location, with the addition of a combined matrix showing all of the techniques we have conducted across all historical operations. This helps us understand trends and identify potential gaps to cover in future operations.
Fork our example project to get started
You can fork our example project to get going on your own. First, you will need an account on GitLab.com, or on a self-hosted instance with GitLab Pages enabled.
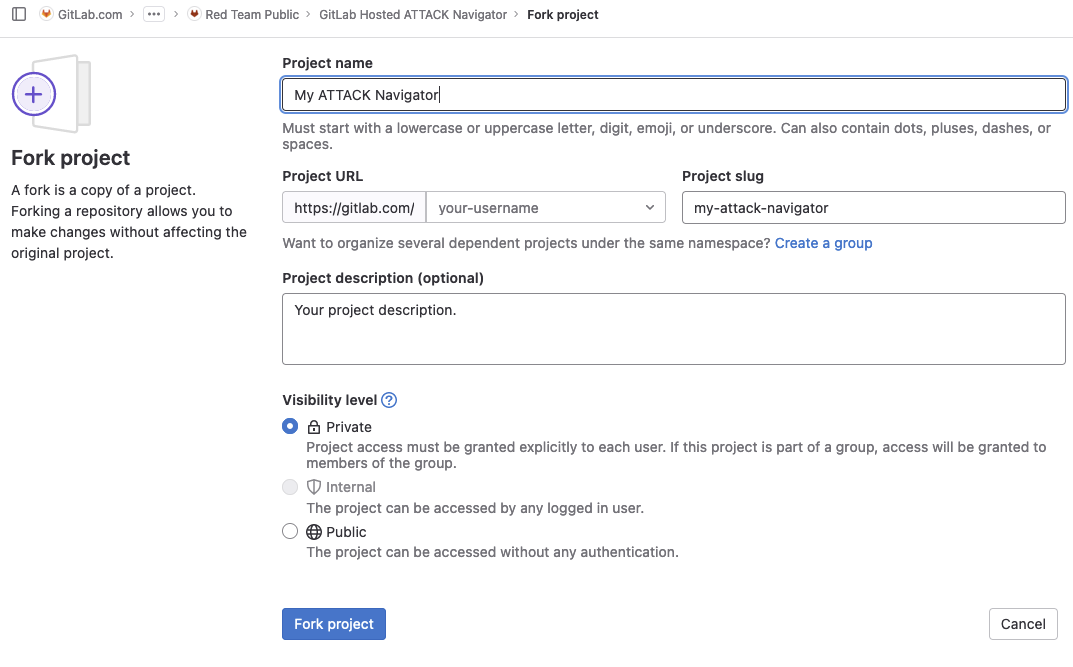
Next, browse to our example project and click on the "Forks" button to create a new fork. Fill in the form shown below by choosing a name, location, and description for your copy of the project. You may wish to change "Visibility level" to "Private," which will require authentication to view your deployed application.
After that, take a look inside the layers/ folder of your new project. Each file in this folder will be used to pre-populate a new tab in the deployed web application where the listed attack techniques are annotated in green. We provide two example files, as well as an empty template file inside templates/template.yml.
Templates should list specific MITRE ATT&CK "technique" IDs as bullets below their corresponding MITRE ATT&CK tactic. You only need to include the tactics for which you will add techniques. Here is a short example of techniques across four tactics:
name: Operation 1
description: Example of a Red Team operation - not real data
techniques:
  initial-access:
    - T1190
  privilege-escalation:
    - T1611
    - T1055
  lateral-movement:
    - T1210
    - T1021
  exfiltration:
    - T1041
You can edit the example files or delete them and add new files of your own.
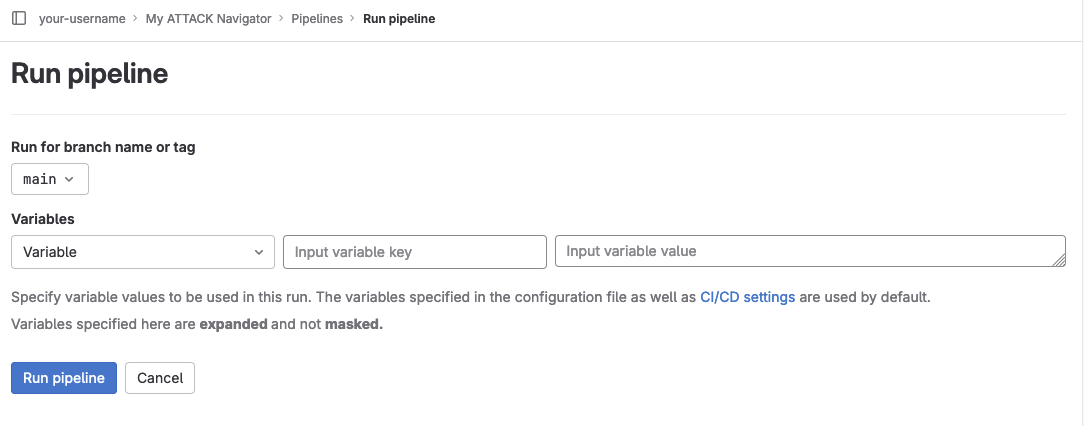
The next step is to build and deploy the web application. If you made any changes to the layers/ folder inside your default branch, this build process should have started automatically. If you just want to deploy the application using the provided sample data, browse to "Build" -> "Pipelines" using the project's sidebar and click the "Run pipeline" button.
You can check to see if a pipeline has completed successfully by browsing to "Build" -> "Jobs" in the sidebar. There should be at least two jobs with a status of "passed" - one named build_navigator and one named pages.
Once both jobs are complete, browse to "Deploy" -> "Pages" in the project's sidebar. Check the "Use unique domain" box and click the "Save changes" button.
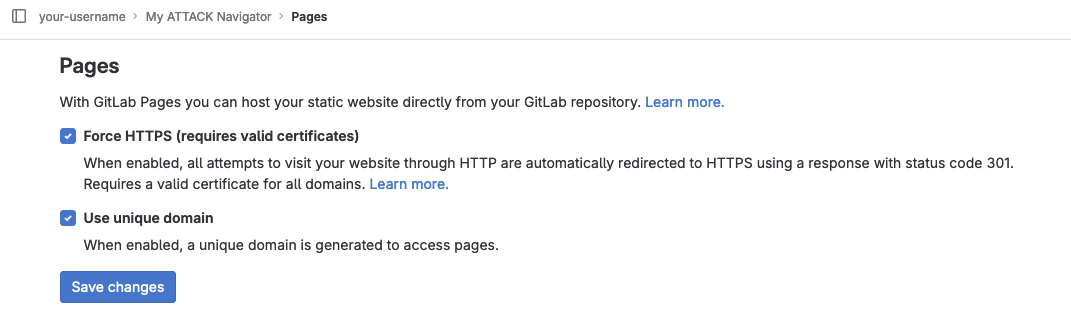
That's it! Your application should now be accessible using the URL provided under "Access pages" on the same page.
How the example project works
There are three main components inside the example project:
- The
gitlab-ci.ymlfile. This defines what jobs run, and when they run. The file contains rules to automatically run the jobs whenever you push changes to thelayers/folder inside the project's default branch, or whenever you manually run a pipeline as described above. - The
create-layers.pyfile. This Python script takes the custom YAML files you provide, and then generates individual and combined JSON files in the format that ATT&CK Navigator expects. You can customize this file to change the annotation color (HIGHLIGHT_COLOR) as well as some of the application defaults (JSON_BLOB). In our internal version, for example, we remove some of the platform filters that don't apply to us. - The
build-navigator.shfile. The shell script is responsible for downloading the ATT&CK Navigator application, injecting the custom layers we create, and building the application. The output is a static website that we then host using GitLab Pages.
More features of the ATT&CK Navigator app
Once deployed, the application is interactive. This blog focuses on using a colored annotation to visualize coverage, but the application is capable of much more.
Here are some features we use often:
- In the "layer controls" bar up top, click on the button that looks like an asterisk surrounded by up and down arrows. The name is "expand annotated sub-techniques." This will ensure that all techniques in your YAML file are easily viewable, as subtechniques may be hidden away when the matrix first loads.
- If you want to hide all unannotated techniques, click anywhere in the matrix and select "select unannotated." Then, under "technique controls," click on the "toggle state" button. This will give you a much cleaner matrix, showing only the specific techniques you've provided in your custom YAML files.
 ATT&CK Navigator with unannotated techniques hidden
ATT&CK is not a bingo card, and for most organizations the goal shouldn't be to have green squares across the board. Instead, you should use this to understand your own coverage and how it relates to the threats most relevant to you.
Share your feedback
MITRE ATT&CK Navigator is a great tool for visualizing coverage of attack techniques across a matrix. Using our example project, you can easily deploy an automated solution that builds this tool and pre-populates it with your own data.
On our Red Team, we love to find creative use cases for GitLab, and this is one we use ourselves. If you find this useful, or if you have any ideas to improve it, we would love to hear from you! Feel free to open an issue or a merge request inside our example project.