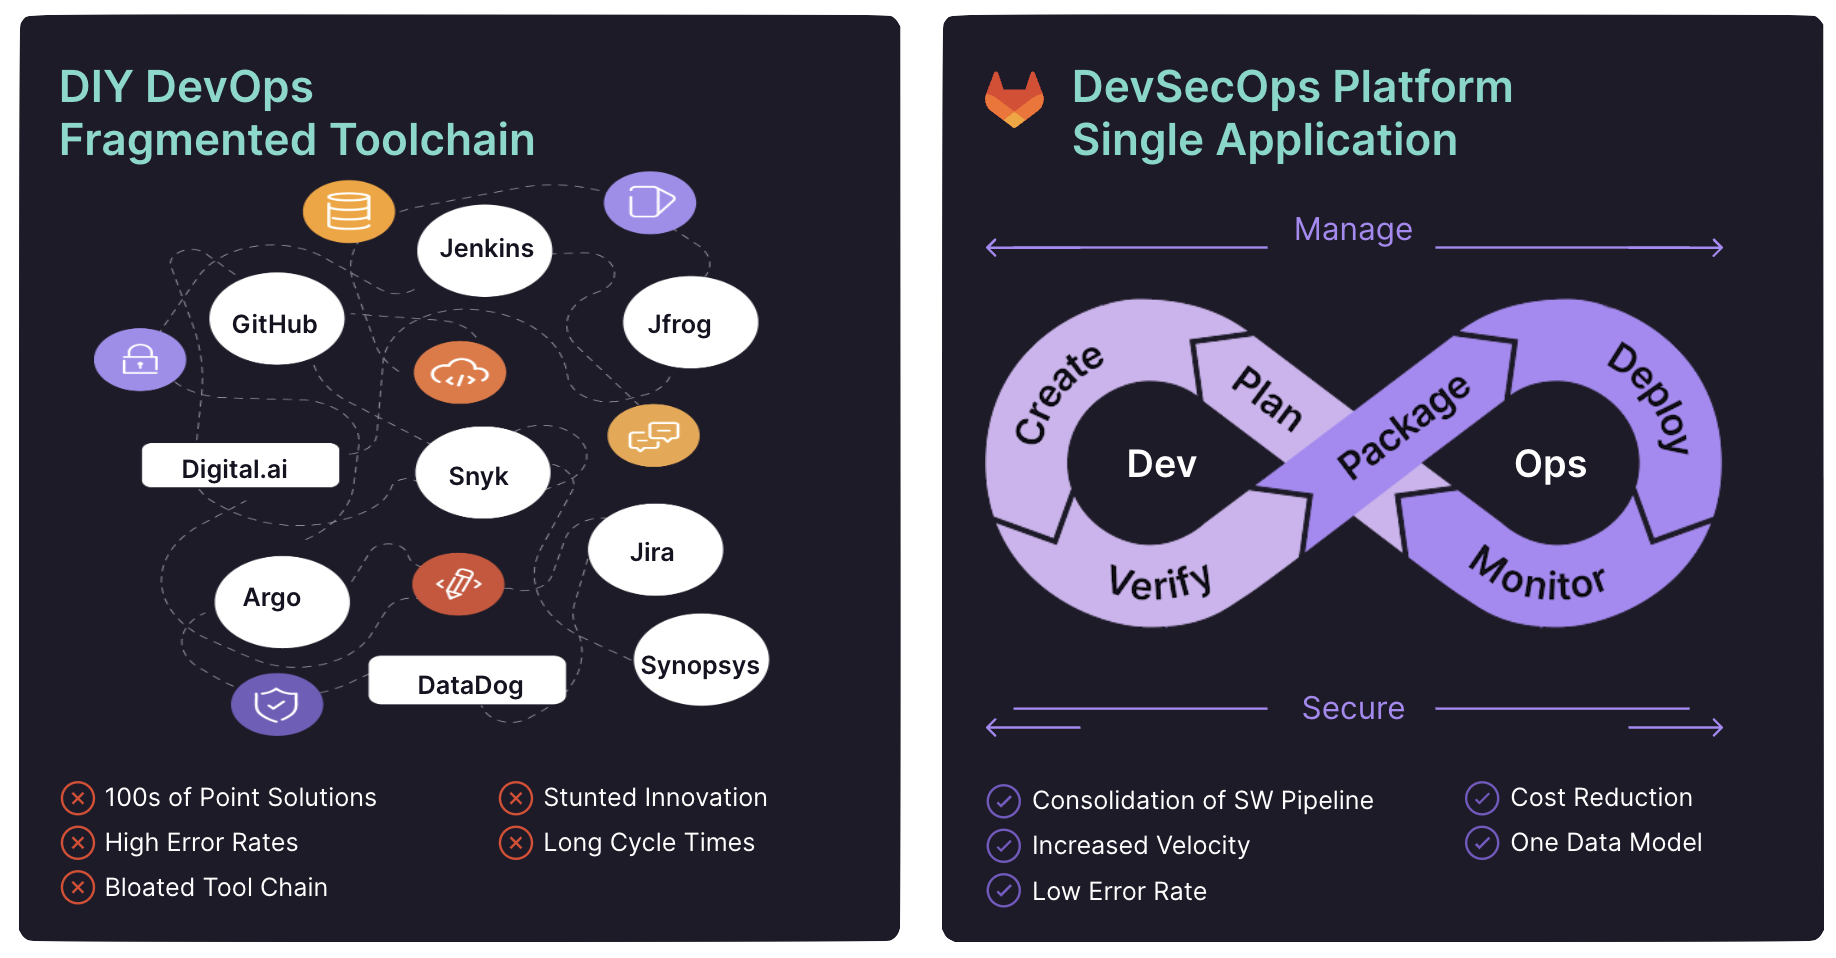
GitLab is the most comprehensive AI-powered DevSecOps platform. This means that GitLab provides everything needed to plan, develop, and deliver secure software faster, all within one tool.
Platforms take away the pains and struggles of integrating various tools (DIY DevOps) to enable the software development lifecycle (SDLC). Since Jenkins is not a platform, additional tools are required to complete the SDLC. This DIY DevOps approach introduces toolchain complexity, which creates the following drawbacks:
- Custom support is required for the integration and orchestration of tools
- Difficulty maintaining/upgrading/securing separate tools
- Inefficiency in measuring organizational transformation
- Poor developer experience
- Additional management/time/budget costs
- Loss of productivity
- Context switching and collaboration inefficiencies
For these reasons, many Jenkins teams are considering migrating to a DevSecOps platform. If you are looking for a more powerful, reliable, and secure solution, GitLab is your best option! GitLab is free to get started with and offers different subscription tiers based on the needs of your organization. To learn more about our offerings and features, check out our pricing page.
In this blog, you will learn:
- How to plan for a migration
- How to migrate repositories from other source code management (SCM) tools to GitLab
- How to migrate CI/CD pipelines from Jenkins to GitLab
- Additional migration considerations
Planning for a migration
Before starting a migration from another tool to GitLab CI/CD, you should begin by developing a migration plan. A migration plan is an important technical step for setting expectations. CI/CD tools differ in approach, structure, and technical specifics, meaning that migrations are not just 1:1 mappings of data. A migration plan will provide the following benefits:
- Sets and communicates a clear vision of what your migration goals are, which helps your users understand why the effort is worth it. The value is clear when the work is done, but people need to be aware while it’s in progress too.
- Provides sponsorship and alignment from the relevant leadership teams helps with the point above.
- Spends time educating users on what’s different.
- Finds ways to sequence or delay parts of the migration and prevent non-migrated (or partially migrated) states for too long.
- Documents advantages of the improvements that GitLab CI/CD offers, and updates your implementation as part of the transition.
A migration plan will allow you to put a process in place where you can slowly migrate to GitLab with minimal disruption. This may include running both Jenkins and GitLab, while certain projects are moved to GitLab and offloaded from Jenkins.
Defining a change management process
The migration plan should define an effective change management process. Developers, IT Operations, Cloud Administrators, Security, and Quality Engineers may not have experience with GitLab and they may not know why you or your leadership have decided to move in this direction.
The people this is impacting need to know:
- Why the change is being made
- What the future state looks like
- How the company intends to get there from here
- Where to go for more information or help
To this end, you should consider the following steps to manage change across these functional roles:
- Analyze the current state: Document the current state of processes. Gather metrics as a baseline. Identify what's working and not working with CI/CD by interviewing key team members. Document the challenges you uncover both quantitatively and qualitatively. You’re going to have to sell the vision and reason for the change, so the more clearly you can define the problem set, the easier it will be to gain buy-in from across the business.
- Establish a vision: Now that you have current pain points outlined quantitatively with baseline metrics and qualitatively (in the words of your team members), communicate a vision of the future state. Explain why it's important (tie this to business success metrics). Provide live and recorded demonstrations of what good looks like and compare it to the current state. Reinforce this message through multiple channels and media — chat groups, all-hands meetings, email notifications, banner notifications on GitLab, etc.
- Educate the workforce: Invest in GitLab CI/CD Training delivered by a GitLab expert. Measure knowledge acquisition and retention using GitLab Certifications.
- Communicate roadmap and resources: Communicate to your team members the intended timeline, available resources to help them transition, and community resources like chat groups, Q&A boards, or GitLab Influencer office hours so they can ask questions and get help. Bonus points for building a reward system to incentivize teams to transition early and share their experience with their peer application groups!
If you have these elements in place as you begin this transition, you will have a framework for success.
Establishing migration goals
Before performing a migration, you should have a good understanding of your goals and how to meet them. For example, some questions you should have answers to are as follows:
- What is your timeline to migrate?
- How is your Jenkins server currently configured?
- How many projects must be migrated?
- What is the complexity of your pipeline?
- Does it require external dependencies, multiple pipeline triggers, parallel builds, etc.?
- How/Where do you deploy your code?
- What is the release/review process for deploying code?
- Is it integrated into Jenkins, or a separate workflow triggered by Jenkins?
- Which build artifacts or binaries are required for pipeline success?
- Which plugins are used by jobs in Jenkins today?
- Which software is installed on the Jenkins agents?
- What SCM solution are you currently using?
- Are there any shared libraries in use within your Jenkins jobs?
- Which authentication method is used for Jenkins (Basic auth, LDAP/AD, SSO)?
- Are there other projects that you need to access from your pipeline?
- Are there credentials in Jenkins used to access outside services?
By answering these questions you’ll know how to proceed with the migration, how long it will take, and where to start. Once you have built a plan and are confident of the expectations and possible pitfalls, you can begin the migration process.
Prerequisites for migration
Once you have created a migration plan and addressed all the expectations of the migration, you can begin to set up GitLab. Some of the prerequisites suggested for migration are as follows:
- Get familiar with GitLab. Read about the key GitLab CI/CD features.
- Follow tutorials to create your first GitLab pipeline and more complex pipelines that build, test, and deploy a static site.
- Review the .gitlab-ci.yml keyword reference.
- Set up and configure GitLab.
- Test your GitLab instance.
Once you understand GitLab and an instance has been configured, you can work through your migration plan and begin to move projects from Jenkins over to GitLab. Make sure your GitLab instance has been properly set up using GitLab best practices and reference architectures.
Migrating repositories to GitLab
One of the main drawbacks of Jenkins is that it does not provide an SCM solution. If you are using Jenkins, your code must be stored in a separate SCM solution which Jenkins must have access to. Because GitLab has built-in SCM, migrating away from Jenkins also allows you to migrate from the SCM solution you were leveraging, bringing forth an additional reduction in costs.
GitLab provides tools to allow you to easily move your repository and its metadata into GitLab. The following importers are included to assist in migrating your projects to GitLab:
- GitHub
- Another GitLab instance
- Bitbucket Cloud
- Bitbucket Server
- FogBugz
- Gitea
- Jira (Issues only)
- Repo by manifest file
- Repo by URL
Each importer imports different data from a project. Read the import and migrate projects documentation to learn more about the provided importers to see what data is migrated to GitLab. Additionally, you can automate group and project import and build a custom solution to further suit the needs of your organization:
How to migrate a repository
Migrating a repository to GitLab is easy using our built-in importers. In this example, I’ll show how to copy a repo from GitHub to GitLab along with its resources (Issues, Pull Requests, Milestones, etc.). In order to migrate a repository from another GitHub to GitLab, you can follow the steps below:
- On the left sidebar, at the top, select Create new (+).
- Select New project/repository under the In GitLab section.
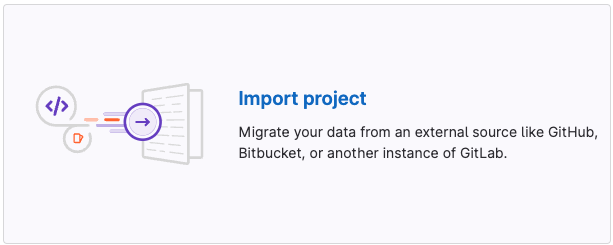
- Select Import project.
- Click the GitHub button.
- If using GitLab self-managed, then you must enable the GitHub importer.
- Note that other importers can be initiated in the same way.
- Now you can either:
- Authorize with GitHub OAuth: Select Authorize with GitHub.
- Or, use a GitHub personal access token:
- Go to https://github.com/settings/tokens/new.
- In the Note field, enter a token description.
- Select the repo scope.
- Optionally to import collaborators, select the read:org scope.
- Click the Generate token button.
- On the GitLab import page, in the Personal Access Token field, paste the GitHub personal access token.
- Click the Authenticate button.
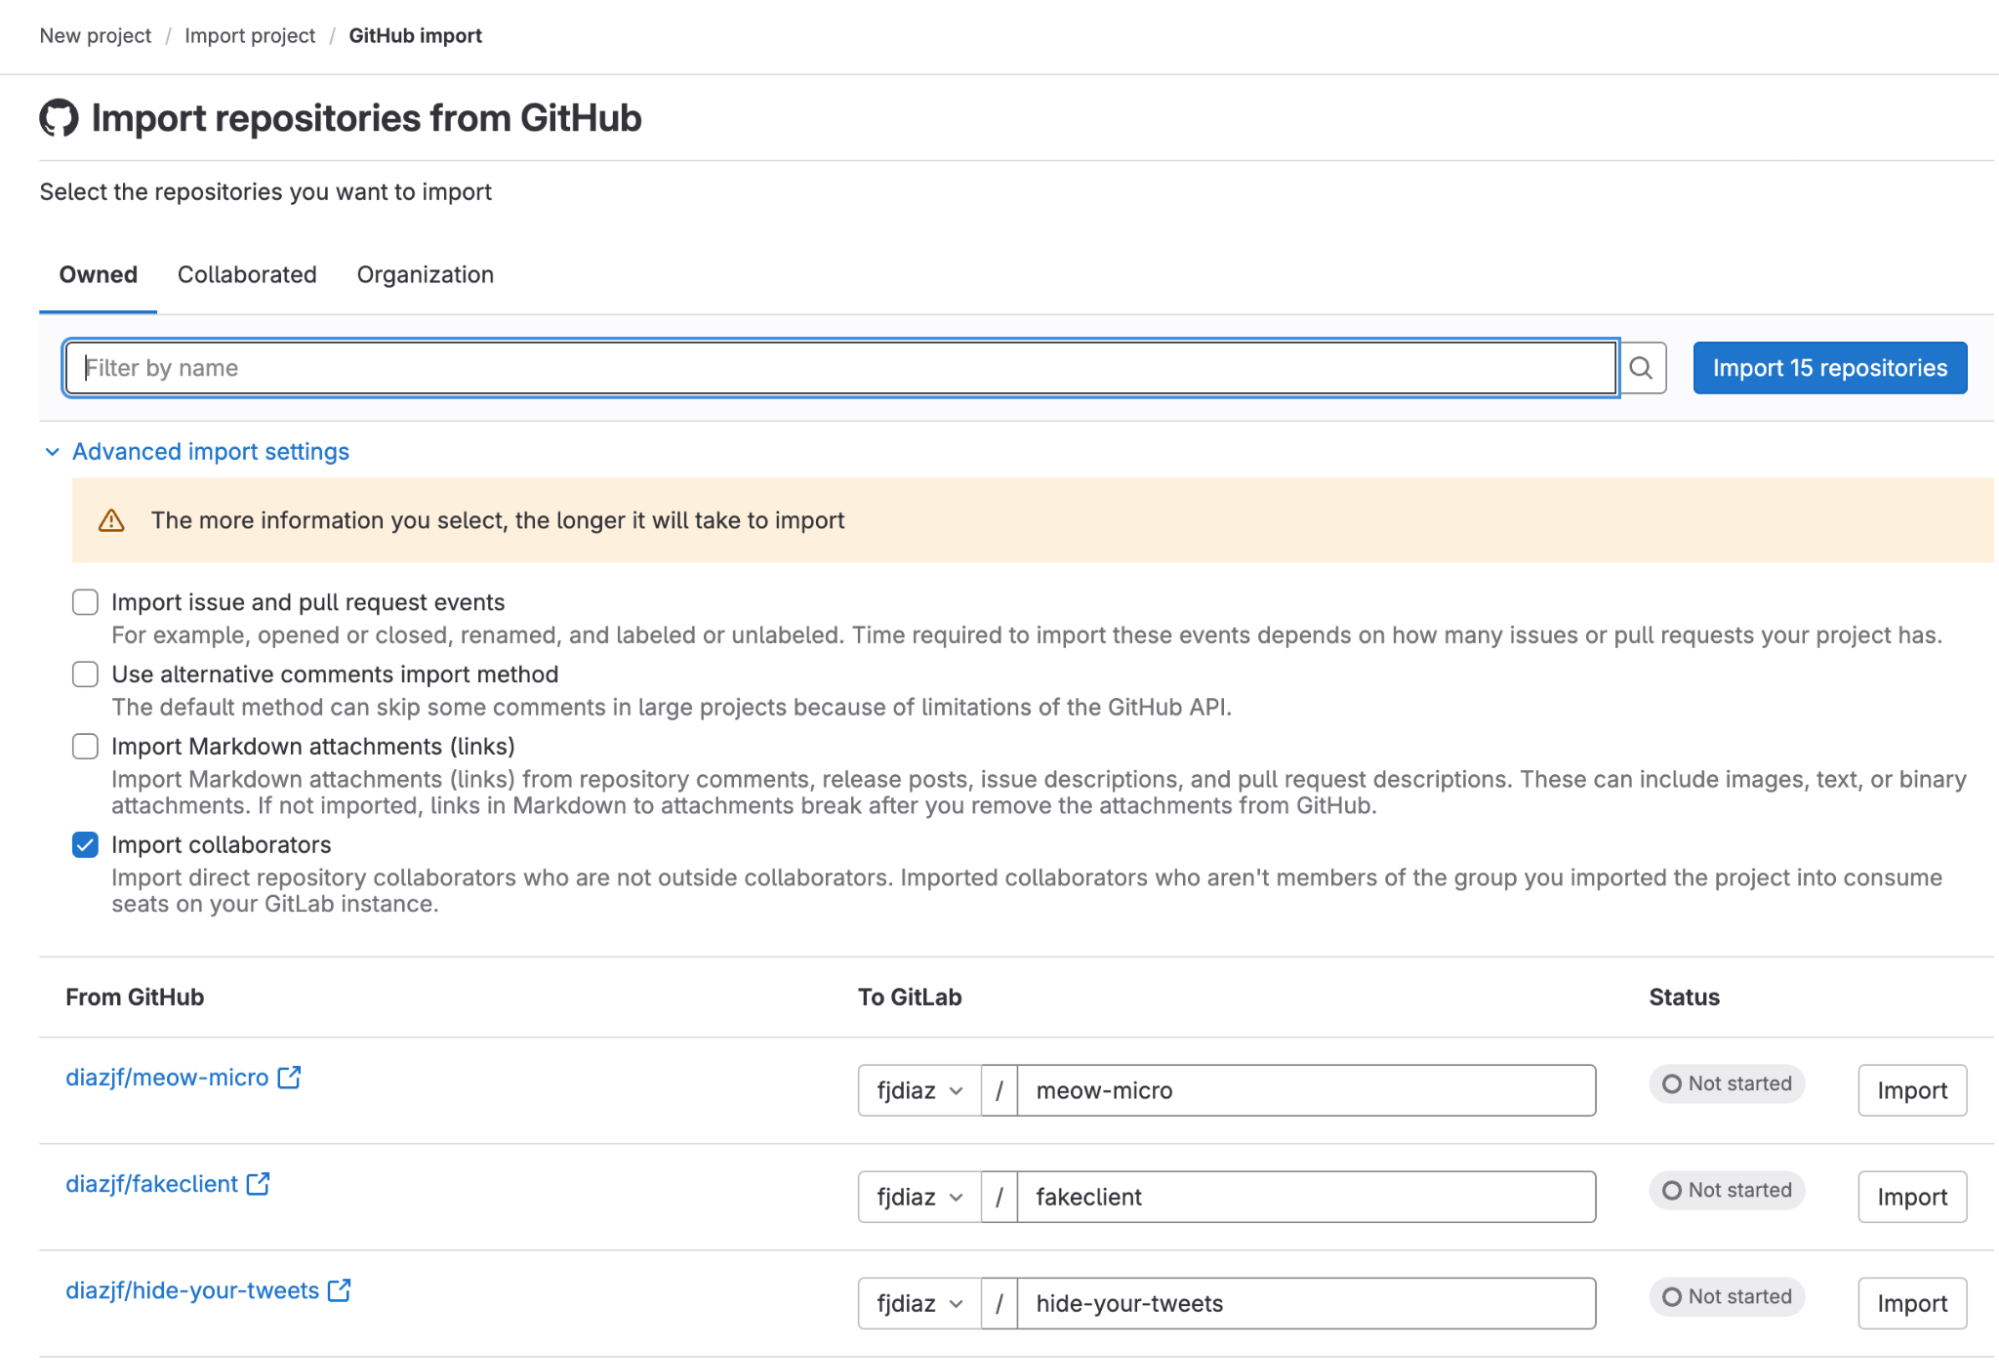
- Select the items you wish to migrate.
- Select the projects you wish to migrate and to where.
- Press the Import button.
Now you should have the imported project in your workspace. For additional guidance on migrating from GitHub to GitLab you can watch this video:
Once you have completed the repository migration, you can set your Jenkins pipeline to leverage the Jenkinsfile within GitLab. This can be done by setting the repository URL via to your newly imported project via the Jenkin pipeline configuration menu:
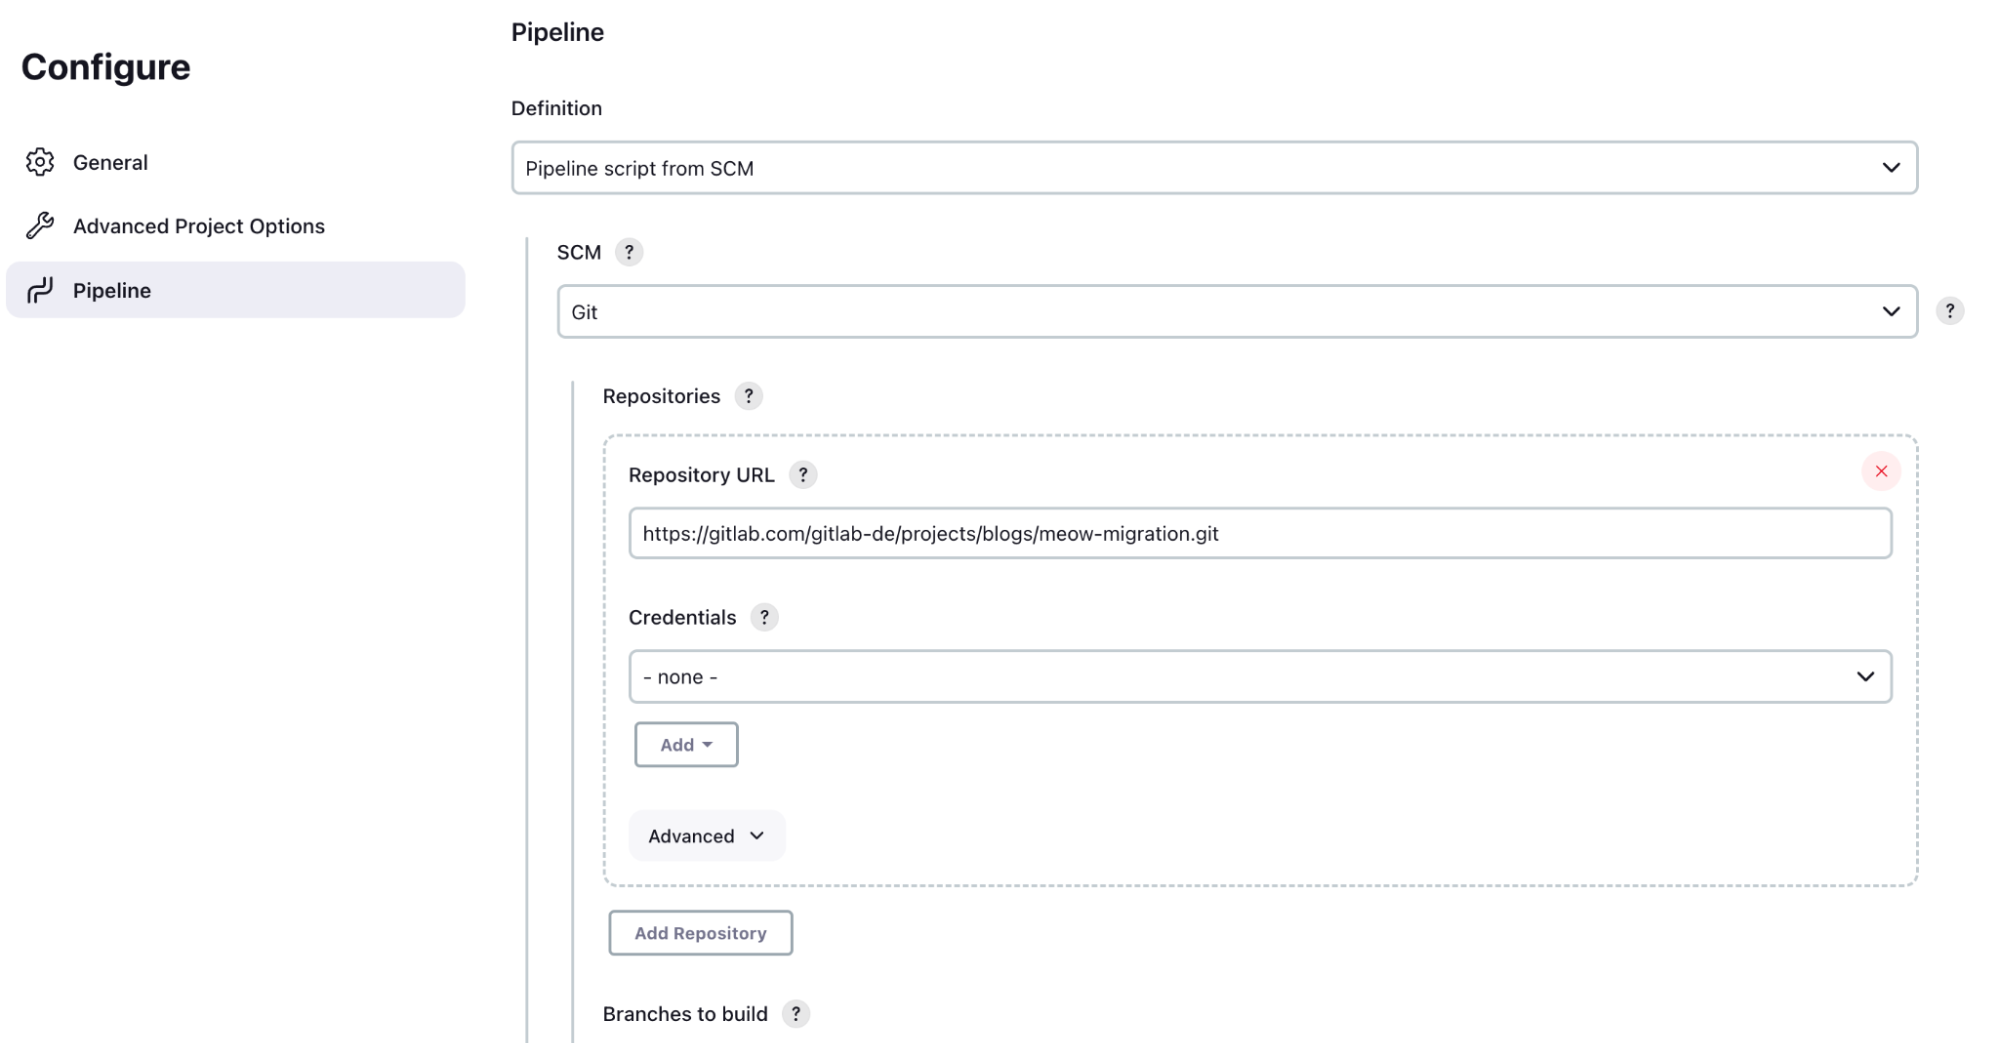
This is useful for the initial repo migration phase and allows you to use both Jenkins and GitLab in parallel, preventing service disruptions while you work on migrating the CI/CD functionality.
Additionally, you can leverage the GitLab Jenkins plugin to assist with migration. This plugin allows GitLab to trigger and obtain the status of Jenkins builds.
Migrating CI/CD pipelines
Once you have migrated your repositories to GitLab, you can proceed to migrate your Jenkins pipelines to GitLab. This process can be fairly straightforward, but requires an understanding of both Jenkins and GitLab concepts and syntax.
Jenkins provides two different types of syntax for defining pipelines, Declarative and Scripted. In this guide we will be covering migrating from Declarative pipelines since they are the most commonly used.
Step-by-step pipeline migration
In this tutorial we will analyze a Jenkinsfile (Groovy) alongside a GitLab CI/CD configuration file (YAML) that builds, tests, and deploys a microservice written in Golang. We will then proceed to enable the pipeline within GitLab and see its results. The pipeline will:
- Use the golang container image with the alpine tag
- Run a job for building the Golang code into an executable binary
- Stores the built executable as an artifact
- Run a job to run unit tests
- Run a job to deploy to staging
- Only executes if the commit targets the staging branch
- Starts after the test stage succeeds
- Uses the built executable artifact from the earlier job
Below you can see Jenkins and GitLab pipeline definitions along with descriptive comments. You can see the pipeline in action in the Meow Migration project.
Let's take a look at a Jenkinsfile written in Groovy:
// The top-level of the declarative
// pipeline.
pipeline {

  // Defines the default agent to use
  // when it is not explicitly defined
  // in a job.
    agent any

  // Defines the stages that will run
  // in numerical order. Each stage
  // only runs one job.
    stages {

    // Defines the name of the stage
        stage('build') {
      // Defines the container image to
      // use for this job, overwriting
      // the default 'agent any'.
      // The Jenkins Docker plugin
      // must be configured for this
      // to run.
            agent { docker 'golang:alpine' }

      // Defines the sequence of steps
      // to execute when the stage is
      // run.
            steps {
                sh 'go build -o bin/meow-micro'
                sh 'chmod +x bin/meow-micro'
            }

      // The steps to run after the
      // stage completes.
            post {
              always {

        // Stores the stage artifacts
        // generated for use in another
        // job.
                archiveArtifacts artifacts: 'bin/meow-micro'
                onlyIfSuccessful: true
              }
            }
        }

    stage('test') {
            agent { docker 'golang:alpine' }
            steps {
                sh 'go test .'
            }
        }

        stage('deploy') {
      // Defines conditions which must
      // be met in order for the job to
      // execute. In this case the
      // deploy job will only run on the
      // staging branch.
            when {
              branch 'staging'
            }
            steps {
                echo 'Deploying meow-micro to staging'
        // Uses the artifact stored in
        // the build stage.
                sh './bin/meow-micro'
            }
        }
    }
}
Now, let's see how to create the same functionality in GitLab:
# Defines the default image to use
# when it is not explicitly defined in
# a job.
default:
  image: alpine:latest

# Defines the order to run the stages.
# Each stage can have multiple jobs.
stages:
  - build
  - test
  - deploy

# Defines the name of the job
create-binary:
 # Defines the stage the job will run in
  stage: build
 # Defines the container image to use
 # for this job, overwriting default.
  image: golang:alpine
 # Defines the sequence of steps to
 # execute when the job is run.
  script:
    - go build -o bin/meow-micro
    - chmod +x bin/meow-micro
 # Stores the job artifacts generated
 # for use in another job.
  artifacts:
    paths:
      - bin/meow-micro
    expire_in: 1 week

unit-tests:
  stage: test
  image: golang:alpine
  script:
    - go test .
 # Defines commands to run after the
 # job.
 after_script:
  - echo "Tests Complete"

staging-deploy:
  stage: deploy
 # Defines commands to run before the
 # actual job.
  before_script:
    - apk update
  script:
    - echo "Deploying meow-micro to staging environment"
    - ./bin/meow-micro
 # Defines conditions which must be met
 # in order for this job to execute. In
 # this case the staging-deploy job will
 # only run on the staging branch.
  rules:
    - if: $CI_COMMIT_BRANCH == 'staging'
 # Allows the artifact stored in the
 # build job to be used in this job.
  artifacts:
    paths:
      - bin/meow-micro
As you may have observed, there are many similarities between both Jenkins and GitLab in terms of syntax, making pipeline migration straightforward. While the above provides a basic example, be sure to read the comprehensive list of feature and concept comparisons between both tools.
Now that we have an understanding of how to map Jenkins to GitLab we can start creating a pipeline with the same functionality in GitLab. In order to perform the migration of CI/CD, you can go through the following steps:
1. Open the repository you migrated to GitLab in the section above.
- On the left sidebar, at the top, select Search or go to….
- Locate your project.
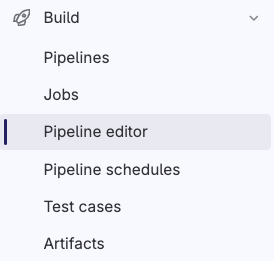
2. Open the Pipeline Editor.
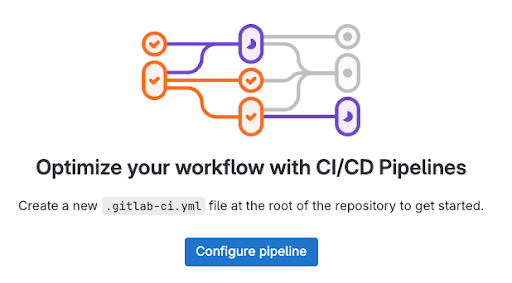
- On the left sidebar, Select Build > Pipeline editor.
- Click the Configure pipeline button.
3. Populate the .gitlab-ci.yml.
- Add the GitLab CI pipeline code.
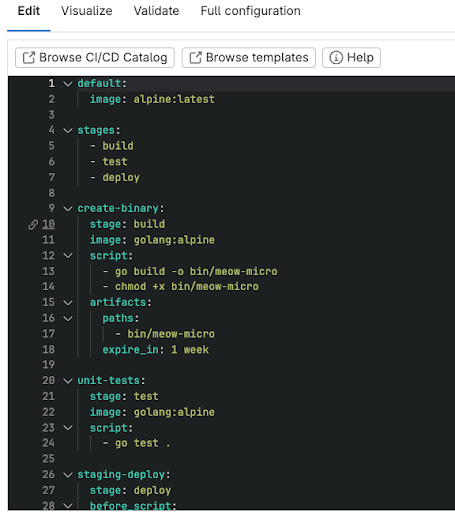
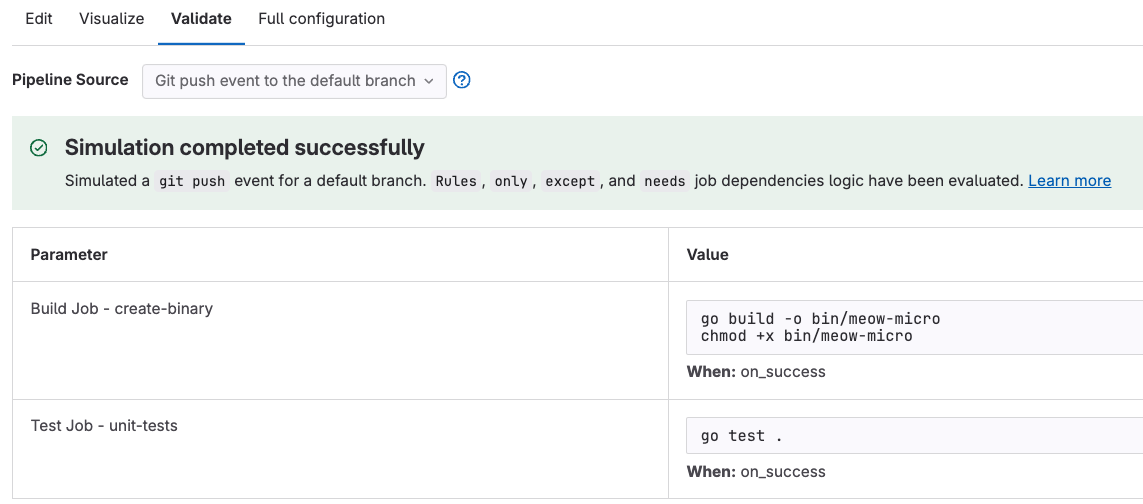
- Verify that the syntax is correct.
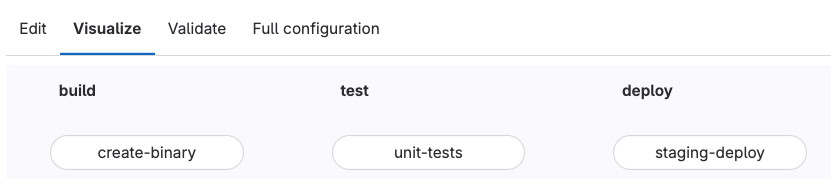
- Visualize the pipeline.
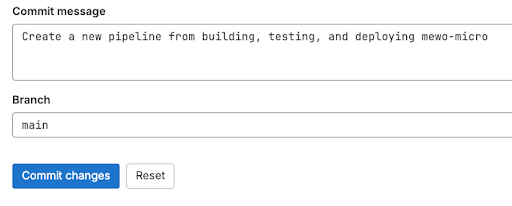
4. Commit the file to the main branch.
- Add a commit message.
- Make sure the branch is set to main.
- Click the Commit changes button.
Once the file has been merged, the defined pipeline will kick off. You can go back to your project and view the pipeline in action by selecting it under your project’s Build > Pipelines page. Since it was run on the main branch, you will see only the create-binary and unit-tests jobs; the staging-deploy job only runs on the staging branch.
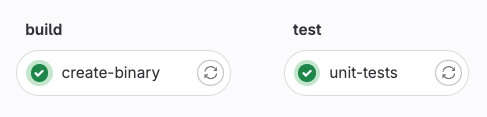
If we create a staging branch, we can see that the following pipeline is initiated.

When clicking on a job we can see its output:
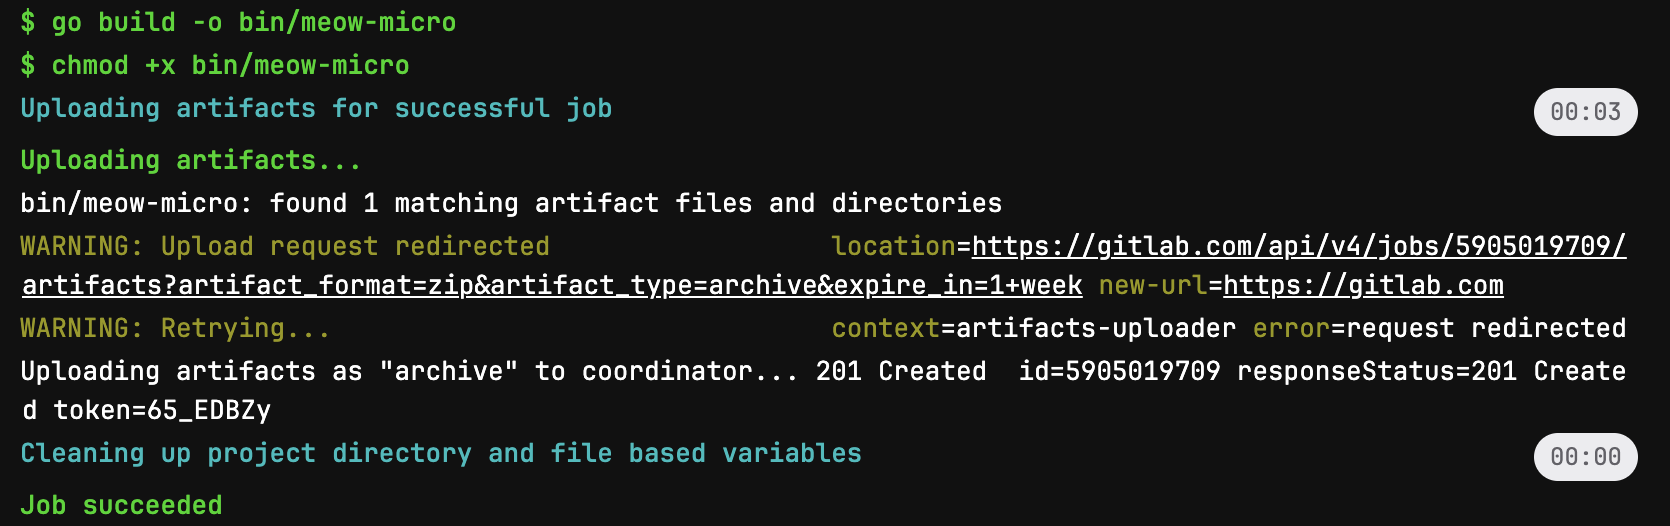
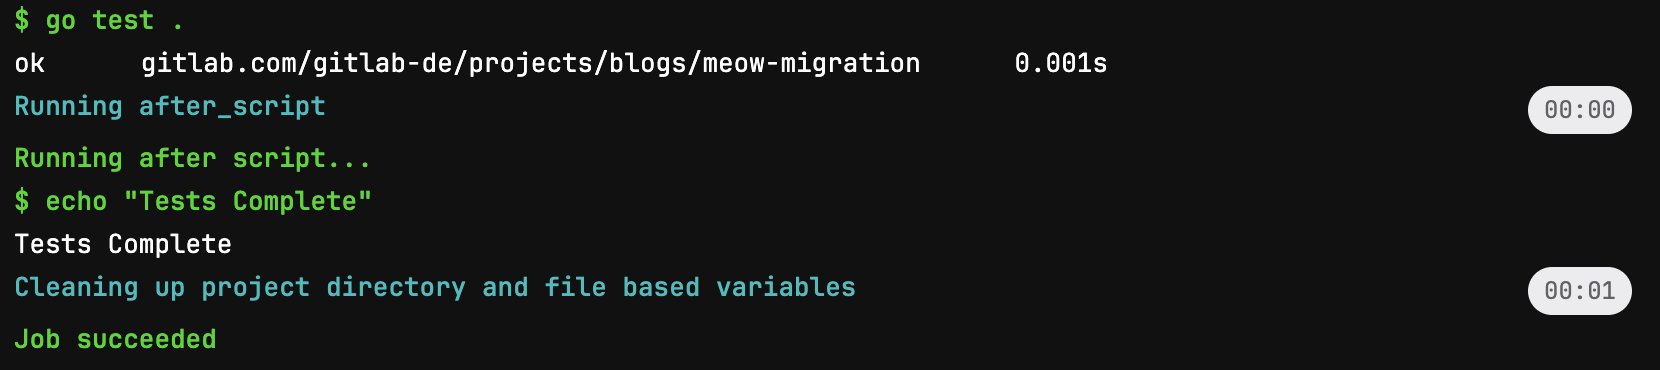
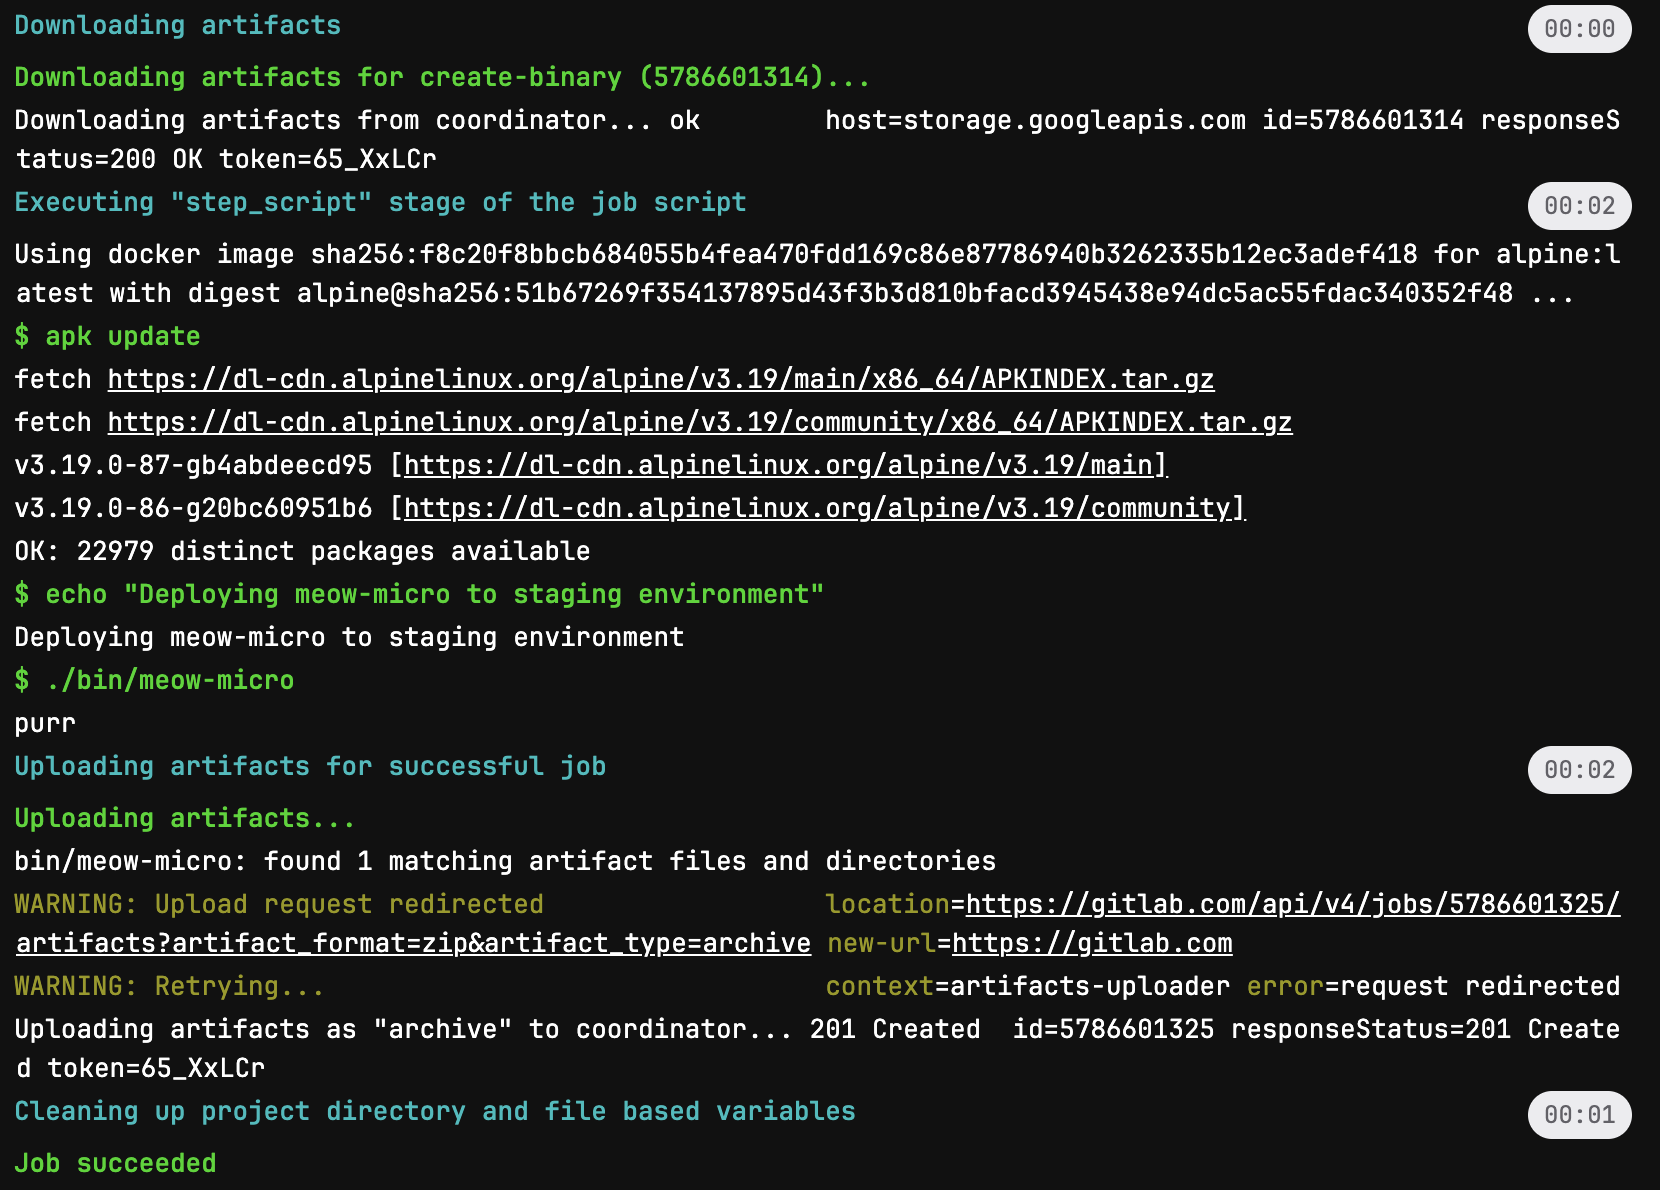
You can see how the artifact is stored in the create-binary job and used in the staging-deploy job. And that's how easy it is to migrate a pipeline from Jenkins to GitLab!
Additional considerations when migrating
Some helpful considerations we’ve found to make the deployment process more straightforward are as follows:
-
Don't try to replicate tasks into GitLab jobs 1:1. Take some inventory and time to understand what the current pipeline is doing, and which problem it is solving.
-
Some Jenkins jobs may be too complex to move over to GitLab right away. For this reason, it may be beneficial to use the GitLab Jenkins plugin to initiate Jenkins pipelines and view their results directly from GitLab. This allows you to slowly migrate certain actions to GitLab until the whole pipeline can be moved.
-
Implement security scanners and code quality using built-in templates provided by GitLab from the start. This will allow you to shift security left, reducing the potential for a breach. Don't overcomplicate the CI/CD config and try to use every feature advantage at once. Modularize code and implement it in small iterations.
-
Implement monitoring and governance from the start.
-
Understand that the GitLab Runner (Go) might behave differently than the Jenkins agent (Java). CPU usage and memory consumption might differ — make sure to compare over time.
-
Consider investing in auto-scaling mechanisms, and shut down unneeded resources on the weekend, or outside of working hours.
-
Modernize application development by containerizing your jobs. Jenkins jobs are not executed on a container today but on a Jenkins agent running as a VM.
While this list is not exhaustive, it does provide a good start on some considerations to take note of. If you need additional help, GitLab provides professional services to support your migration journey.
Learn more
Thanks for reading! I hope this guide has helped you get a clear understanding of why and how to migrate from Jenkins to GitLab. Not convinced? Give GitLab a try with our free trial, and see the value of a DevSecOps platform!
Here are a few resources where you can learn more about GitLab, the benefits of using a DevSecOps platform, and migrating from Jenkins: