Published on: August 19, 2015
5 min read
Continuous Integration of GitLab-Hosted Docker Projects with Quay.io
Continuous Integration of GitLab-Hosted Docker Projects with Quay.io

This is a guest post by CoreOS.
The proliferation of containerization via systems such as Docker and rkt has introduced many benefits for application developers worldwide. However, this trend towards running applications in containers has also introduced hurdles when trying to ensure continuous integration of applications. Developers who depend upon continuous integration are faced with a new problem: How to ensure they always have a fully up-to-date container image of their source code, built every time they push to source control, and, available in their container registry immediately.
To help developers be more efficient working in teams and ensure they are developing on the most up-to-date version of their container images, we at Quay.io developed a continuous building pipeline. Quay.io transforms source code found in GitLab and other SCMs into Docker container images on every push. Quay.io, delivered by CoreOS, is a secure and easy way to build, manage, store and serve Docker container images.
By bringing Quay.io together with GitLab, users are able to develop easier and faster thanks to seamless syncing of their code to container images, helping to identify problems more quickly and easily test their updated container images in response to changes.
How to set up a GitLab project with a Dockerfile
Getting started with GitLab and Quay.io can be done in a few simple steps.
Sign in to GitLab
First, sign in to GitLab with your account. Quay.io will request access to your GitLab repository later on in this process.
Sign in to Quay.io
Sign into Quay.io with either a username and password, or GitHub/Google. If you do not yet have a Quay.io account, an account with a 30-day free trial can be created here: https://quay.io/plans.
Use an existing container repository in Quay.io
If you have an existing container repository in Quay.io, click on the repository you’d like to automatically build, and click the builds tab found on the left-hand side of the repository screen:
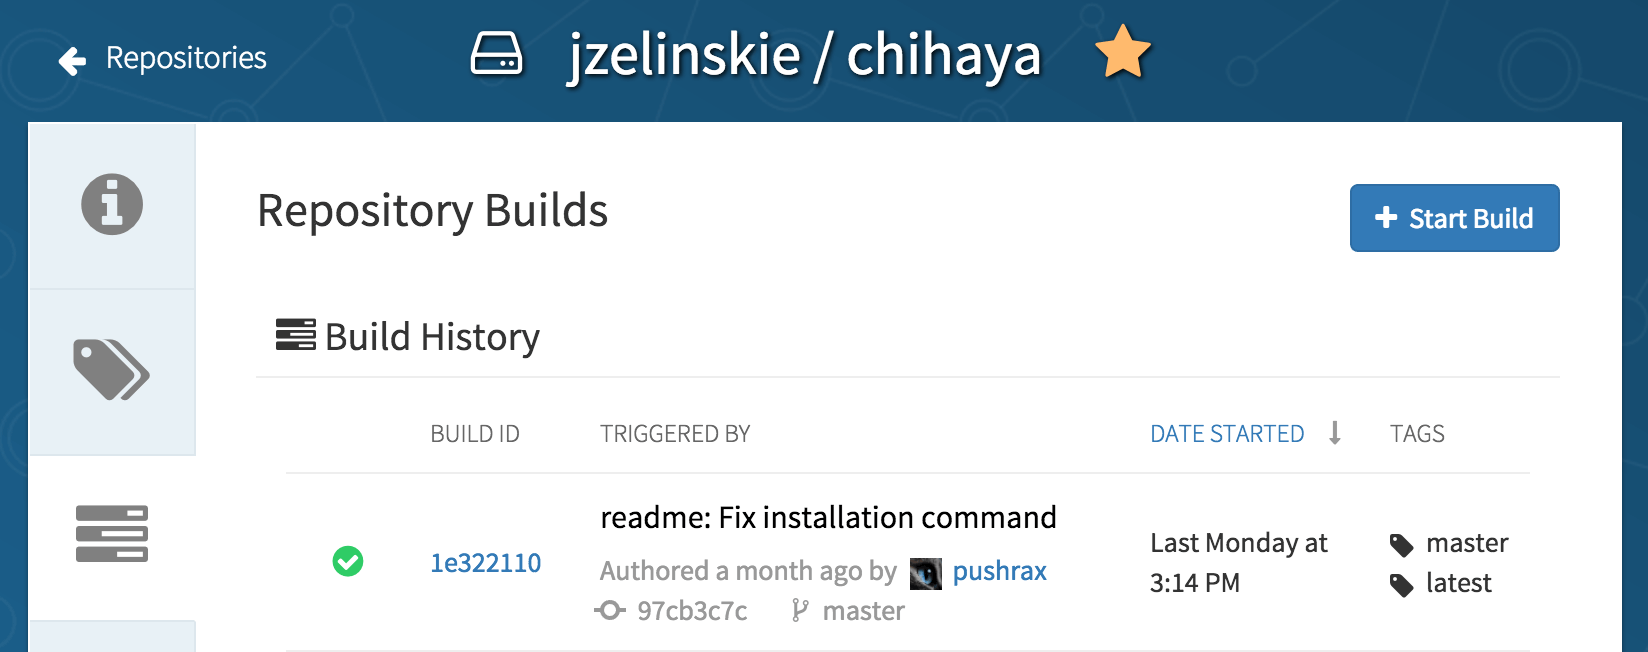
From here, scroll to the bottom of the tab and click the “Create Build Trigger” button. You will be presented with a menu showing the various source control management systems supported by Quay.io. Choose GitLab Repository Push:

Create a new container repository in Quay.io
If you do not yet have a container repository on Quay.io, follow these instructions to create a new repository.
Click the + icon next to your username in the upper right hand corner of Quay.io, and click New Repository:

You will be asked for a new name for the repository, whether to make it public or private, and how to initialize the repository.
Choose Link to a GitLab Repository Push for the Initialize Repository option:
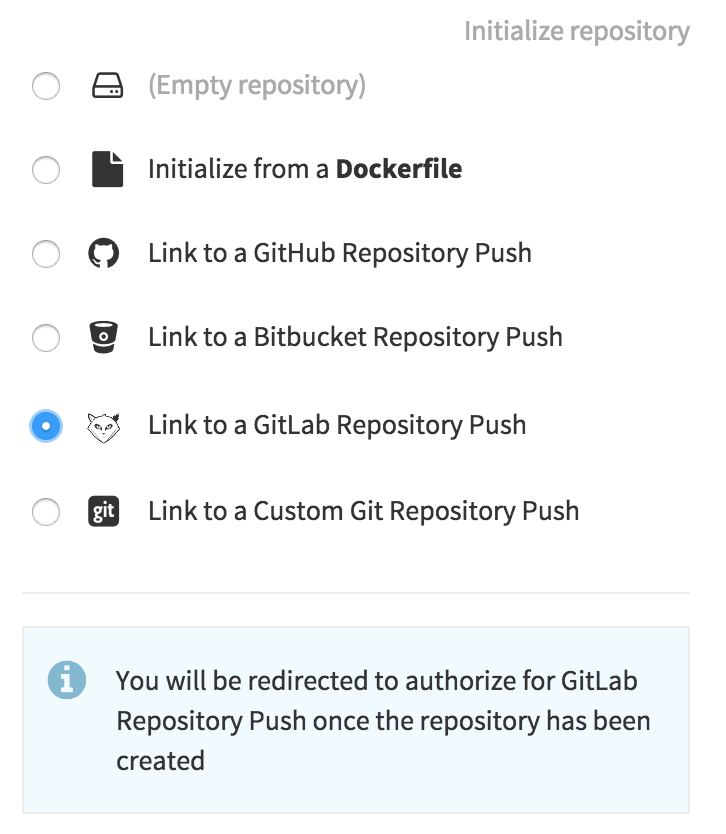
Allow Quay.io access to GitLab
Once the above process has completed, you will be redirected to GitLab to begin the build trigger setup process:

Click Authorize to grant Quay.io access to your GitLab repositories.
Select the GitLab repository to build
After authorization, GitLab will redirect you back to Quay.io, which (after a few moments) will display the trigger setup dialog:
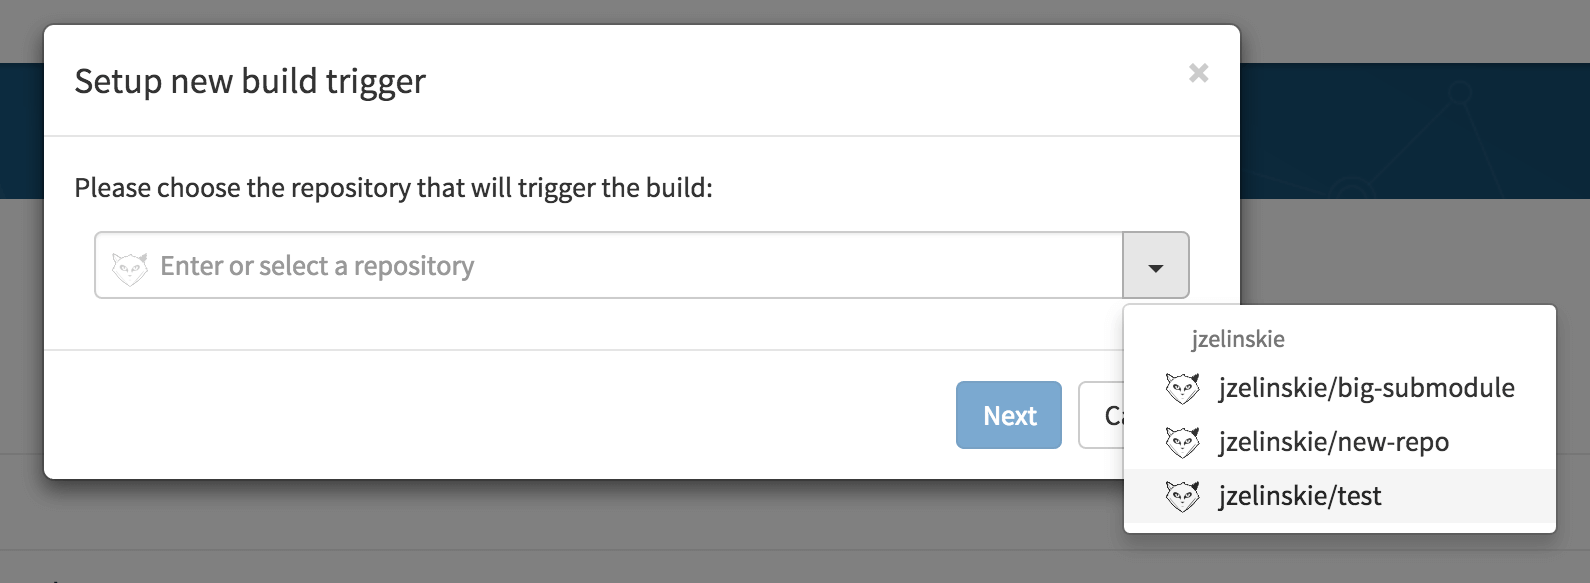
Choose a GitLab repository to build (or enter the repository in the repository box) and click Next.
Finish GitLab trigger setup
You will be asked for other information pertaining to the build, such as the subdirectory that contains the Dockerfile (usually this is just “/”), what branches/tags to build (by default: everything) and whether to use a Robot Account as pull credentials (only required if you have a private base image on Quay.io).
Once this information is entered, the build trigger will be set up on GitLab:
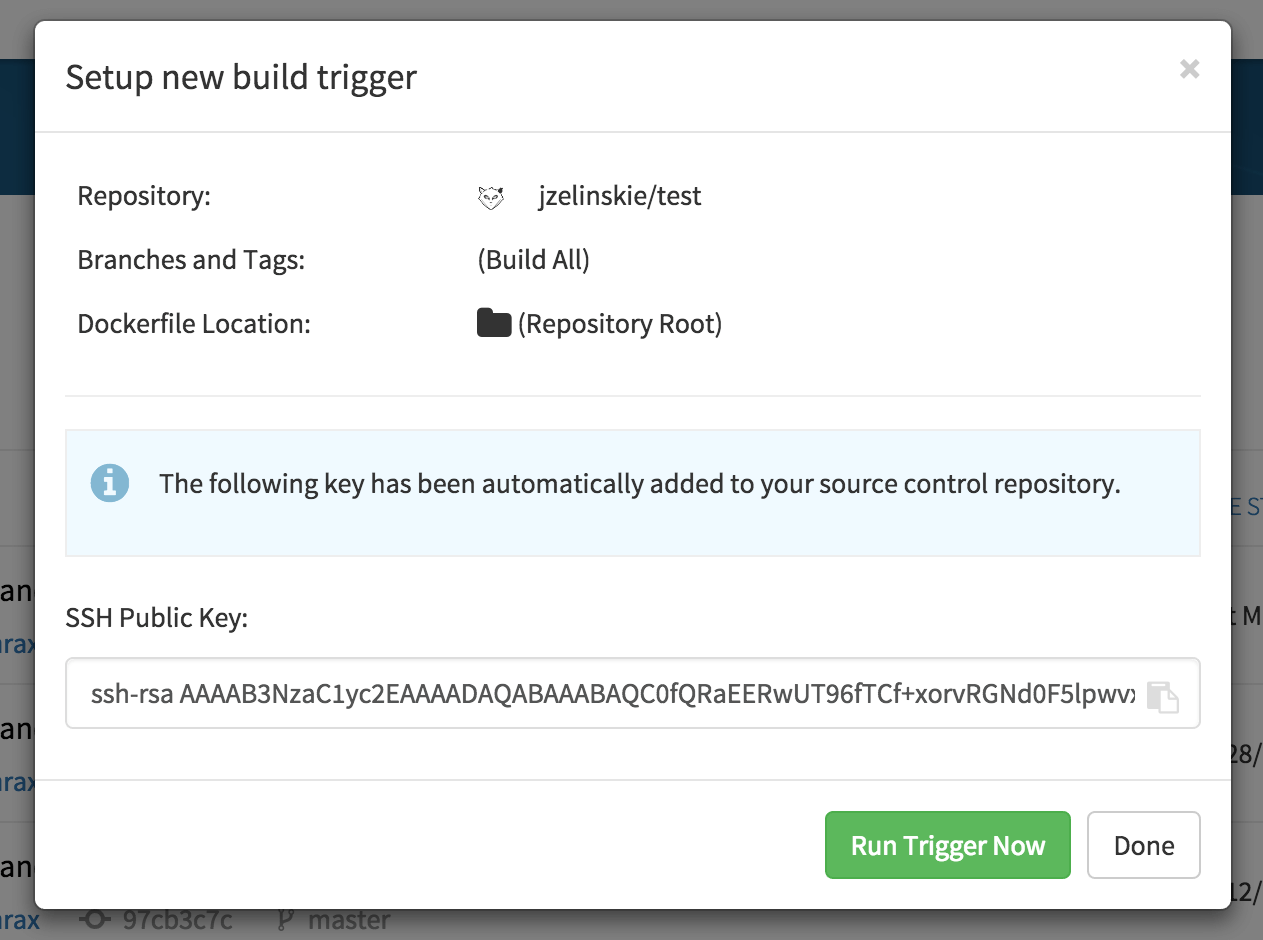
From this point forward, any pushes to your GitLab repository will immediately start a build on Quay.io of the commit pushed.
If you want to view a build without a GitLab push, you can click Run Trigger Now to have Quay.io pull the latest commit from GitLab and begin a build to populate your container repository.
Monitor GitLab builds on Quay.io
All builds triggered from GitLab can be found under the builds tab in the repository page. Each build shows its status, the commit information and links to the commit itself on GitLab:

Clicking on the build ID will take you to a page to view the logs of the build in real-time:
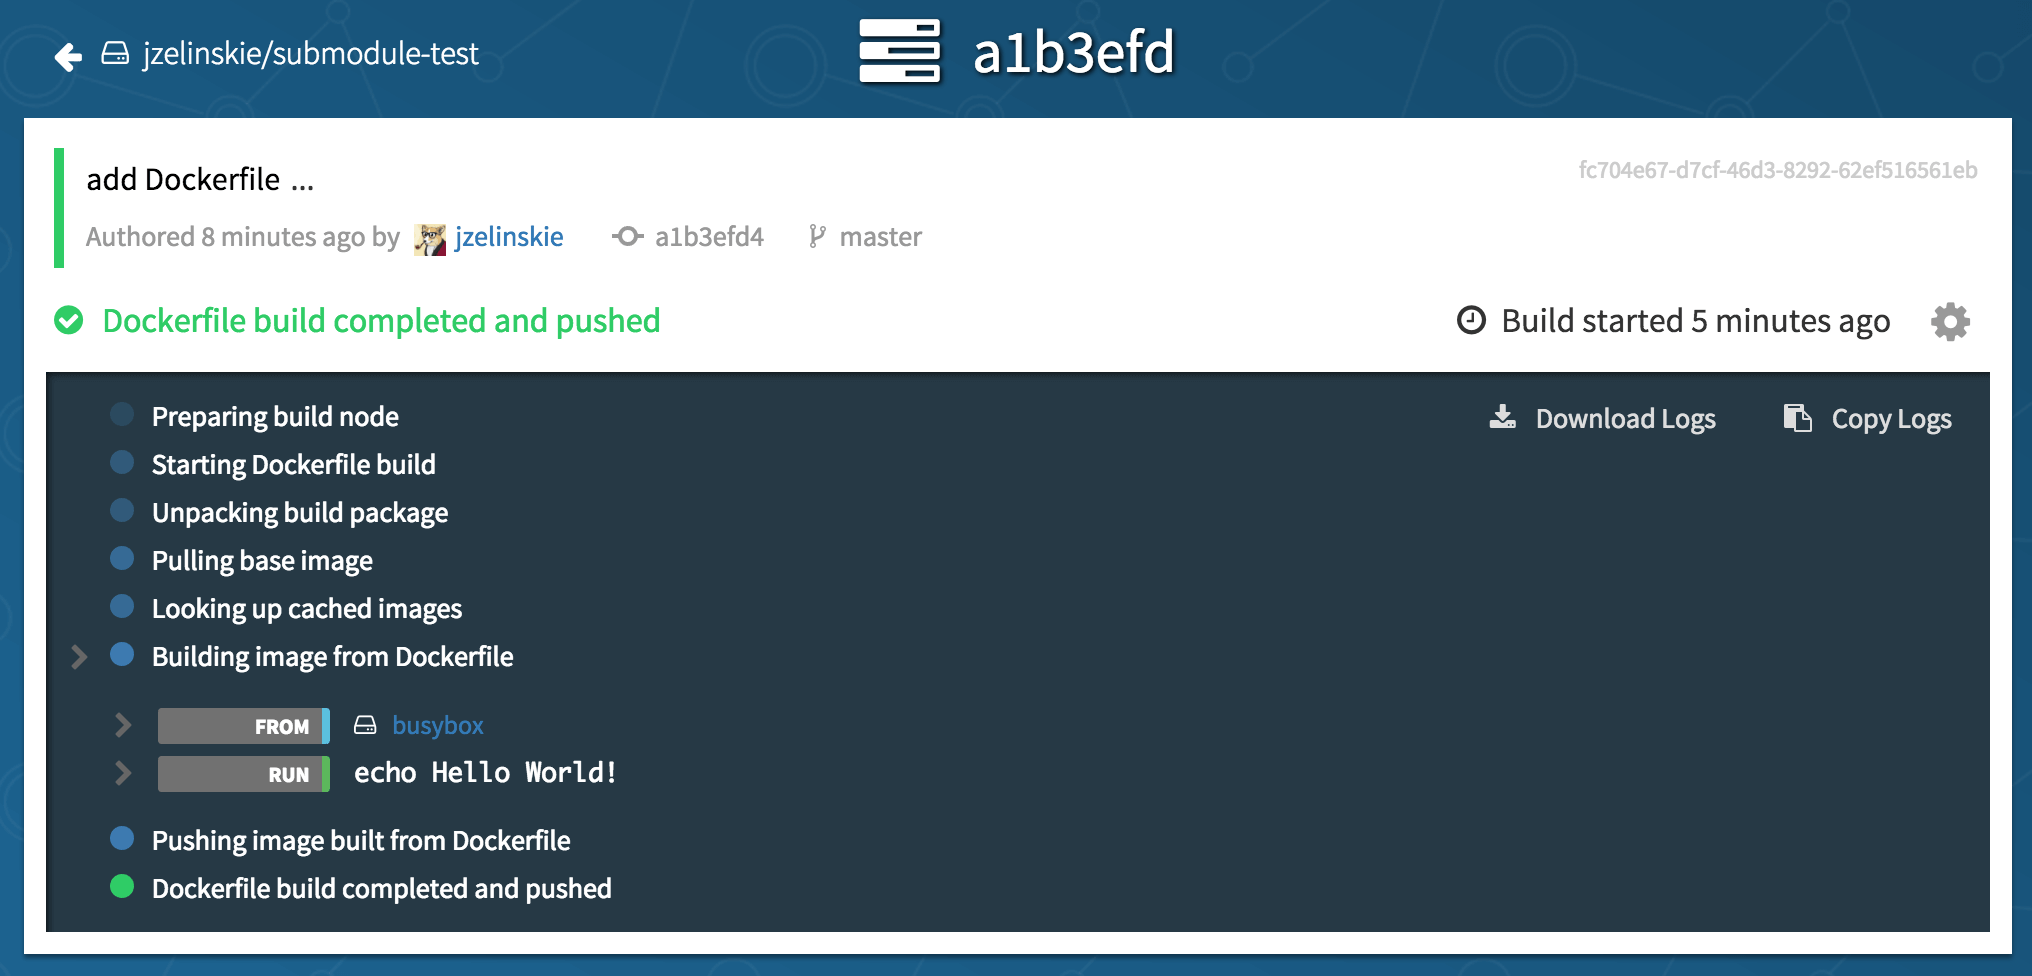
The logs for each step can be displayed by clicking on the > arrow next to the step, to expands it.
GitLab + Quay.io = 👍
As we’ve seen, setting up a continuous integration pipeline from GitLab to Quay.io can be done in a few short and easy steps. The combination of these two powerful services allows developers to be confident that when source code is updated, there will be a fully updated Docker container available for testing and usage with a few short minutes.
To get started with Quay.io, sign up for a free 30-day trial or contact us if you have any questions.
Want to build GitLab repositories behind your firewall? We got you covered with our on-premises Quay.io Enterprise Registry.

