
is now in public beta!
Published on: January 30, 2020
5 min read
One simple trick to make your screenshots 80% smaller
How to compress your screenshots automatically with pngquant and zopfli
Updated 2020-02-03: Added macOS Automator instructions.
I take screenshots every day to share with others in issues, blog posts, email, and Slack. I like them to be crisp, high resolution, and importantly the image file size should be as small as possible. Keeping the file size small means they are both fast to upload and to download. This is particularly important when I am writing a blog post or documentation.
Below is a quick primer on PNG compression, and instructions for completely automating the process.
When you capture a screenshot on your Mac, the image will be saved in the PNG-32 format, with support for 16 million distinct colors and transparency. This means that the screenshot will perfectly capture every pixel on your screen, but having four 8-bit channels for red, green, blue and alpha (transparency) for every pixel makes the file very large. If you're interested, you can verify this yourself using pngcheck.
In practice, the subjects of my screenshots are buttons and forms, not photographs. While you might want 16 million colors for photos, we don't need them for screenshots, so we can take advantage of the PNG-8 format with its more compact 256 color palette.
Lossy Compression: Color Quantization
The first step is to reduce the color palette of the screenshot. This is a type of lossy compression called color quantization, which will reduce the number of distinct colors in the image.
The pngquant command line utility is the perfect tool for this job, and if you've used the popular ImageAlpha tool, you've already used the pngquant library.
# Install pngquant using Homebrew

brew install pngquant

# Quantize 32-bit RGBA PNG to 8-bit (or smaller) RGBA-palette
# pngquant [number of colors] [options] input.png
#   --skip-if-larger  only save converted file if they're smaller than original
#   --strip           remove optional metadata
#   --ext=.png        set output filename to be same as input filename
#   --force           overwrite existing output files

pngquant 256 --skip-if-larger --strip --ext=.png --force example.png
The screenshots below illustrate different levels of palette size reduction.
| PNG-32 (134 KB) | 256 colors (42 KB) | 128 colors (39 KB) | 64 colors (38 KB) |
|---|---|---|---|
 |
 |
 |
 |
I've observed for most screenshots you can comfortably reduce the color palette to as few as 64 colors before the difference in image quality becomes noticeable. If you frequently take screenshots of gradients or more complex images, you may want to stick with 256 colors to avoid noticeable artifacts.
Lossless Compression: DEFLATE
The PNG image file format uses DEFLATE compression internally for an added layer of lossless compression, but most PNG libraries do not implement aggressive lossless compression. This provides another opportunity to reduce the file size further.
In 2013, Google released zopfli, which claimed to improve compression by 3-8% compared to zlib. The trade off for this improvement: waiting an extra 1-2 seconds. (There is no decompression penalty when viewing the compressed image).
# Install zopfli using Homebrew, which includes zopflipng

brew install zopfli

# Optimize PNG compression
# zopflipng [options] input.png output.png
#   -y  do not ask about overwriting files
zopflipng -y example.png example.png
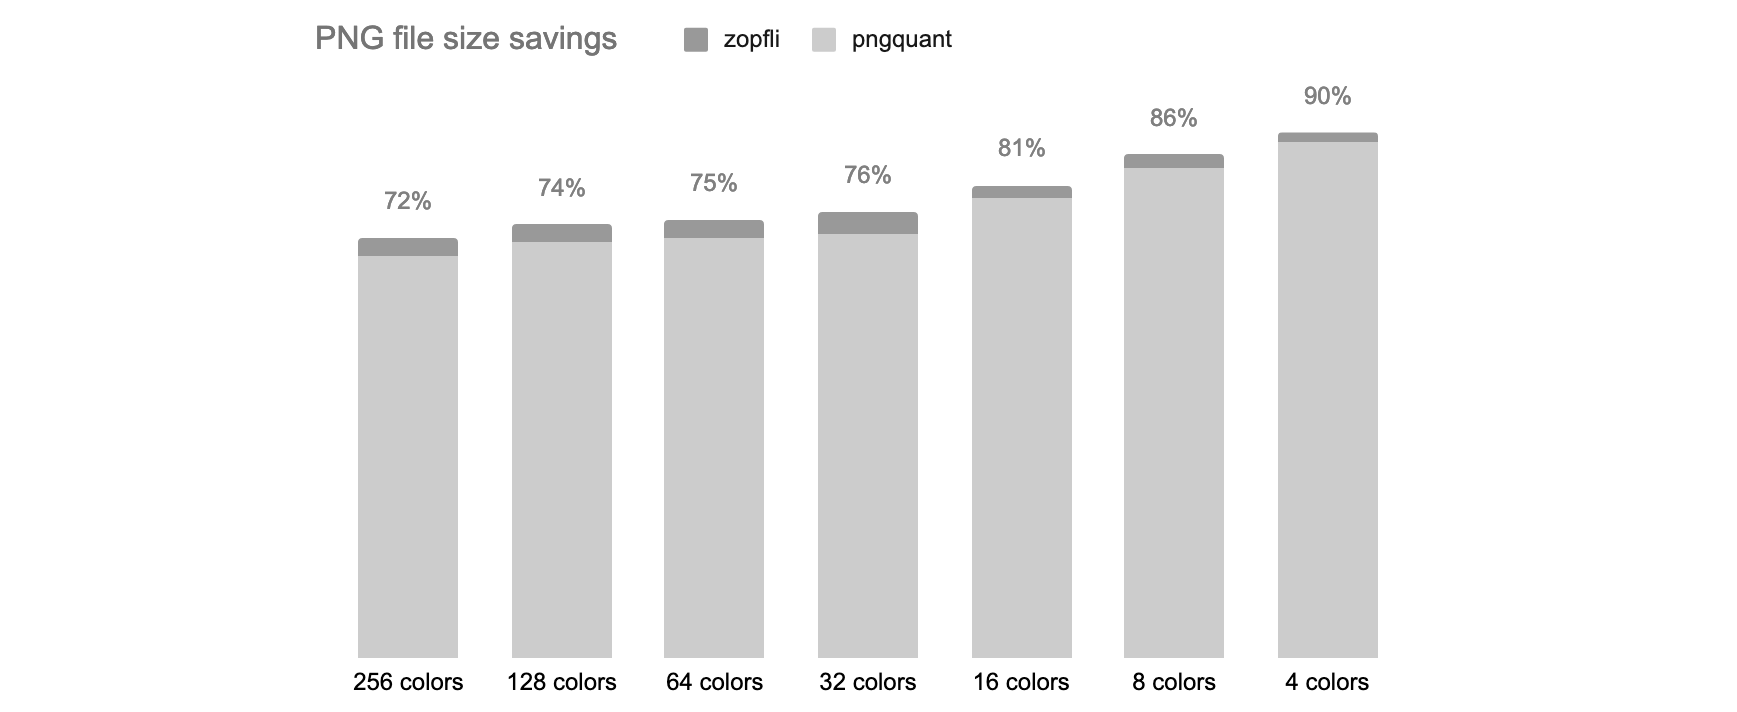
Relative to the massive savings from color quantization, improving lossless compression provides a much smaller reduction, but in the context of pages with many images these marginal gains do add up to worthwhile savings.
Automation
The trick is to make this happen automatically every time I capture a screenshot using Hazel or Automator. This allows you to run commands based on file events, like every time a new screenshot is added to a directory.
A bonus trick, is to create a dedicated Screenshots directory, so that they don't clutter your desktop. This is also easy:
# Create a Screenshots directory in the current users Home directory

mkdir -p "$HOME/Screenshots"

# Configure macOS to capture screenshots to this location
# If you want to revert this change, and save screenshots to your desktop,
# instead use "$HOME/Desktop"

defaults write com.apple.screencapture location "$HOME/Screenshots"
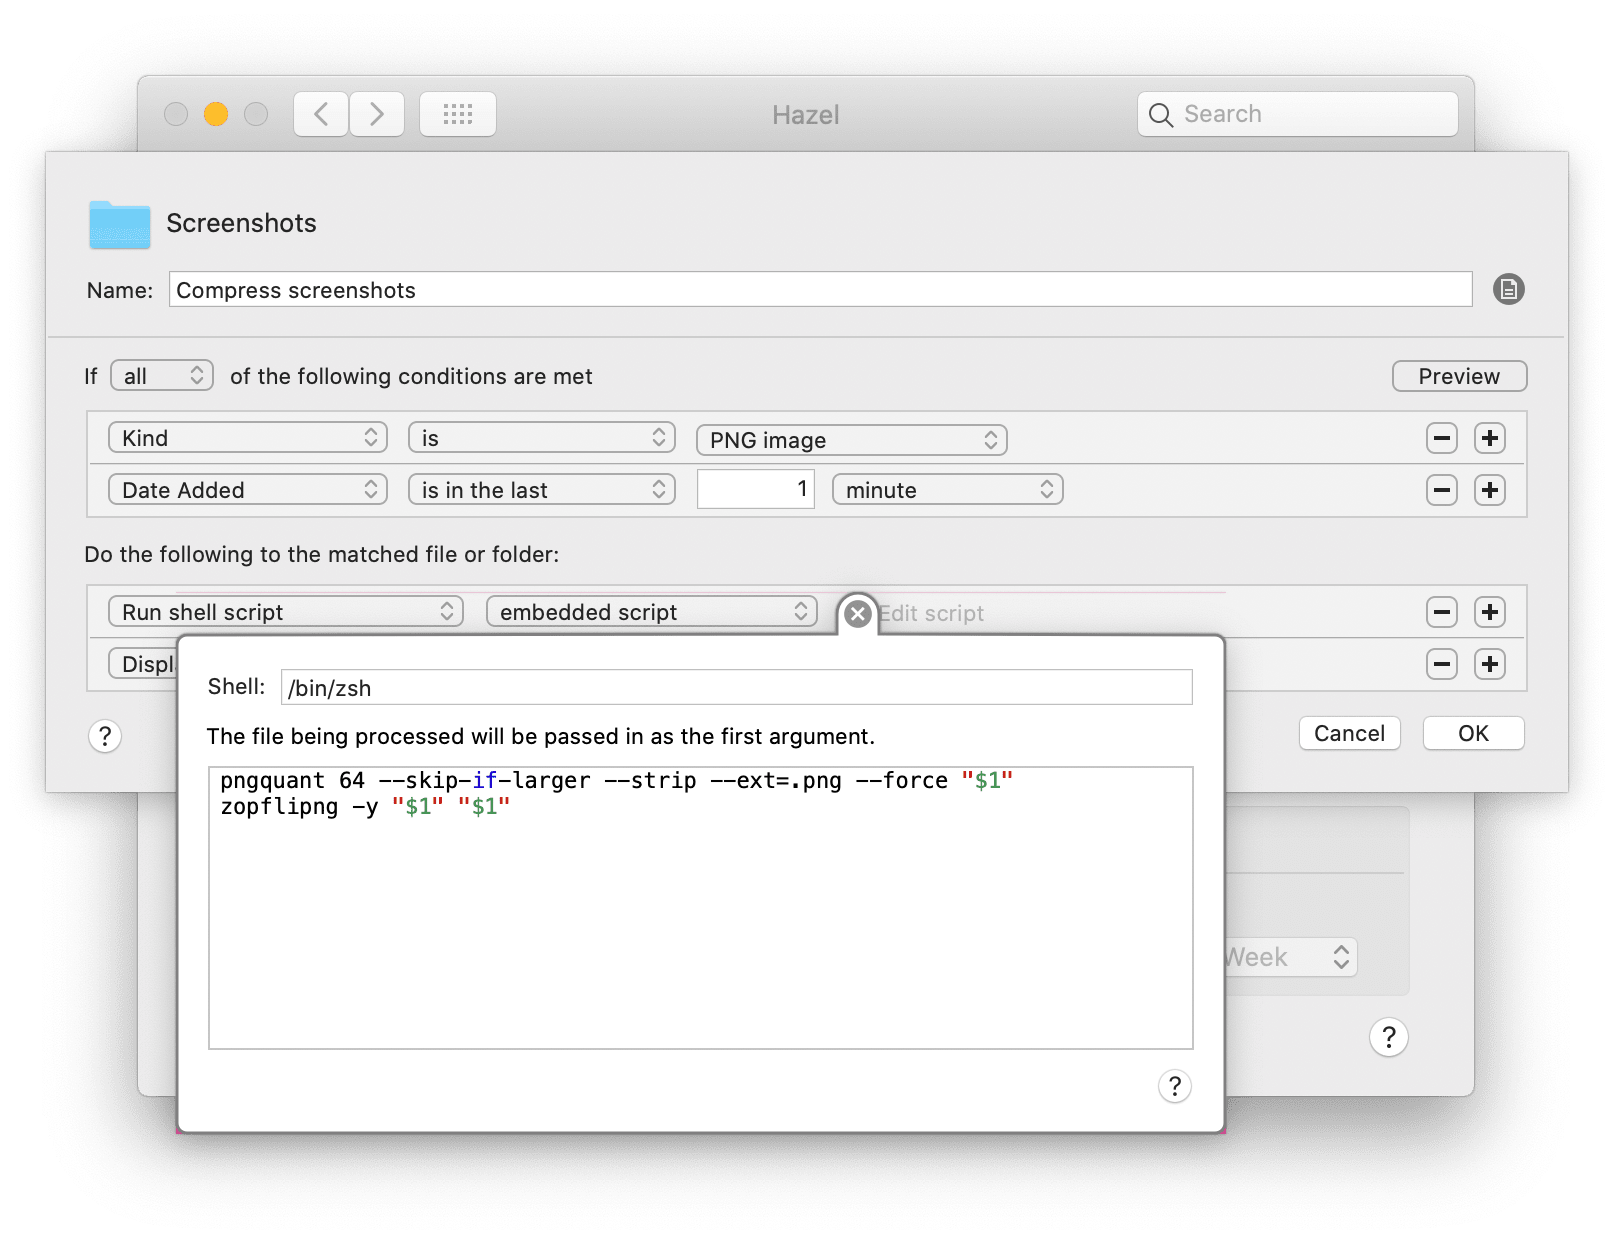
Using Hazel, add the Screenshots folder where newly captured screenshots will be created, and create a new rule to compress files when they are added.
Combining the commands above, and using $1 syntax to access the filename argument passed by Hazel, the final script is:
pngquant 64 --skip-if-larger --strip --ext=.png --force "$1"
zopflipng -y "$1" "$1"
Alternatively, using Automator, create a new Folder Action that receives notifications from the Screenshots folder. Add a Run Shell Script block, and make sure to Pass input as arguments. Combining the commands above, and this time using $@ syntax to handle multiple arguments, and absolute paths for pngquant and zopflipng, the final script is:
for f in "$@"
do
  /opt/homebrew/bin/pngquant 64 --skip-if-larger --strip --ext=.png --force "$f"
  /opt/homebrew/bin/zopflipng -y "$f" "$f"
done
The absolute paths for pngquant and zopflipng can vary depending on the version of Homebrew.
You can double check the exact path with which pngquant and which zopflipng.
Here are screenshots of the configuration.
| Hazel | Automator |
|---|---|
 |
 |
My final trick, is to add the Screenshots folder to my Dock for easy access.
This is achieved by dragging the Screenshots folder from Finder to your Dock.
Summary
The PNG file format is great for screenshots, but the defaults output is too large for sharing on the internet. Instead of using ImageAlpha and ImageOptim to compress your screenshots by hand, you can use Hazel to automate this to regularly yield file size reductions of 80%.
If you know of compression tricks, or alternatives that work on Windows or Linux, let me know below in the comments!
Cover image by Emmy Smith on Unsplash
We want to hear from you
Enjoyed reading this blog post or have questions or feedback? Share your thoughts by creating a new topic in the GitLab community forum.
Share your feedback