
is now in public beta!
Published on: April 27, 2016
7 min read
Getting started with GitLab and DigitalOcean
This tutorial is adapted from the How To Use the GitLab One-Click Install Image to Manage Git Repositories tutorial on DigitalOcean.


This tutorial is adapted from the How To Use the GitLab One-Click Install Image to Manage Git Repositories tutorial on DigitalOcean.
Introduction
Collaborating on projects, keeping track of source changes, and maintaining a clean code repository are some great reasons to use a version control system. Version control is now considered an essential tool in software development.
Git is the most popular distributed version control system. GitLab is a Git repository management server that can be used to host repositories and set up control structures for git within a clean web interface. It is built on Ruby on Rails.
DigitalOcean has created a GitLab application image that can be used to instantly deploy GitLab Community Edition on a DigitalOcean Ubuntu 14.04 x86-64 droplet using the Omnibus installer. You can have your own repository system up and running in minutes.
Requirements
The GitLab documentation recommends a minimum of 2GB of RAM and 2 CPU cores for optimum performance. If your projects are small (fewer than 100 users total), 1GB of RAM and 1 CPU core may be sufficient, but make sure you have at least 1GB swap. You can follow the How To Add Swap on Ubuntu 14.04 tutorial.
Low memory may result in 500 server errors ("cannot allocate memory"), so make
sure you add enough RAM according to your needs.
Step One – Create a GitLab Droplet
Before you begin using GitLab, you need to spin up a DigitalOcean droplet using the provided image.
From the Control Panel, click on the "Create Droplet" button that is visible from any page:

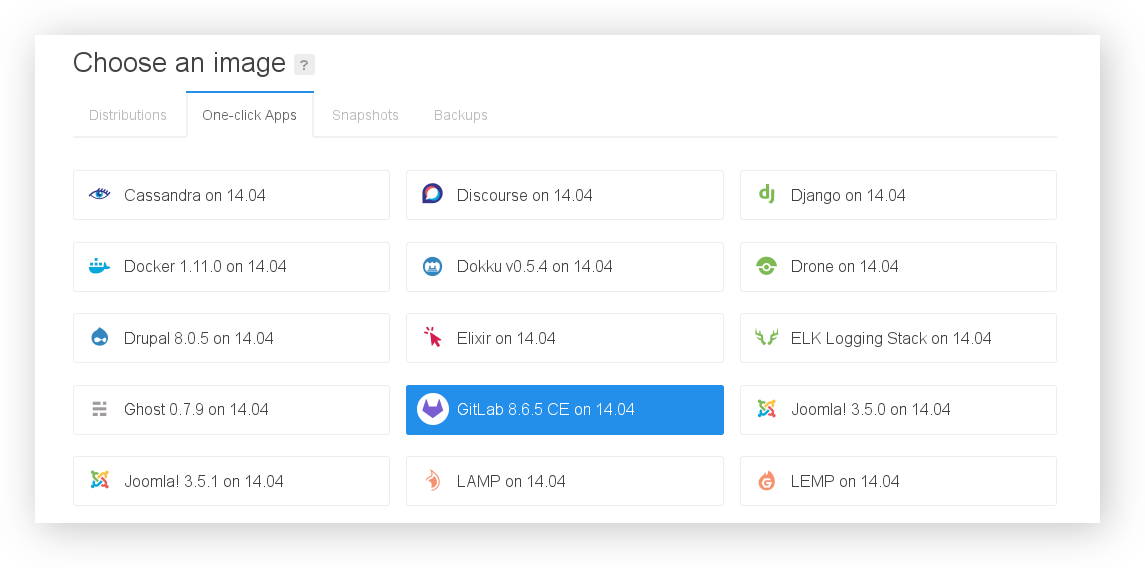
Under the "Choose an image" section, select the "One-click Apps" tab and click the "GitLab" image (the version might differ).
The next step is to choose the droplet size and the region you would like to use.

Add any SSH Keys, select any settings you'd like to use, and click "Create" at the bottom.
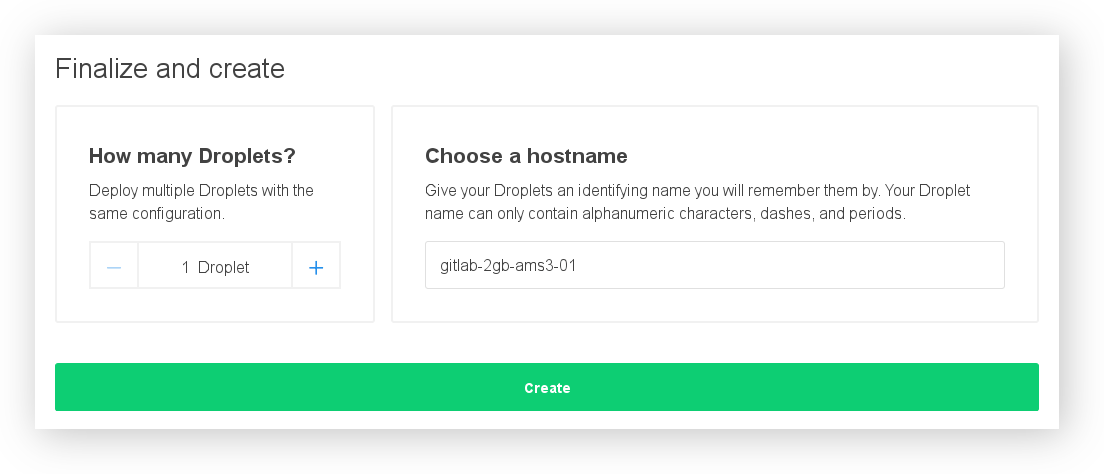
Your GitLab droplet will be created and available in a few minutes!
Step Two – Configure Domain Names and Emails
We still need to configure just a few things first to utilize our environment.
Begin by setting up the domain name you would like to use for your GitLab instance. Learn how to set up domain names on DigitalOcean if you want to use DigitalOcean's nameservers.
Note: If you don't have a domain name at your disposal, you can just use your droplet's IP address, but GitLab will not be able to send emails without using an SMTP server.
Once your domain name is configured correctly, you need to adjust some values on the actual VPS instance. Log into your droplet as root through SSH, and open the GitLab configuration file with your text editor:
vim /etc/gitlab/gitlab.rb
Uncomment and adjust the external_url parameter to match your domain name:
external_url "http://your_domain.com/"
If you have generated an SSL certificate for your domain, you can
configure GitLab to use it in this file as well. The following settings set the
locations of the SSL certificates and instruct the NGINX web server to redirect
the HTTP traffic to HTTPS. Note that for HTTPS to work, you must set the URL
scheme in external_url as https:
      external_url "https://your_domain.com/"

nginx['ssl_certificate'] = "/etc/gitlab/ssl/your_domain.com.crt"
nginx['ssl_certificate_key'] = "/etc/gitlab/ssl/your_domain.com.key"
nginx['redirect_http_to_https'] = true
GitLab uses its own bundled NGINX web server. You can find more information like using your own external web server, changing the ports NGINX listens to, etc., in the official documentation.
While we're in this file, we can adjust the email settings that GitLab will use in the "From:" field in automated emails, and the email display name, respectively:
      gitlab_rails['gitlab_email_from'] = "gitlab@your_domain.com"
gitlab_rails['gitlab_email_display_name'] = 'Example'
The GitLab One-Click application is configured to use a local postfix server for sending emails. If you wish to use it with GitLab you might want to set it up correctly. Follow the "How To Install and Configure Postfix as a Send-Only SMTP Server on Ubuntu 14.04" tutorial for more information. For a production site, you will likely want to use an external service such as Mandrill or SendGrid. If so, you can configure the SMTP settings here as well.
After saving and closing the file, we just need to reconfigure the service:
gitlab-ctl reconfigure
This should be done whenever you make configuration changes in order for them to take effect.
Step Three – Log into GitLab
When you connect to your GitLab instance via SSH or the DigitalOcean web console, you will see the message of the day (MOTD) which contains your randomly generated GitLab password. It will look like this:
      ------------------------------------------------------------------------------
Thank you for using DigitalOcean's GitLab Application.
Your GitLab instance can be accessed at http://xxx.xxx.xxx.xxx/
The default credentials for GitLab are:
Username: root
Password: e0wXRM4fLmb6

You can find more information on using this image at: http://do.co/gitlabapp
------------------------------------------------------------------------------
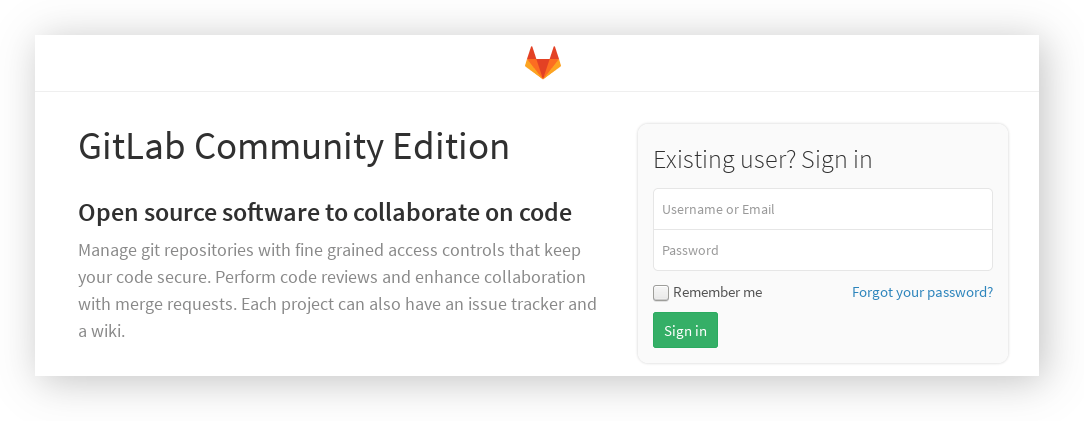
Next, open a web browser and navigate to your domain name (or the IP address of your Droplet if you did not set up a domain name). You will be able to log in using the credentials you found above.
You now have a full GitLab server configured and at your disposal to manage your repositories.
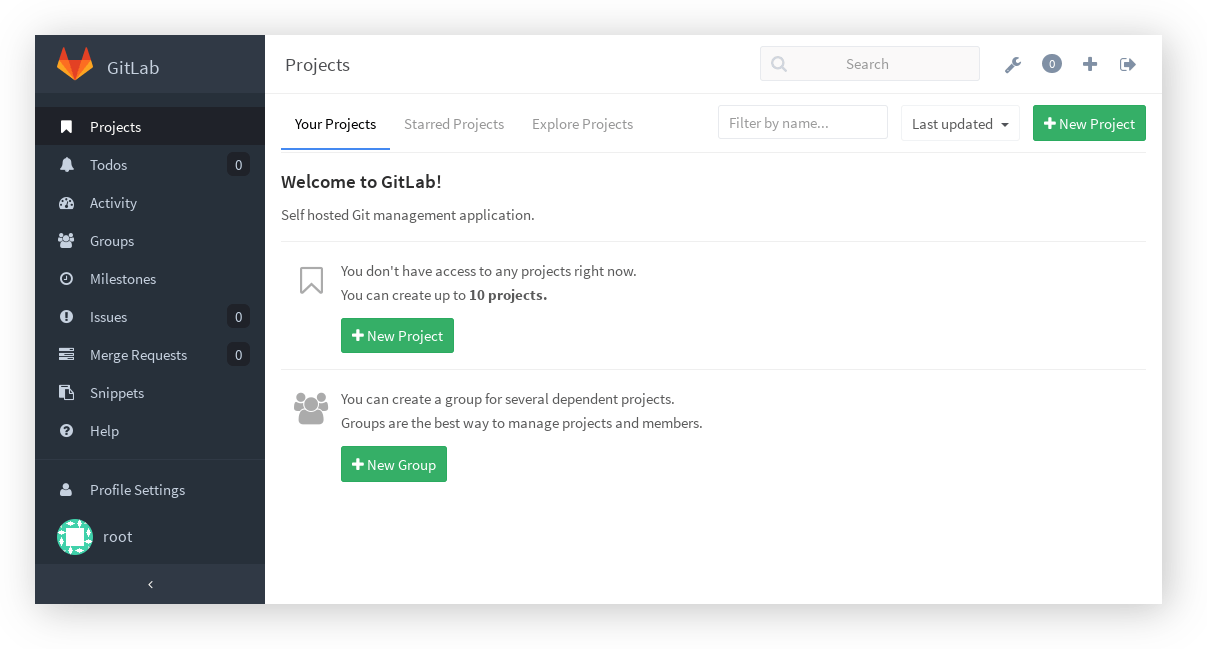
Step Four – Modify Account Information
It would probably be more helpful if the account you're using, more accurately reflected your information. This will allow you to receive email updates and will display your information to other users. The root account is the first one created by default, and it contains some predefined values for "Name", "Username" and "Email". You can change all that from the "Admin Area".
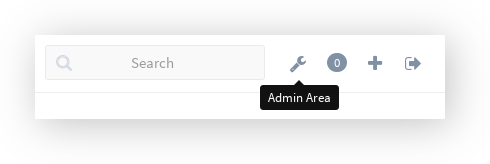
Let's navigate to the "Admin Area" by clicking the wrench icon in the top-right corner.
In the left sidebar click Users. This should only contain one user, the Administrator account you are logged into.
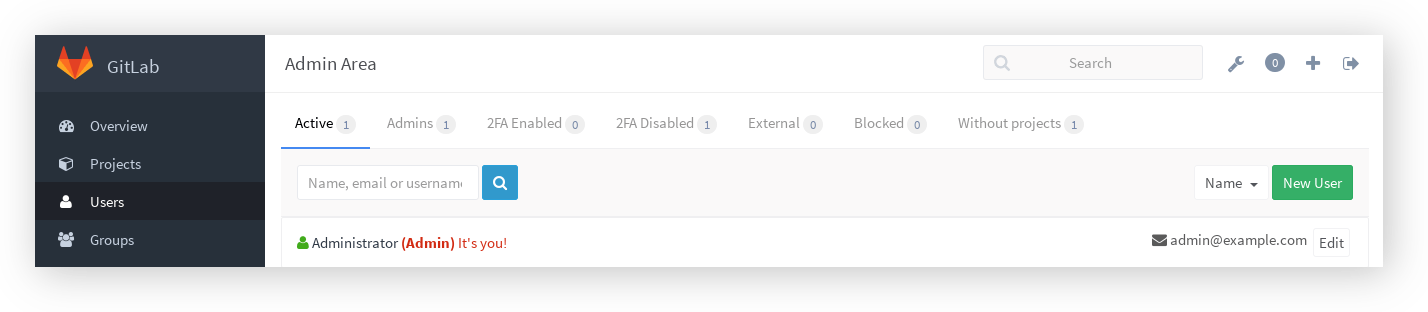
Click on the "Edit" button and change the account information at the top.
The "Name" field will be your name as displayed to other users. The "Username" can be used to log in and it defines the owner of your projects. The "Email" is where alerts will be sent.
It is important to at least change the email field.

Click "Save changes" at the bottom for the changes to take effect.
Updating to Newer Releases
The GitLab One-Click application is configured to use the GitLab Apt repository. [Updating to the most recent version]update-doc is as simple as running:
      sudo apt-get update
sudo apt-get upgrade
Before upgrading to a new release, GitLab automatically backups the database. If you wish to make a full back up of your existing installation, run:
sudo gitlab-rake gitlab:backup:create
The resulting backup will be located in: /var/opt/gitlab/backups. You can read
more in the Omnibus backup documentation.
Conclusion
You should now have a server configured to handle your team's Git projects. You can easily manage user access, configure both public and private repositories, and get an overview of your projects' issues and commits.
GitLab has a great help system accessible from within the user interface
(visit https://your_domain.com/help). In a future article, we will discuss
how to manage repositories and users and effectively take advantage of the
interface.
For further information on configuring your GitLab Omnibus installation, check out the official documentation.
If you already have GitLab installed and want to use the [integrated CI]glci for your projects, check our other tutorial on setting up GitLab Runner on DigitalOcean.
![]()
Photo credits: https://flic.kr/p/9RAQ2J ([CC BY-NC 2.0]cc)
glci: /solutions/continuous-integration/ cc: https://creativecommons.org/licenses/by-nc/2.0/update-doc: http://doc.gitlab.com/omnibus/update/README.html#updating-using-the-official-repositories
We want to hear from you
Enjoyed reading this blog post or have questions or feedback? Share your thoughts by creating a new topic in the GitLab community forum.
Share your feedback