Updated on: October 21, 2025
4 min read
Mobile DevOps with GitLab, Part 2 - Code signing for Android with GitLab
This second part of our tutorial series shows how to use Project-level Secure Files to sign an Android application.


In Part 1 of this tutorial series, we talked about a new feature in GitLab called Project-level Secure Files. With Project-level Secure Files, you can securely store your build keys as part of your project in GitLab, and avoid some painful problems caused by lost keystore files. In this blog post, I'll show you how to create a Keystore file and use it to sign an Android application. Then I'll show you how to quickly create a CI pipeline in GitLab using Project-level Secure Files.
Generate a private signing key
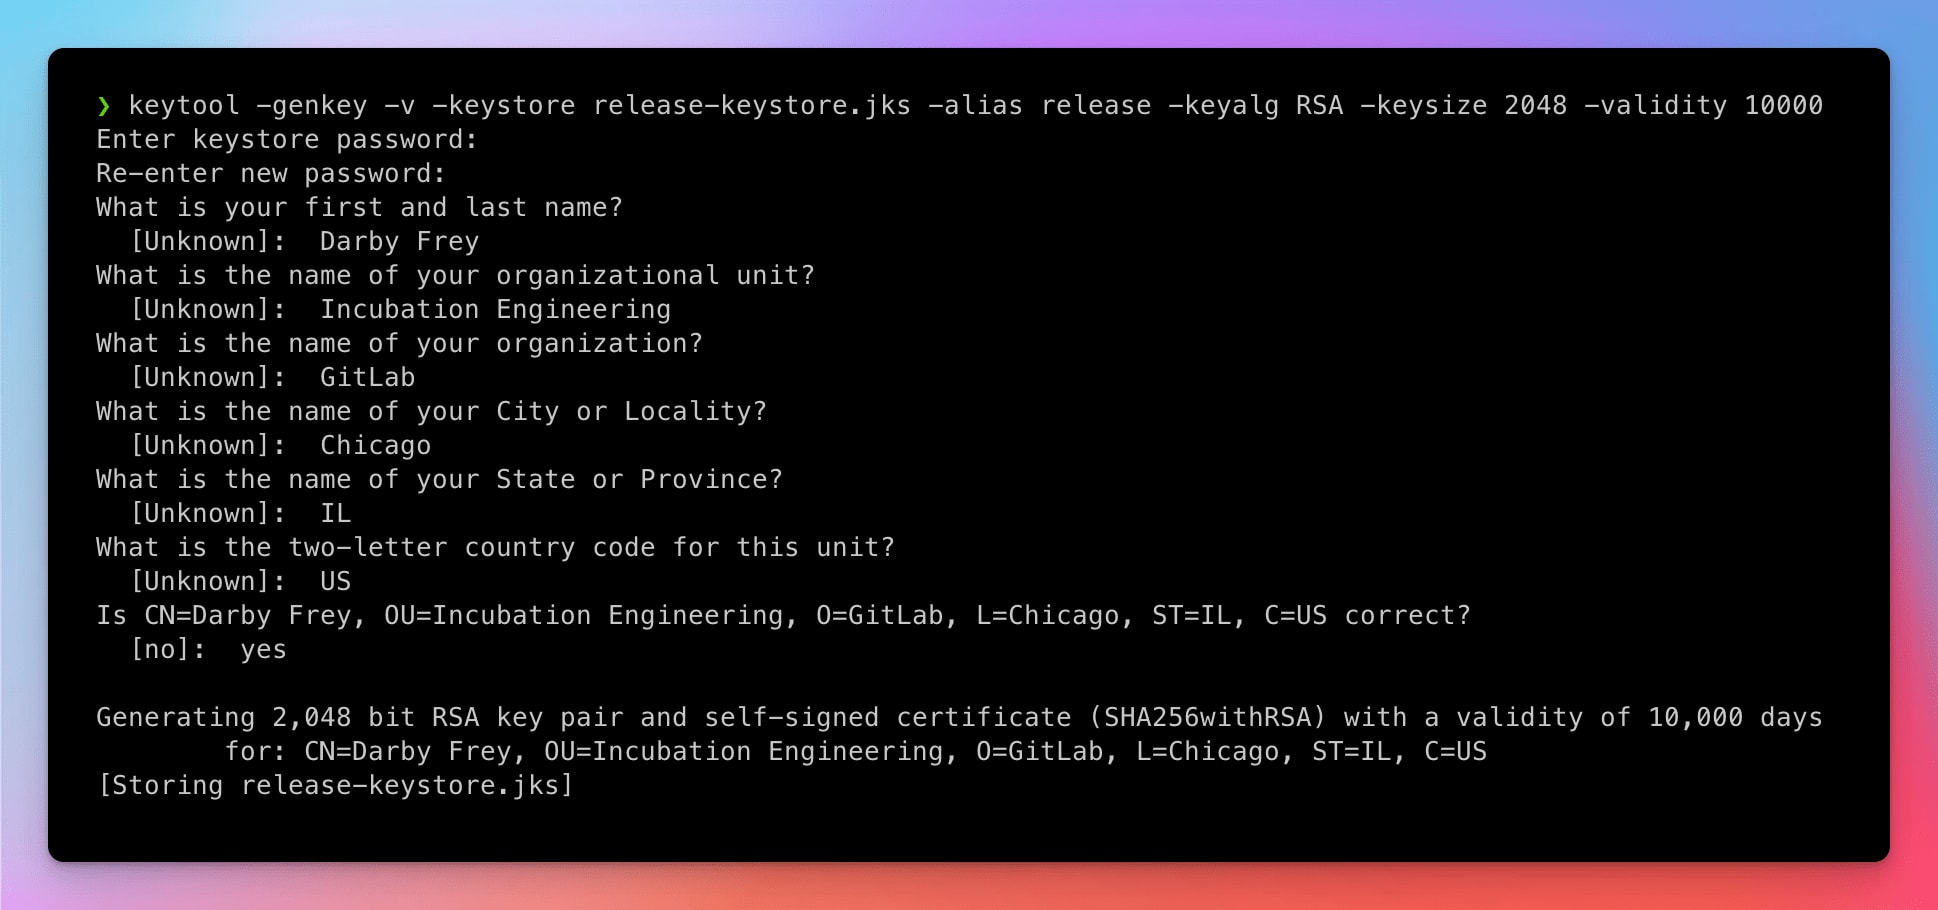
The first thing you'll need is a Keystore file. This file is used to securely sign the application. You can generate a Keystore file from your machine by running the following command:
keytool -genkey -v -keystore release-keystore.jks -alias release -keyalg RSA -keysize 2048 -validity 10000
During this process, you'll be asked to create a new password for the Keystore file and provide some information about you and your organization. See the example below:
Configure your application
The next step is to set some environment variables and update build.gradle to add the new signing configuration. First, set the following environment variables in either a .env file or in the shell via export.
ANDROID_KEY_ALIASis the alias you gave for the key in the keytool command above. In this example the value is release.ANDROID_KEYSTORE_PASSWORDis the new password you supplied to the keytool command above.ANDROID_KEY_STOREFILEis the path to the new keystore file you just created. In this example we're using../release-keystore.jks. With the environment variables set, the next step is to update the build configuration to use the new Keystore in the build process. In theapp/build.gradlefile add the following configuration inside the Android block for the release signing config.
      android {
    ...
    defaultConfig { ... }
    signingConfigs {
        release {
           storeFile file(System.getenv('ANDROID_KEY_STOREFILE'))
           storePassword System.getenv('ANDROID_KEYSTORE_PASSWORD')
           keyAlias System.getenv('ANDROID_KEY_ALIAS')
           keyPassword System.getenv('ANDROID_KEYSTORE_PASSWORD')
        }
    }
    buildTypes {
        release {
            ...
            signingConfig signingConfigs.release
        }
    }
}
Save these changes to the app/build.gradle file, and run the build locally to ensure everything works. Use the following command to run the build:
./gradlew assembleRelease
If everything worked you'll see a message saying BUILD SUCCESSFUL.
Configure project
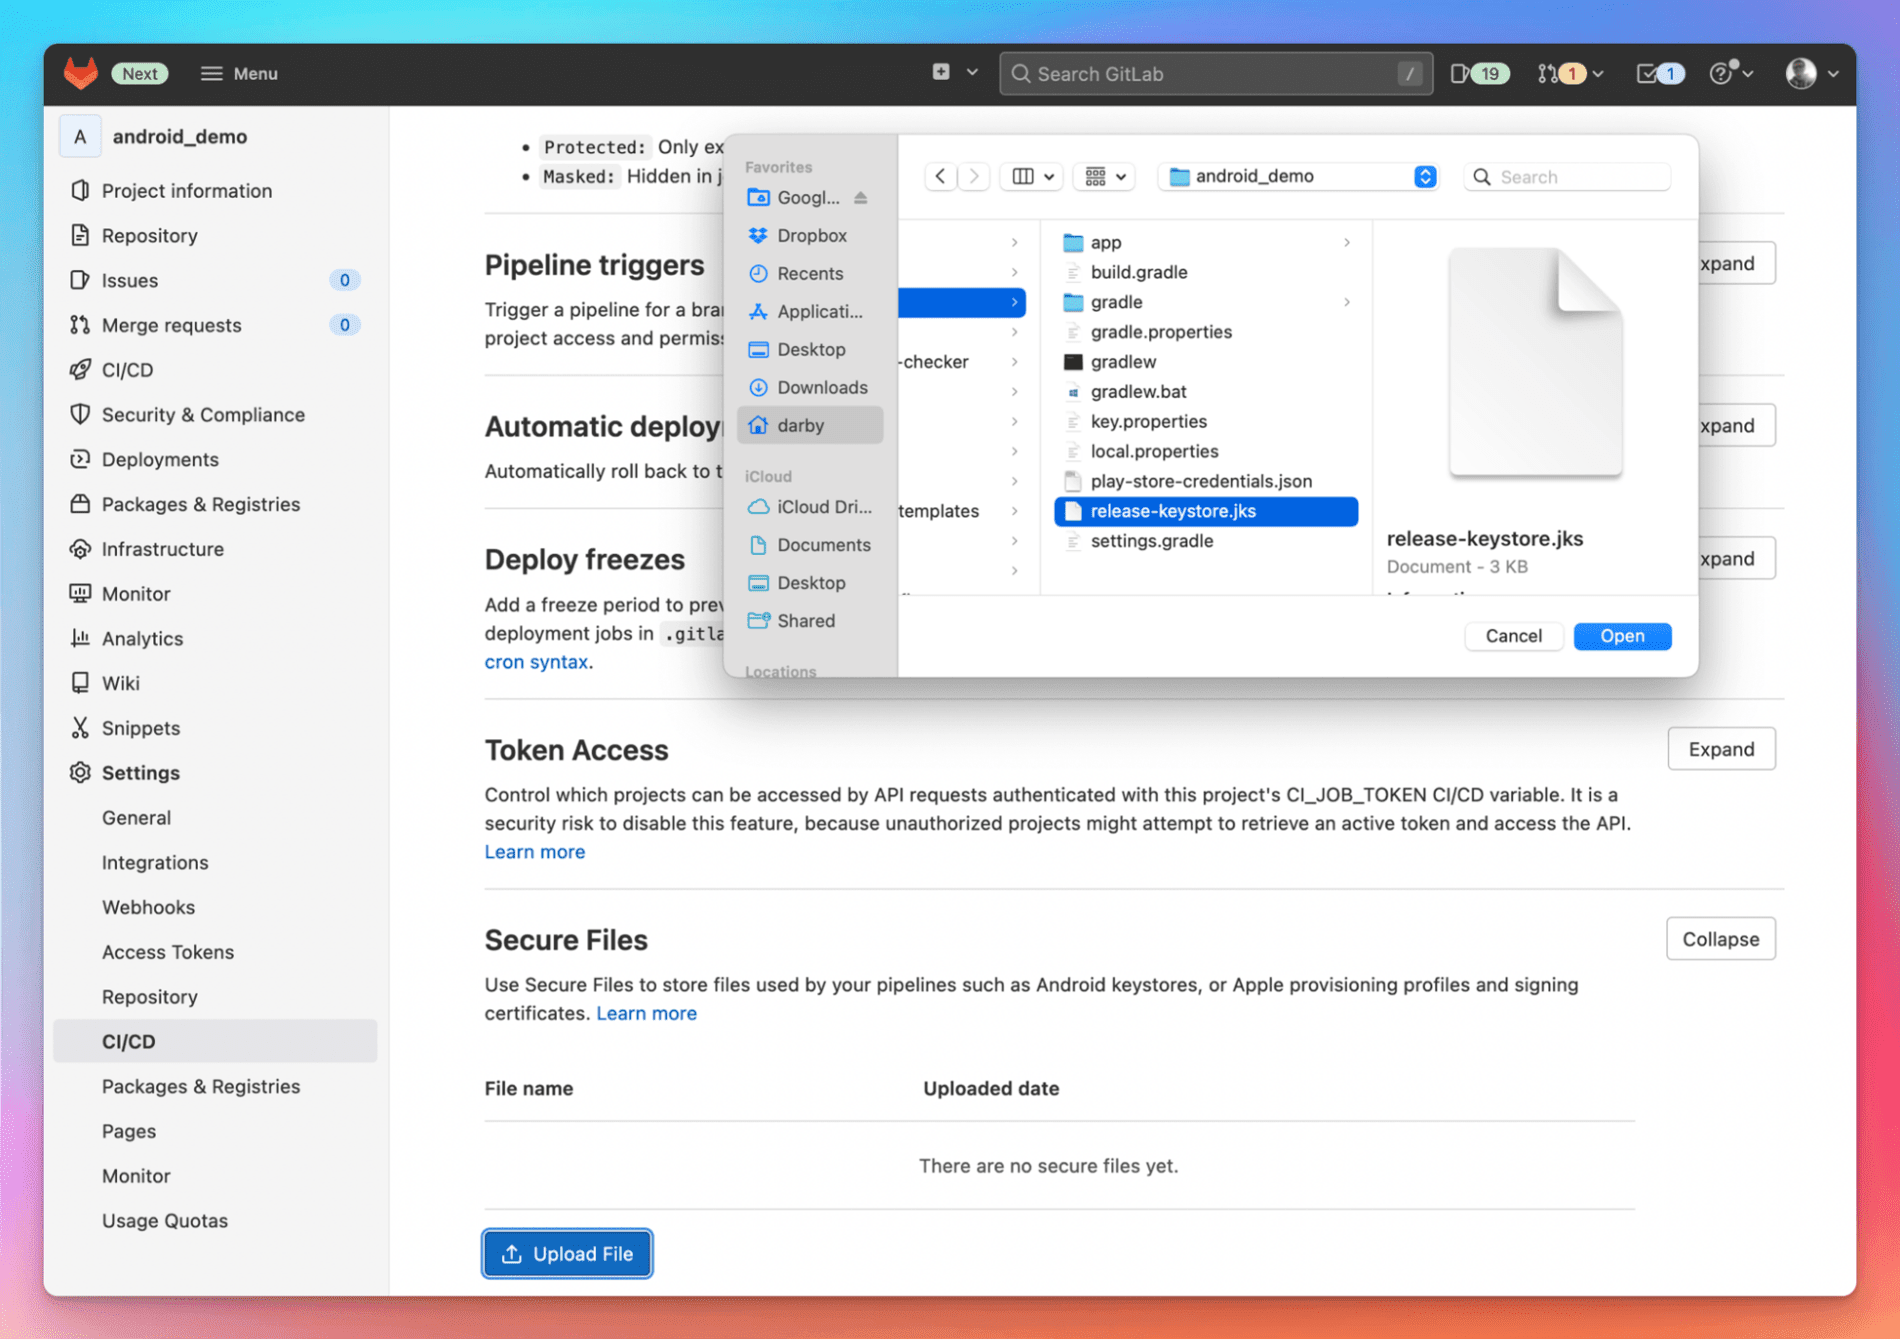
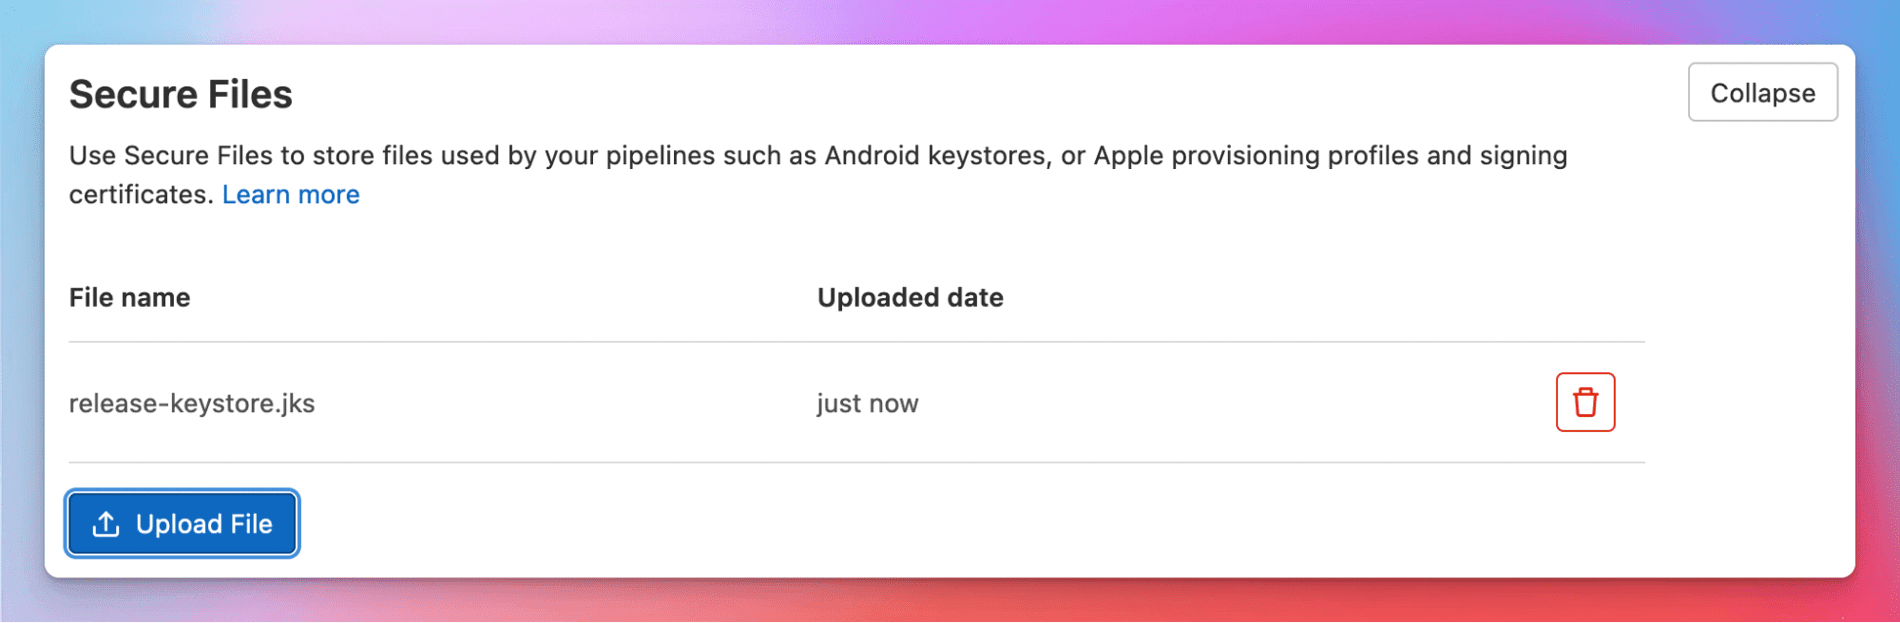
With the build running locally, it takes just a couple of steps to get it running in GitLab CI. The first step is to upload your Keystore file in GitLab.
- On the top bar, select Menu > Projects and find your project.
- On the left sidebar, select Settings > CI/CD.
- In the Secure Files section, select Expand.
- Select Upload File.
- Find the file to upload, select Open, and the file upload begins immediately. The file shows up in the list when the upload is complete.
 The next step is to set the CI variables in your project.
 - On the top bar, select Menu > Projects and find your project.
- On the left sidebar, select Settings > CI/CD.
- In the Variables section, select Expand.
- Create entries for the three environment variables set earlier:
ANDROID_KEY_ALIAS,ANDROID_KEY_STOREFILE,ANDROID_KEYSTORE_PASSWORD.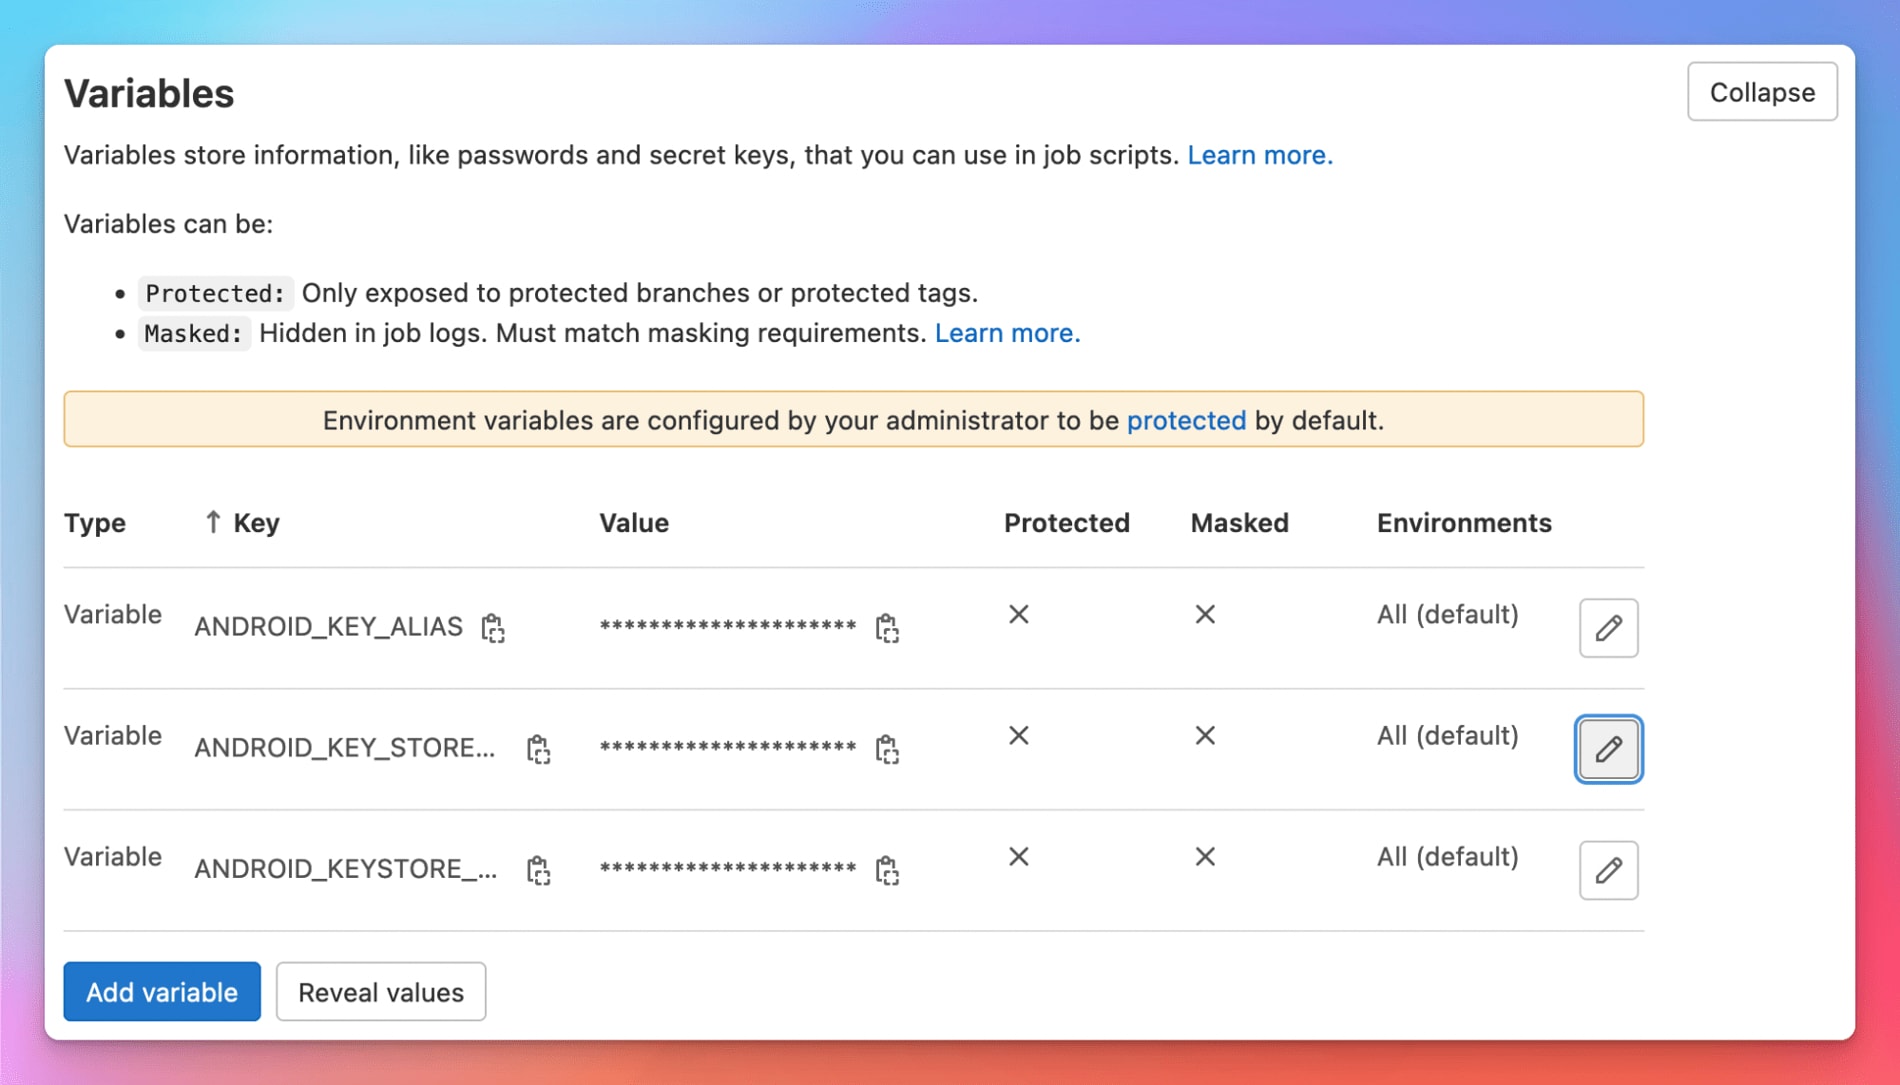
CI/CD pipelines
Once the project is configured, the final step is to create the build configuration in the .gitlab-ci.yml file. Below is a sample file.
      stages:
  - build

build_android:
  image: fabernovel/android:api-31-v1.6.1
  stage: build
  script:
    - wget https://gitlab.com/gitlab-org/cli/-/releases/v1.74.0/downloads/glab_1.74.0_linux_amd64.deb
    - apt install ./glab_1.74.0_linux_amd64.deb
    - glab auth login --job-token $CI_JOB_TOKEN --hostname $CI_SERVER_FQDN --api-protocol $CI_SERVER_PROTOCOL
    - glab -R $CI_PROJECT_PATH securefile download --all
    - ./gradlew assembleRelease
  artifacts:
    paths:
      - app/build/outputs/apk/release
A few interesting bits from this configuration:
- Image: https://github.com/faberNovel/docker-android provides a collection of prebuilt Docker images that work great for CI systems. Find the right version for your project in Docker Hub https://hub.docker.com/r/fabernovel/android/tags.
- Script: The first two lines of the script download and install
glab. Line 3 uses theCI_JOB_TOKENto authenticateglab, and line 4 performs the download. Files are downloaded into the current working directory unless the--output-pathflag is present. - Artifacts: Make the build output available to be downloaded from the CI job, or used in subsequent jobs in the pipeline.
Commit the changes to your
.gitlab-ci.ymlfile and after you push the changes to GitLab the build will start. Take a look at this branch in the sample project for reference. Give it a try, and let us know what you think in the feedback issue. Then, check out Part 3, which deals with code signing for iOS. Cover image by Teddy GR on Unsplash

More to explore
View all blog posts


We want to hear from you
Enjoyed reading this blog post or have questions or feedback? Share your thoughts by creating a new topic in the GitLab community forum.
Share your feedback