Published on: October 8, 2024
4 min read
Tutorial: Integrate GitLab Merge Request approvals with external systems
Learn how to improve GitLab extensibility and integration with external applications in this demo. The result: a seamless integration that provides more control over merge requests.


GitLab customers often ask how to connect merge requests to external applications, such as ServiceNow or custom-built applications, to control approvals for the merging of code into a target branch from these external systems. To address this need, GitLab offers External Status Check, a powerful feature that allows the sending of API calls to external systems to request the status of an external requirement, providing seamless integration and control over your merge requests.
In this article, I'll demonstrate this feature by explaining how to deploy an application I developed. The application is designed to receive status check requests from GitLab Merge Requests, list them, and enable external users to approve/reject these requests without logging in to the GitLab console. As a result, GitLab platform architects will better understand GitLab extensibility and integration with external systems.
The provided sample application can:
- Receive API requests from merge requests.
- Store the requests in AlchemyDB running on the same instance.
- Show Approve/Reject buttons for each row to approve or reject the corresponding merge request status check.
How to deploy the status review demo application
- Import this GitLab repo project to your GitLab account.
- The project pipeline will deploy the application to a Kubernetes cluster. To achieve this, define a GitLab Agent for Kubernetes in a separate project and include a path to the cloned project under the “user_access” section in the agent configuration.
- Add a new environment variable
KUBE_CONTEXT, with the value equal to the used agent path:name, similar to the following structurepath/to/agent/project:agent-name. - The status check application will be deployed to the
approval-appnamespace by default. - Create the
approval-appnamespace in the target Kubernetes cluster. - In the created namespace, add a secret named
gitlab-tokenwith the value set to the personal access token (PAT) of the user who will be approving the requests. The approval application will use this PAT to communicate back to the GitLab instance. - Run the status check application pipeline on the main branch.
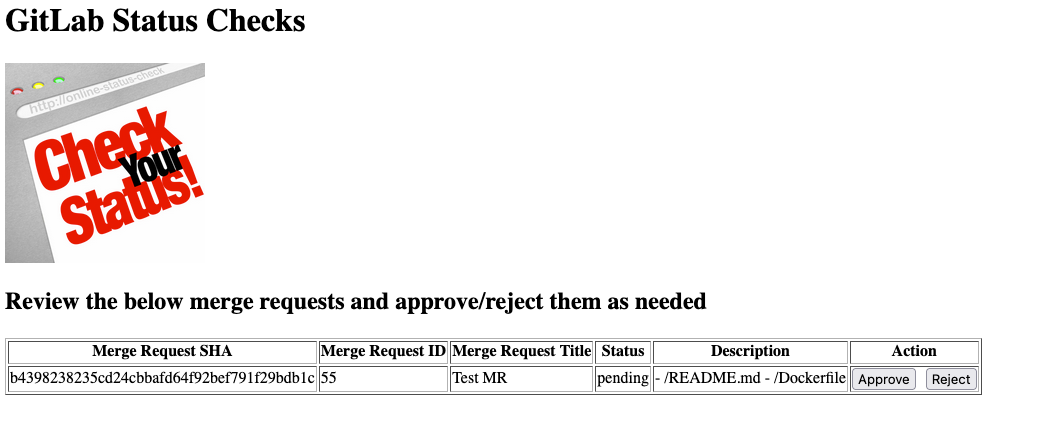
- Once deployed, the application will be exposed behind a load balancer. Use this command to grab the public IP address of the load balancer:
kubectl get services -n approval-app. - The application can then be accessed using this URL: http://EXTERNAL-IP/approval-apps/. Replace the
EXTERNAL-IPwith the value of the external IP address from the previous step. The resulting page should look like below (the table would be empty as we have not added any new merge requests yet).
Configure status check in GitLab
- In the GitLab project where the external status check needs to be configured, from the left menu, navigate under settings -> Merge Request and scroll down to Status checks.
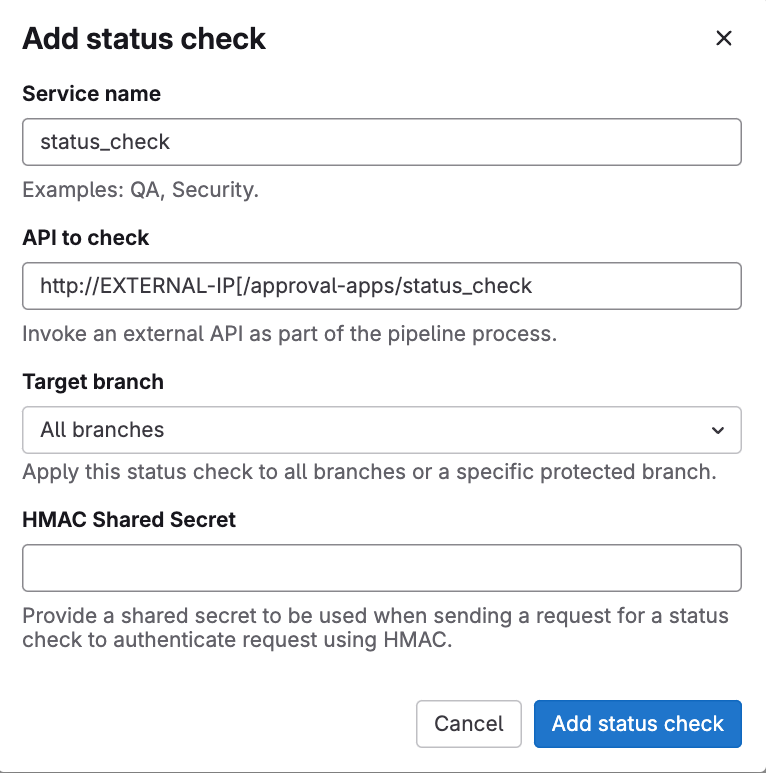
- Click on Add status check.
- Add a service name.
- For the API to check enter:
[http://EXTERNAL-IP[/approval-apps/status_check. Replace theEXTERNAL-IPwith the external IP address found in the previous steps. - Leave the
Target Branchto the default, or select branch if you want this check to be triggered only for merge requests against certain branches. - Leave
HMAC Shared Secretas it is and click Add status check.
Test everything together
- In the project where you have configured the external check, create a new merge request from any branch targeting the main branch (assuming the main branch was selected when the external check was configured in the previous section).
- In the merge request details, look for the Status checks section and it should show
1 Pending. - Now, in a new tab, open the deployed external check application using this URL (replace
EXTERNAL-IPwith the value of the external IP address from the previous steps):http://EXTERNAL-IP/approval-apps/. - A new entry should show in the list for the request external check from the merge request just created. Click on Approve.
- Switch back to the merge request's details screen and notice how the merge request is showing an approved status now.
Debugging tips
Use the following notes to debug if something does not go as planned:
It is always helpful to view the logs for the external status check application. To do so:
- Extract the name of the application pod using this command:
kubectl get pods -n approval-app. - View the pod logs
kubectl logs [THE NAME OF THE POD] -n approval-app.
You can SSH into the application pod and view the database (Alchemydb), which is used for the application.
kubectl exec -it \[POD-NAME\] -n approval-app -- /bin/shcd instancesqlite3 gitlab_status_checks.db- To view the database tables, type
.tables. - To describe the table structure, type
PRAGMA table_info('status_check');. - To view all the records in the
status_checktable, typeselect * from status_check.
Discover more about GitLab External Status Check and how to gain more control over merge requests.

More to explore
View all blog posts

We want to hear from you
Enjoyed reading this blog post or have questions or feedback? Share your thoughts by creating a new topic in the GitLab community forum.
Share your feedback