Published on: November 15, 2022
6 min read
Simple Kubernetes management with GitLab
Follow our tutorial to provision a Kubernetes cluster and manage it with IAC using Terraform and Helm in 20 minutes or less.


Kubernetes can be very complex and has dozens of tutorials out there on how to provision and manage a cluster. This tutorial aims to provide a simple, lightweight solution to provision a Kubernetes cluster and manage it with infrastructure as code (IaC) using Terraform and Helm in 20 minutes or less.
The final product of this tutorial will be two IaC repositories with fully functional CI/CD pipelines:
- gitlab-terraform-k8s - A single source of truth to provision, configure, and manage your Kubernetes infrastructure using Terraform
- cluster-management - A single source of truth to define the desired state of your Kubernetes cluster using the GitLab Agent for Kubernetes and Helm

Prerequisites
- AWS or GCP account with permissions to provision resources
- GitLab account
- Access to a GitLab Runner
- 20 minutes
An overview of this tutorial is as follows:
- Set up the GitLab Terraform Kubernetes Template 🏗️
- Register the GitLab Agent 🕵️
- Add in Cloud Credentials ☁️🔑
- Set up the Kubernetes Cluster Management Template 🚧
- Enjoy your Kubernetes Cluster completely managed in code! 👏
Set up the GitLab Terraform Kubernetes Template
Start by importing the example project by URL - https://gitlab.com/projects/new#import_project
To import the project:
- In GitLab, on the top bar, select Main menu > Projects > View all projects.
- On the right of the page, select New project.
- Select Import project.
- Select Repository by URL.
- For the Git repository URL:
- GCP Google Kubernetes Engine: https://gitlab.com/gitlab-org/configure/examples/gitlab-terraform-gke.git
- AWS Elastic Kubernetes Service: https://gitlab.com/gitlab-org/configure/examples/gitlab-terraform-eks.git
- Complete the fields and select Create project.
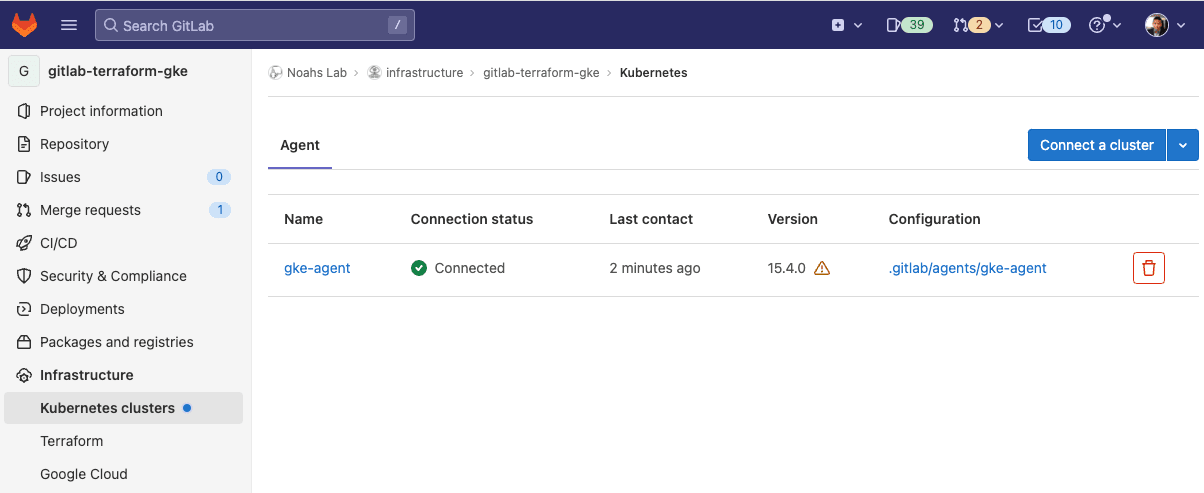
Register the GitLab Agent
With your newly created gitlab-terraform-k8s repo, create a GitLab Agent for Kubernetes:
- On the left sidebar, select Infrastructure > Kubernetes clusters. Select Connect a cluster (agent).
- From the Select an agent dropdown list, select **eks-agent/gke-agent and select Register an agent.
- GitLab generates a registration token for the agent. Securely store this secret token, as you will need it later.
- GitLab provides an address for the agent server (KAS). Securely store this as you will also need it later.
- Add this to the gitlab-terraform-eks/.gitlab/agents/eks-agent/config.yaml in order to allow the GitLab Agent to have access to your entire group.
      ci_access:
  groups:
    - id: your-namespace-here
Add in your Cloud Credentials to CI/CD variables
AWS EKS
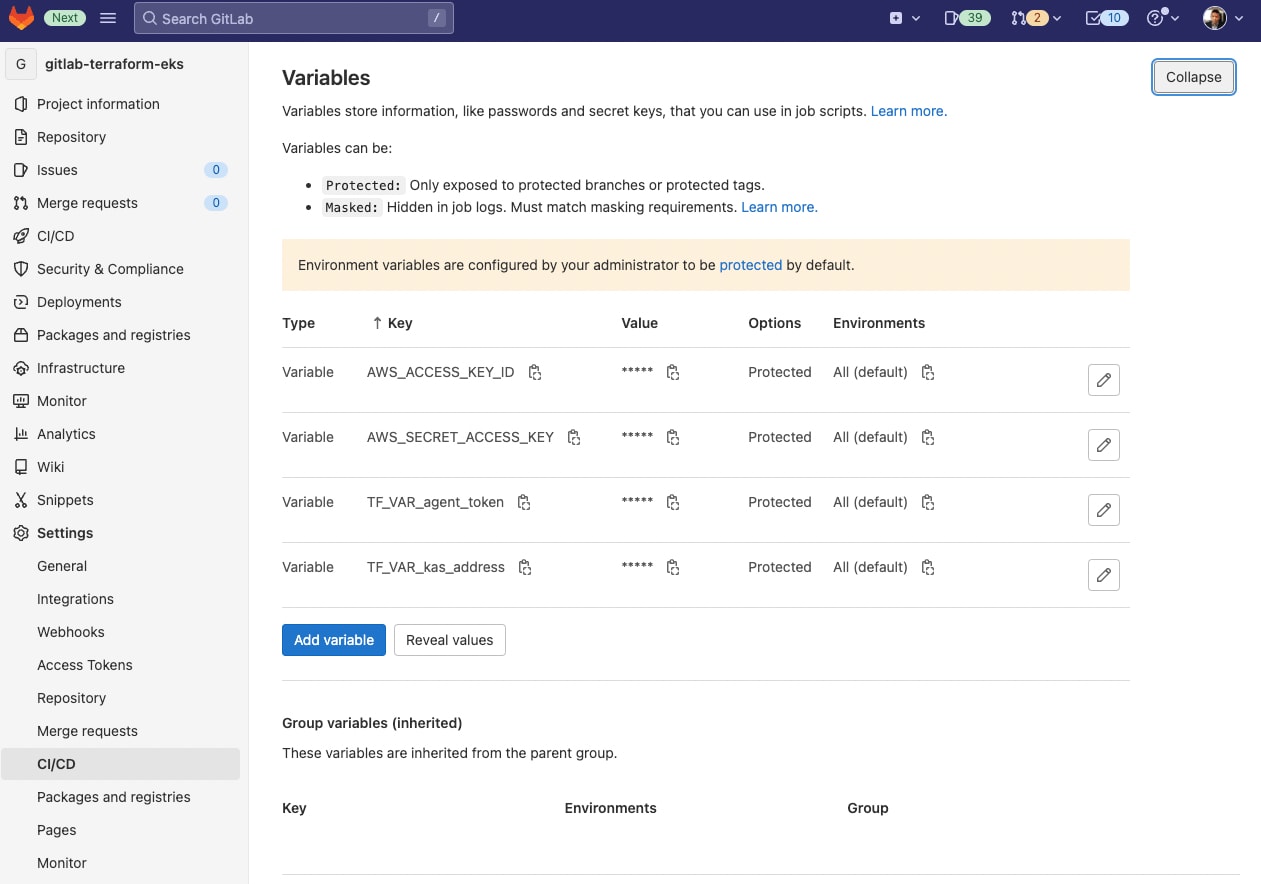
On the left sidebar, select Settings > CI/CD. Expand Variables.
- Set the variable AWS_ACCESS_KEY_ID to your AWS access key ID.
- Set the variable AWS_SECRET_ACCESS_KEY to your AWS secret access key.
- Set the variable TF_VAR_agent_token to the agent token displayed in the previous task.
- Set the variable TF_VAR_kas_address to the agent server address displayed in the previous task.
GCP GKE
- To authenticate GCP with GitLab, create a GCP service account with the following roles: Compute Network Viewer, Kubernetes Engine Admin, Service Account User, and Service Account Admin. Both User and Admin service accounts are necessary. The User role impersonates the default service account when creating the node pool. The Admin role creates a service account in the kube-system namespace.
- Download the JSON file with the service account key you created in the previous step.
- On your computer, encode the JSON file to base64 (replace /path/to/sa-key.json to the path to your key):
base64 -i /path/to/sa-key.json | tr -d
- Use the output of this command as the BASE64_GOOGLE_CREDENTIALS environment variable in the next step.
On the left sidebar, select Settings > CI/CD. Expand Variables. 5. Set the variable BASE64_GOOGLE_CREDENTIALS to the base64 encoded JSON file you just created. 6. Set the variable TF_VAR_gcp_project to your GCP’s project name. 7. Set the variable TF_VAR_agent_token to the agent token displayed in the previous task. 8. Set the variable TF_VAR_kas_address to the agent server address displayed in the previous task.
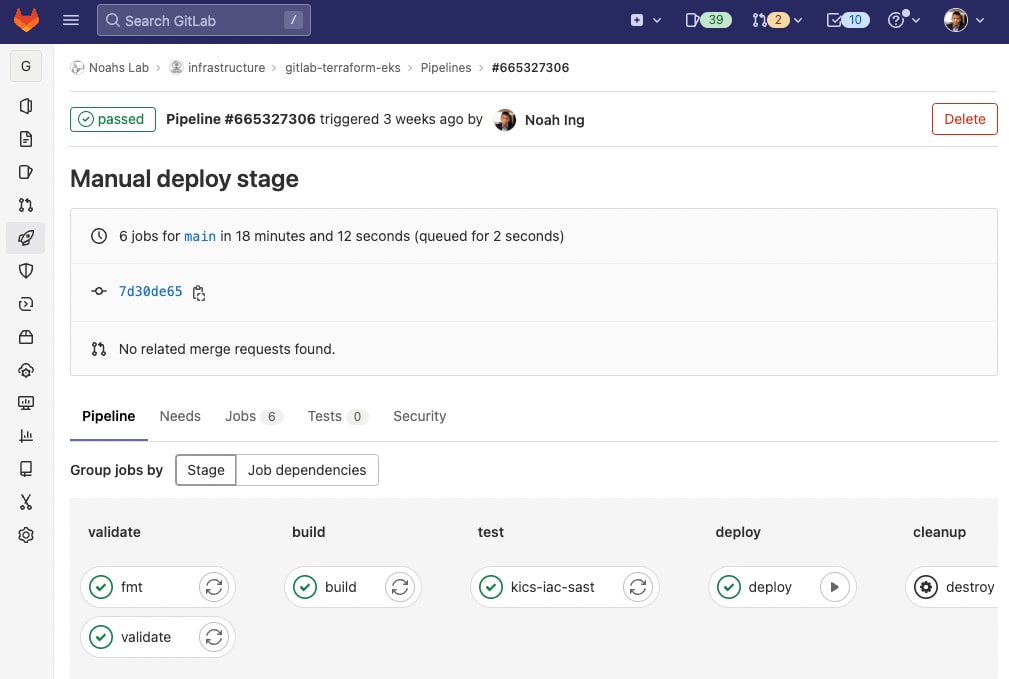
Run GitLab CI to deploy your Kubernetes cluster!
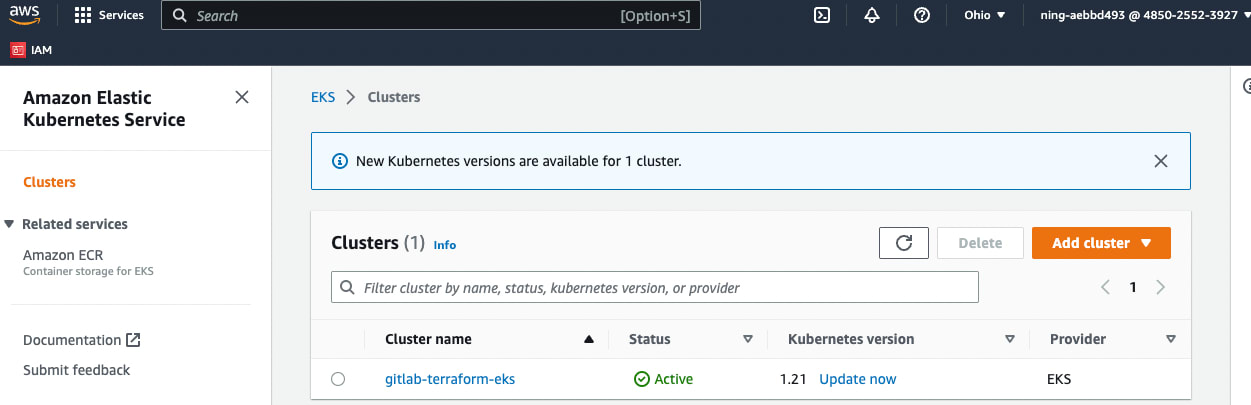
When successfully completed, view the cluster in the AWS/GCP console!
You are halfway done! 👏 Keep it up!
Set up the Kubernetes Cluster Management Project
Create a project from the cluster management project template - https://gitlab.com/projects/new#create_from_template
- In GitLab, on the top bar, select Main menu > Projects > View all projects.
- On the right of the page, select New project.
- Select Create from template.
- From the list of templates, next to GitLab Cluster Management, select Use template.
- Enter the project details. Ensure this project is created in the same namespace as the gitlab-terraform-k8s project.
- Select Create project.
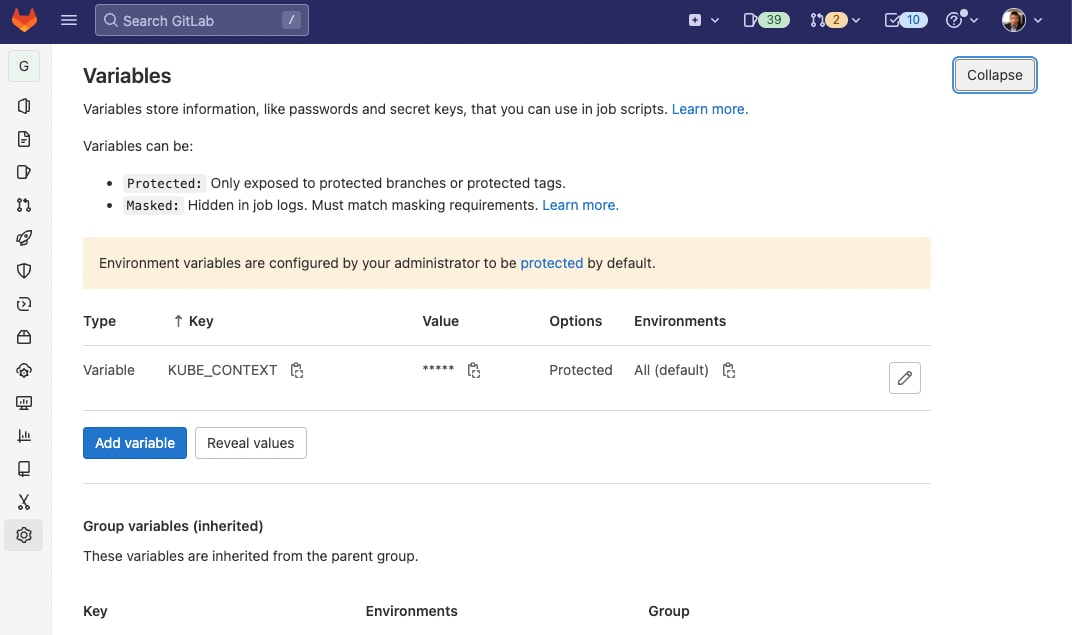
- Once the project is created on the left sidebar, select Settings > CI/CD. Expand Variables.
- Set the variable KUBE_CONTEXT to point to the GitLab Agent. For example,
noah-ing-demos/infrastructure/gitlab-terraform-eks:eks-agent.
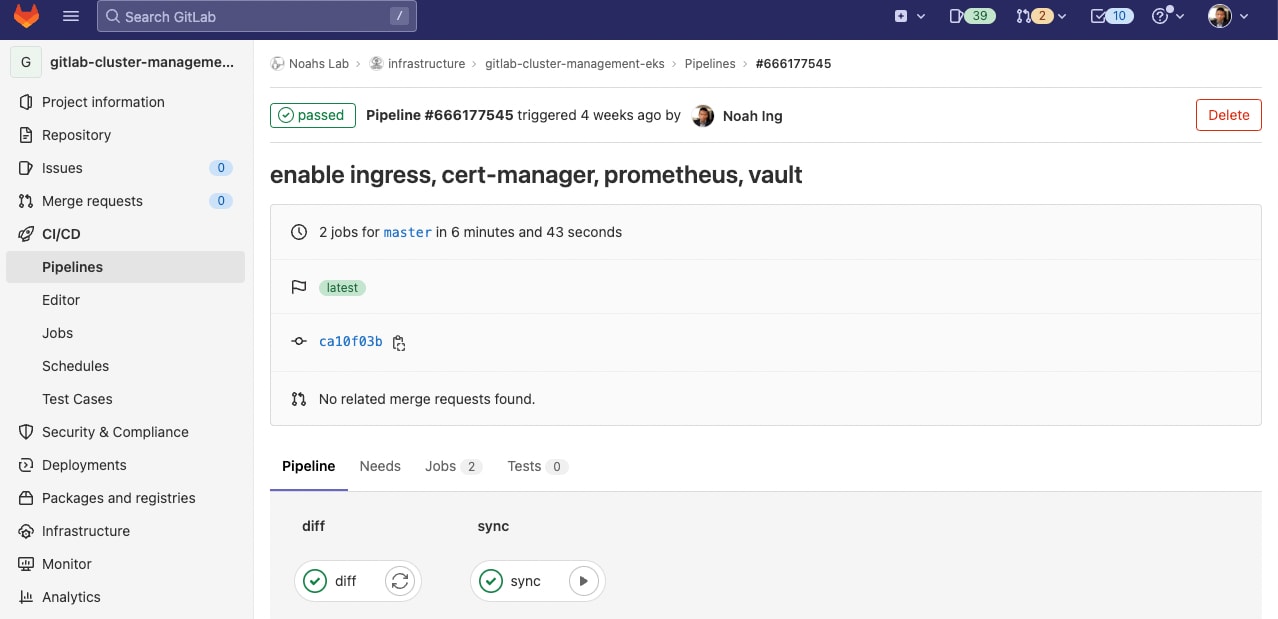
- Uncomment the applications you'd like to be installed into your Kubernetes cluster in the helmfile.yaml. In this instance I chose ingress, cert-manager, prometheus, and Vault.

That will trigger your CI/CD pipeline and it should look like this.
Once completed, go to the AWS/GCP console and check out all the deployed resources!
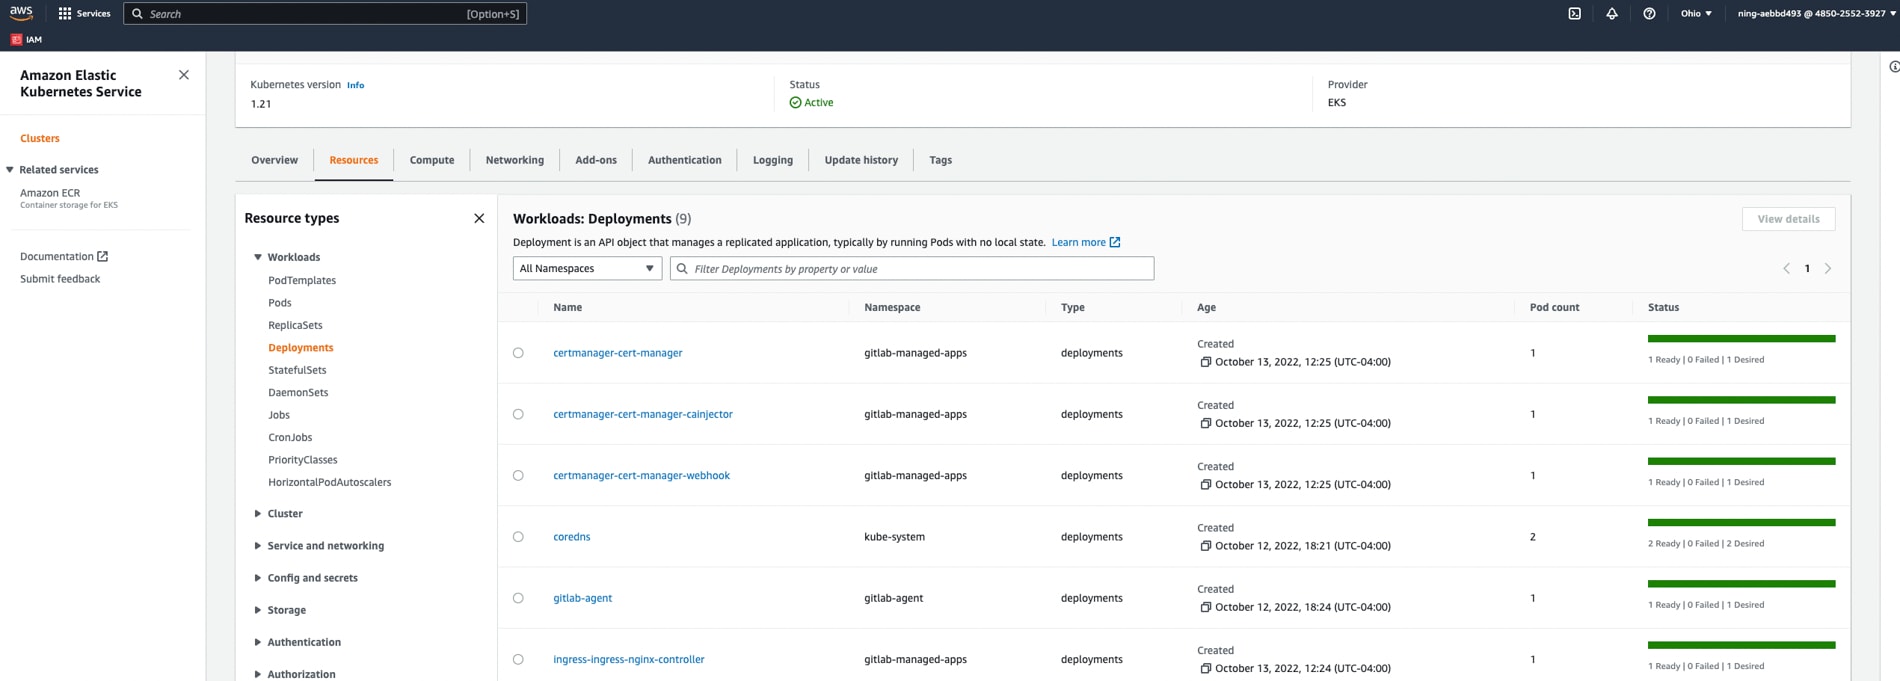
Voila! 🎉
Enjoy your Kubernetes cluster completely defined in code! 👏👏👏
Now with these two repositories you can manage a Kubernetes cluster entirely through code:
- For managing the Kubernetes cluster's infrastructure and configuring its resources you can make changes to the gitlab-terraform-eks repository you have setup. This project has a Terraform CI/CD pipeline that will allow you to review, provision, configure, and manage your Kubernetes infrastructure with ease.
- For managing the desired state of the Kubernetes cluster, the cluster-management repository has a GitLab Agent set up and will deploy any Kubernetes objects defined in the helm files.
➡️ Bonus: If you'd like to deploy your own application to the Kubernetes cluster, then add to your cluster-management helmfile and see the GitLab Agent for Kubernetes roll it out with ease!
References
Related posts
More to explore
View all blog posts


We want to hear from you
Enjoyed reading this blog post or have questions or feedback? Share your thoughts by creating a new topic in the GitLab community forum.
Share your feedback